How to Batch Crop PDF
Batch Crop allows you to crop page ranges or margins from multiple PDF files at once, saving time and ensuring consistency across documents. You can select the desired pages or margins to crop, apply settings to all selected PDFs, and process them in one operation. This efficient feature helps manage large volumes of PDFs by removing unwanted areas across multiple files. Read the steps mentioned next to learn how to use the batch crop PDF feature:
Step 1
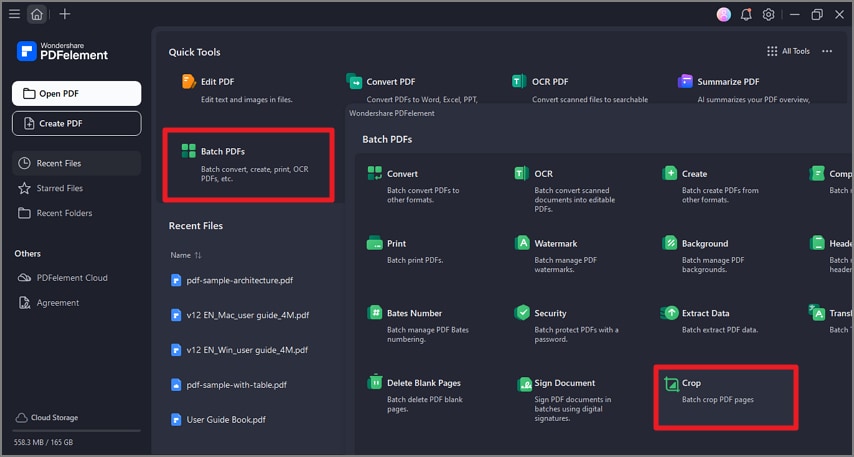
After opening the tool on your Windows device, locate the “Batch PDFs” option on the homepage. Locate the “Crop” option in the following small window and click on it.
Step 2
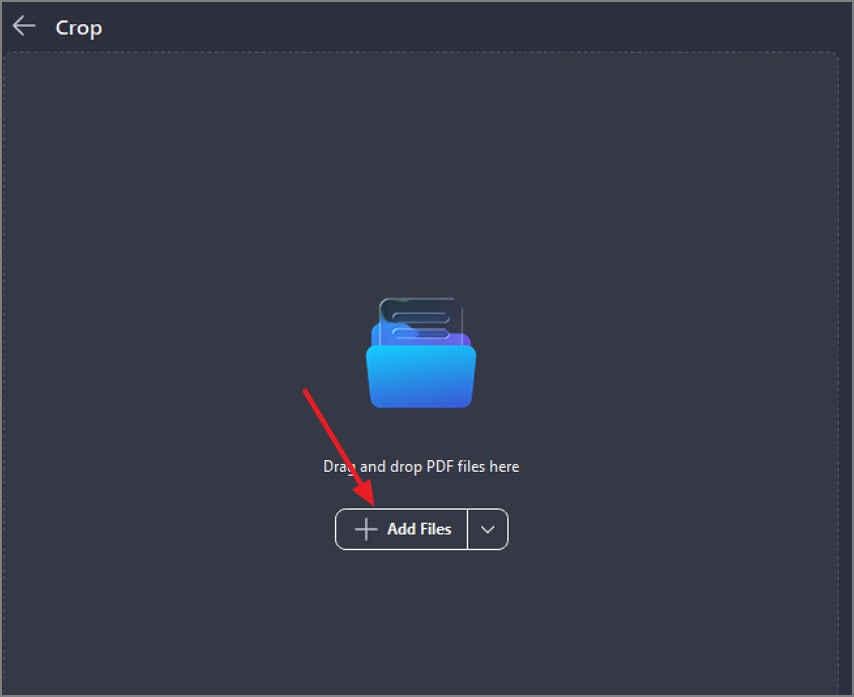
In the following interface, add multiple documents to the tool’s interface using the “Add Files” button.
Step 3
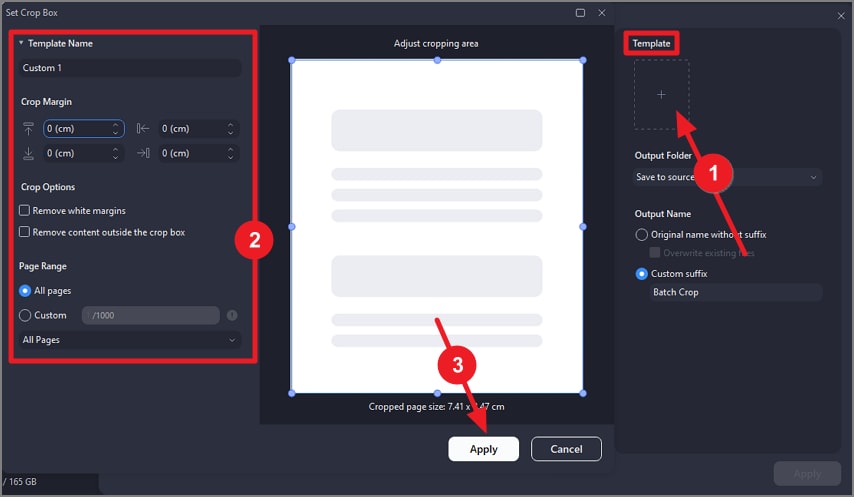
Once the files are added, click the “Template” option from the right and specify crop settings such as “Margin,” “Page Range,” and “Crop Option.” You can manually crop the document by dragging the corners of the page in the preview. Press the “Apply” button located at the bottom to save the applied changes.
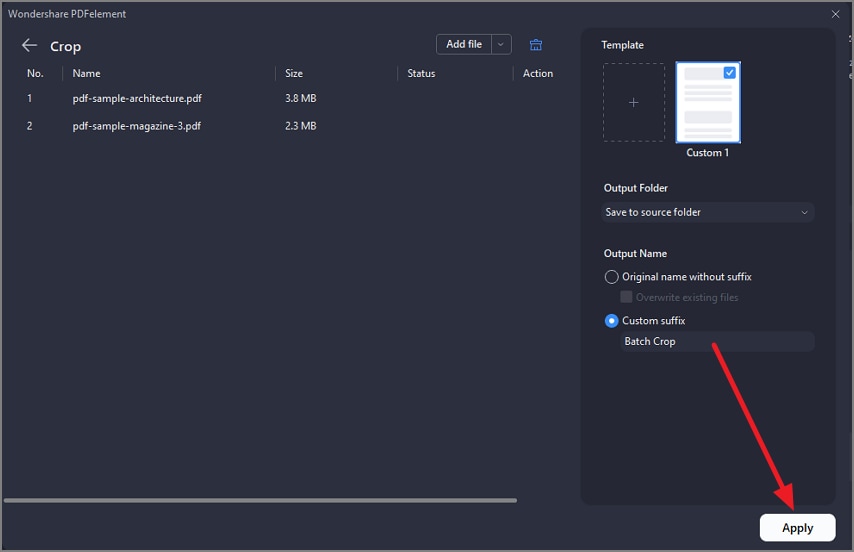
Step 4
Specify the output folder and name for the new file by accessing the options on the right and hitting the “Apply” button. The cropped documents will be automatically saved in the specified location on your device.