How to Add Header & Footer to PDF on Mac
The headers and footers tool allows you to add specific illustrations, such as date, origin, and page number, to your PDF pages and makes the pages formal and professional. Wondershare PDFelement for Mac supports adding headers and footers to your PDF files easily with just a few simple clicks. Follow the steps mentioned next to learn how to use this feature on your Mac:
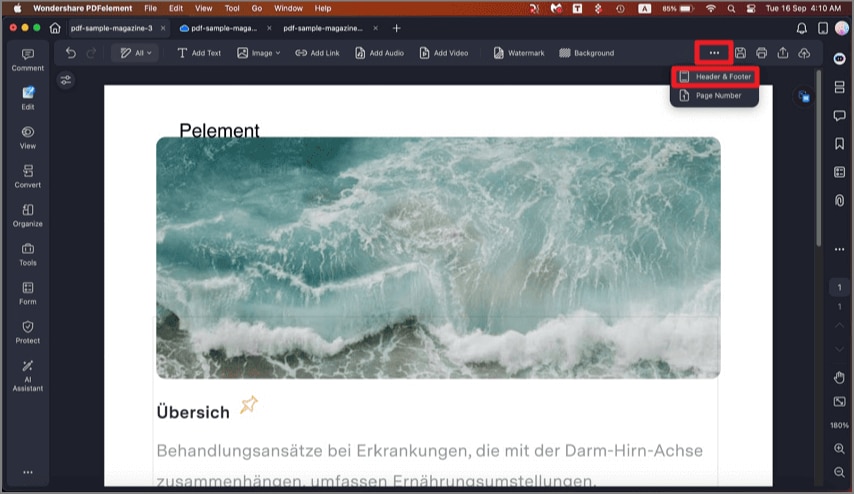
Step 1. Begin by launching PDFelement on Mac and importing your PDF document. Head to the left sidebar and click on the "Edit" option. Next, tap on the "Three Dots" icon on the top toolbar and press the "Header & Footer" option.
Step 2. In the following interface, click on the "Add Header & Footer" option located at the top of the page to proceed.

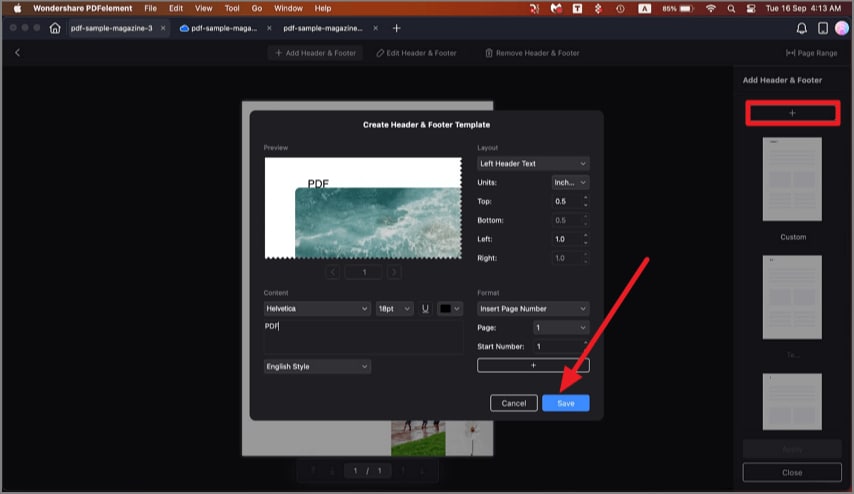
Step 3. Press the "+" button located on the panel enabled on the right. In the following small window, add the text you want to add as header and customize the appearance. Configure other settings and hit the "Save" button.
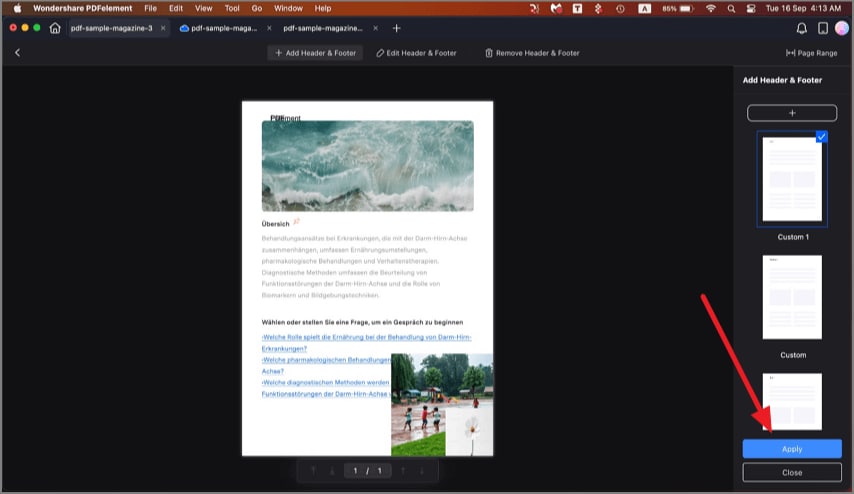
Step 4. Once you are done with the editing, head to the bottom right and press "Apply" to save the changes made.