
How to Set Signature Timestamp on PC?
To ensure credibility and timely authorization, Wondershare PDFelement offers you the facility to insert signature timestamps. Through this, you can easily confirm when the form is signed for legal and professional purposes. Hence, this guide shows how you can insert signature stamps on your PC within a few taps:
- Start by uploading the form on the tool and pick the “Protect” tool from the top toolbar. Beneath that, pick the “Request E-Sign” option to start adding the signature time stamp.

A screenshot of the Protect menu showing the option to request electronic signatures.
- On the new screen, enter the recipient's details and press the “Next” button to proceed further.
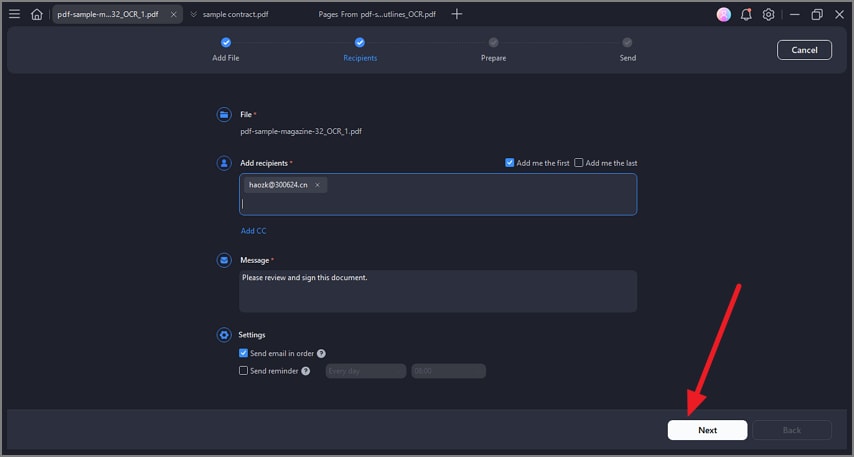
A screenshot of the eSign setup screen displaying recipient information fields.
- Once done, select the signature field from the “Signature Fields” section and place it in the desired location. Now, right-click the signature field and choose the “Style Settings” option from the list.

A screenshot of the eSign settings panel showing signature style options.
- This will fetch a pop-up menu where you have to unfold the menu underneath the “Include Signature Timestamp” checkbox. From here, pick the desired timestamp format and hit the “OK” option to save the changes.
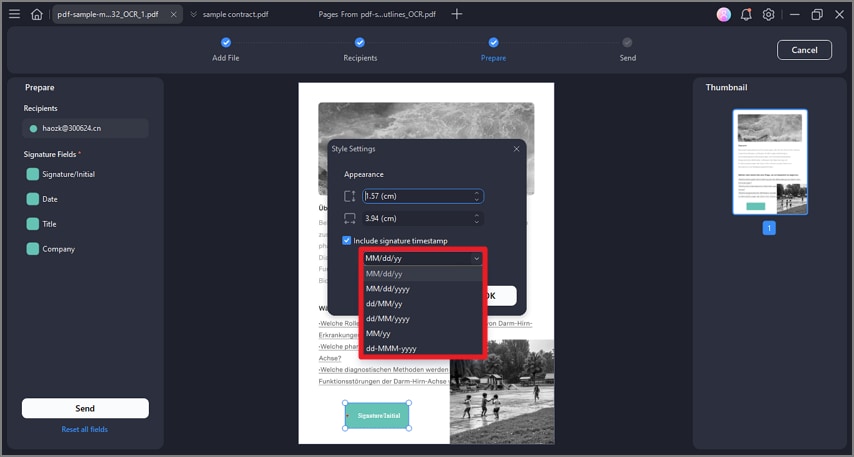
A screenshot of the timestamp settings displaying available format options.