Work Smarter with PDFelement User Guide
PDFelement 12 User Guide
-
Get Started with PDFelement
-
Open PDF
-
View PDF
-
Create PDF Files
-
Annotate PDF Files
-
Edit PDF Files
-
Combine PDF Files
-
Organize PDF Files
-
PDF OCR
-
Convert PDF Files
-
Fill PDF Form
-
Protect & Sign PDF
-
Print PDF Files
-
Share PDF Files
-
PDF AI Tools
- Summarize Multiple PDFs
- PDF Grammar Checker
- AI Knowledge Card
- Customize AI Assistant
- Customize AI Prompt
- Intelligent Image Editing
- Explain Content & Code
- How to Summarize a PDF to a Mind Map on Windows
- PDF to Markdown with AI
- Proofread PDF
- Rewrite PDF
- Summarize PDF
- How to Get Side-by-Side Translation?
- Batch Translate PDFs
- Generate Images With AI
- Chat with PDF
- Chat with Multiple PDFs
- Translate PDF
- How to Read Aloud PDF
- AI Content Detector
PDFelement Tutorial Videos
PDFelement 11 User Guide
PDFelement 10 User Guide
PDFelement 9 User Guide
PDFelement 8 User Guide
Take Screenshot of the PDF
PDFelement offers a built-in screenshot tool that lets you drag to capture any area of a PDF. You can then annotate the capture and copy/save it as text or an image for quick reuse.
Step 1: Enable the Screenshot Tool
- Open your PDF in PDFelement. From the left sidebar, click Tools and select Screenshot.
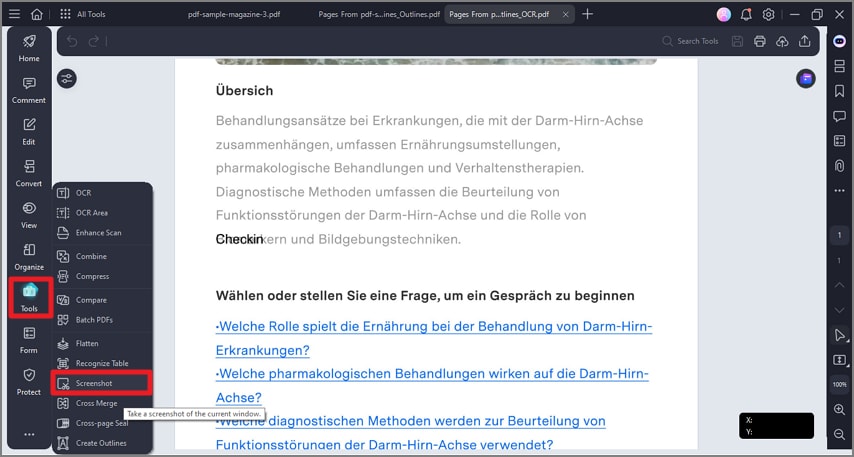
Enable Tools and choose Screenshot
Step 2: Capture & Use the Floating Toolbar
- Click-drag to select the area you want to capture. A floating toolbar appears with options to:
- Pin the screenshot on screen
- Run OCR on the selected area
- Edit the recognized text in the area
- Erase the selected content
- Translate the selected text
- Apply AI actions (e.g., summary)
- Copy the selection as text or as an image
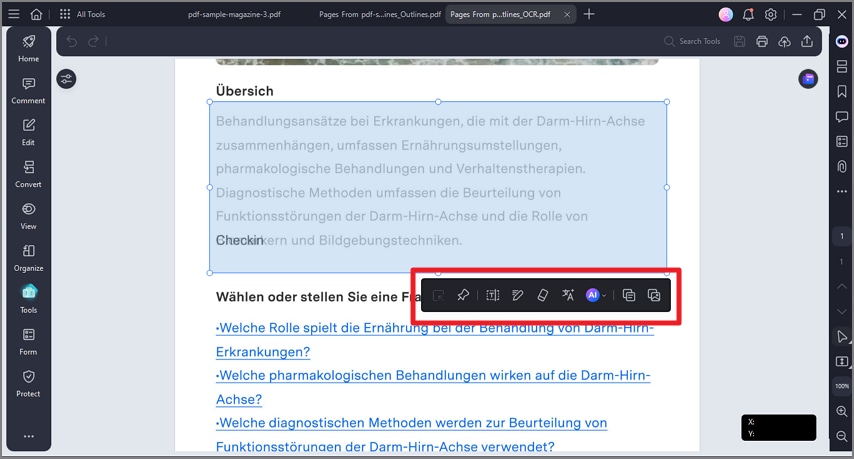
Perform multiple actions on screenshots