How to Take a Screenshot on PC
2026-02-02 10:26:21 • Filed to: Convert Images • Proven solutions
Now that much of the world's content is online, the need to take a screenshot on a PC has risen to tremendous heights. Today, everybody wants to be able to grab a quick screenshot, make a few mark-ups, and shoot it over to their colleagues and friends or offer it up for the Great Social Media Gods to gobble up. Microsoft itself came up with several Windows-integrated tools to take screenshots on their OS platform; besides these, there are numerous other third-party tools for taking screengrabs on a PC. So, how do you choose? Fortunately, we're showcasing a versatile and user-friendly' screenshot on PC'tool for your Windows device.
If you need to take screenshots of a PDF document, Wondershare PDFelement is a PDF editor with a screenshot tool, which allows you to capture screenshots of PDF documents, web pages, or other software programs on your computer. It also provides a variety of annotation options to draw and write on screenshots. If you need a PDF editor plus a snipping tool, PDFelement is a perfect choice.
Best 'Screenshot on PC' Tools on Windows
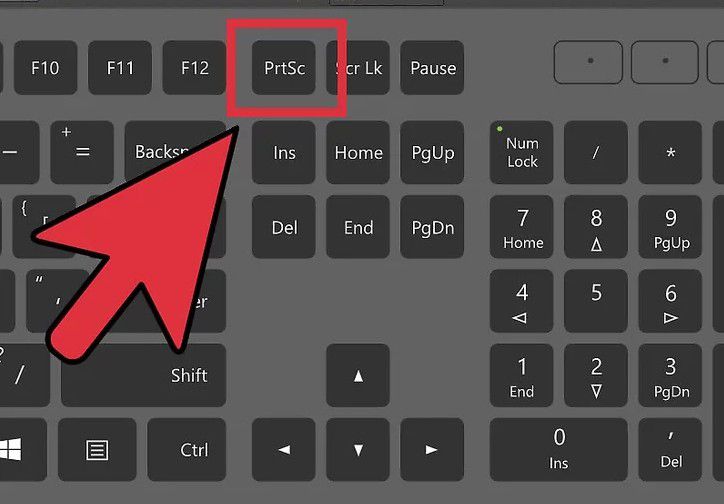
Microsoft has developed some gems in its Windows software library for taking screenshots. A lot of them are integrated with the age-old PrtScn function, which utilizes the Clipboard app to transfer the screengrabs. Here are some of the variations that Microsoft released over time and the disadvantages they bring.
1. PrtScn
This is a useful function that's been around for a very long time. There are several options for taking screenshots, but the biggest draw is the convenience of having a special key on your keyboard just for this. Here are some different types of PrtScn screenshots you can take on your PC:
- Just PrtScn or Ctrl+PrtScn will grab a shot of the open window.
- When used as Windows Key+PrtScn, it will directly save the screenshot to your default Pictures folder without first saving it on the clipboard.
- Alt+PrtScn will copy a screenshot of just the active window to the clipboard.
- If your device's keyboard comes with a Function key (Fn), then just add Fn to the above shortcut key combinations.
Limitations: The problem with the PrtScn tool is that it hasn't evolved into anything over the last several years. It's still a primitive tool with little flexibility and you have to open the actual screenshot in another utility like Paint.

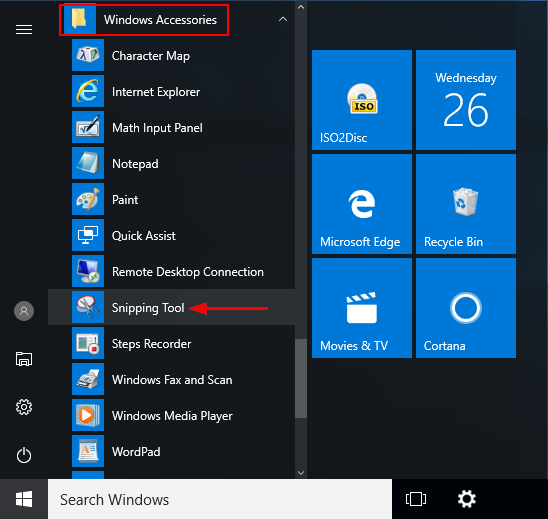
2. Snipping Tool
This is a slightly more advanced tool that lets you see the screenshot and make changes to it before directly emailing it to someone with your Outlook ID. To use the tool, you need to launch the app from the All Programs menu or type Snipping Tool in the search box and select it from the results. There are different modes (types) of screenshots you can take, and the Windows 10 version also has a Delay button that gives you a timed gap before the screenshot is taken.
Limitations: There are some limitations to using this tool from Microsoft as well. For example, a lot of users say the app suddenly becomes unresponsive. In other cases, the app might have to be re-registered since it's from the Microsoft Store and is, therefore, a Universal Windows Platform application, or a UWP app.

3. Snip & Sketch
This is the next major addition to the "screenshot on PC" feature in Windows that came with Windows 10 October 2018 edition. It carries a lot of features over from the Snipping Tool but offers extra editing and cropping capabilities. You can also share your edited screenshots with others. To take a screenshot, you can use Windows Key + Shift + S, which allows you to manually draw the area to be captured or select a preset option.
Limitations: There are some limitations to using this tool from Microsoft as well. For example, a lot of users say the app suddenly becomes unresponsive. In other cases, the app might have to be re-registered since it's from the Microsoft Store and is, therefore, a Universal Windows Platform application, or a UWP app.

Third-party "Screenshot on PC" Tools
There are several downloadable tools for taking a screenshot on PC/laptop that have emerged over the years. Each of them has its own list of features and benefits, but there are some downsides to that as well.
Limitations: For example, Snagit from TechSmith is a great screen capture tool but it's expensive unless you’re a professional. Similarly, other tools might offer a free option that is highly restricted in capability, which means you're forced to upgrade after a certain time.

One of the best tools we've come across in this category is Wondershare PDFelement, a PDF editor that lets you not only edit and sign PDF, but also capture different types of images from your monitor, edit them with annotation tools, and easily share them from within the application itself. The screen capture feature deserves a closer look because of the flexibility it offers. For example, there's an option to take a screenshot of specific toolbars or sections.
Let’s look at how it works.
How to Take a Screenshot on PC using Wondershare PDFelement
The app is easy to install once you download the setup file from the official Wondershare PDFelement website. After the installation, launch the program and follow the steps below to take a screenshot on your Windows PC.
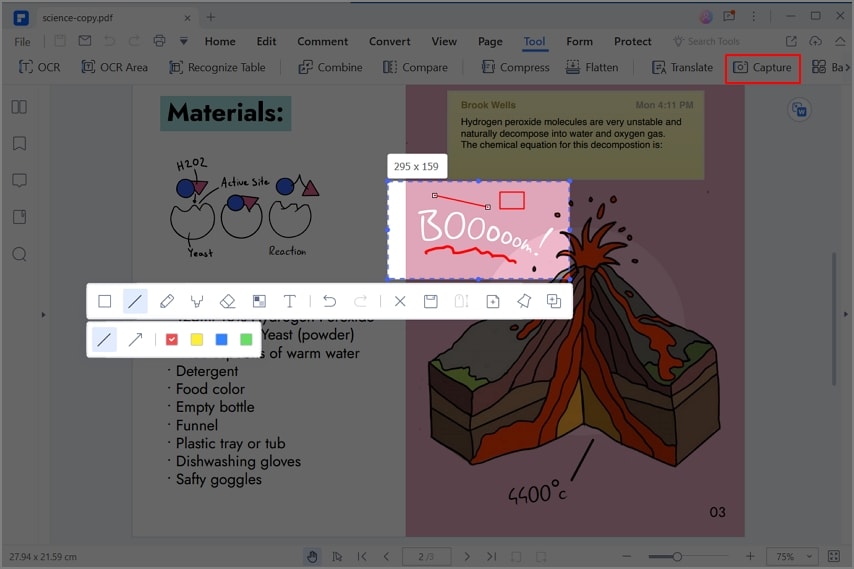
- 1. On PDFelement, open the document you need to take a screenshot, click Tool > Capture and select the area you want to capture.

- 2. Then you can annotate the screenshot with the rectangle, line, pencil, marker, create a pixelated mosaic, or add text.
Once you've done annotating, click  the save button to save your screenshot as JPG, PNG, BMP or GIF image.
Introduction to Wondershare PDFelement
Related Articles
- Steps to Convert PDF to Paint Easily
- Save Multiple PDF Pages as One Image in a simple way
- 8 Ways to Convert TIFF to PDF

 G2 Rating: 4.5/5 |
  100% Secure


Margarete Cotty
chief Editor
Comment(s)