PDFelement-Powerful and Simple PDF Editor
Get started with the easiest way to manage PDFs with PDFelement!
On formal occasions, people usually use emails to send digital documents like PDFs and Word documents. However, if you want to send bulk mail with individual attachments, you are in for a rough ride. You would need to set up each email individually, attach the file then send it to the recipient. Fortunately, mail merging makes your work easier and saves you lots of time. This article will discuss three proven methods to mail merge a PDF.
Part 1. What is mail merge
In simple terms, mail merge is an in-built feature within a data processing application that automates the sending of bulk mail from sender to recipient. This feature also connects the template to a data source containing the recipient's name, address, and other supporting data.
You need two documents to complete a mail merge, the letter template, and the data file. The former is the word document you intend to send, while the latter contains the recipients' information. Once you initiate the mail merge process, the program will fetch the recipient's information from the data file and place it in the empty field within the letter template.
Part 2. Mail Merge a PDF With Word Add-In
You might not have the expertise to use complicated tools to perform a mail merge. Fortunately, there is a simple method you can use. This section of the article will discuss how to mail merge a PDF using a simple add-in on Microsoft Word.
Here is a detailed step-by-step guide.
Step 1 Navigate to the "Mailings" tab on Microsoft Word to set up your mail merge document or open an existing one.
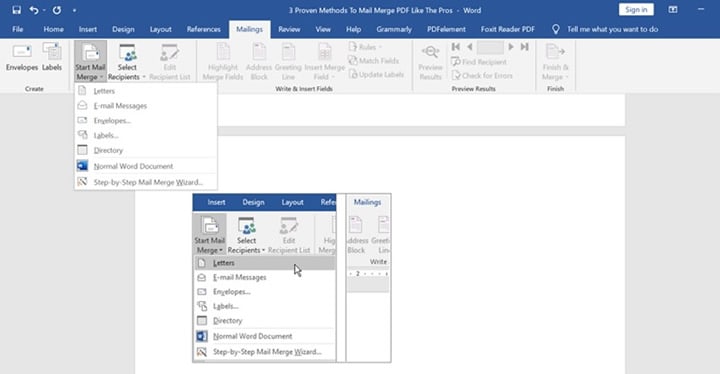
Step 2 Set up a mailing list that will be the data source for the mail merge operation. The column name will be the merge field name. Ensure the merge field names contain alphanumeric characters and do not start with any number from 0 to 9.
Note: The number of characters in the field name should not exceed 40, which includes the spaces.
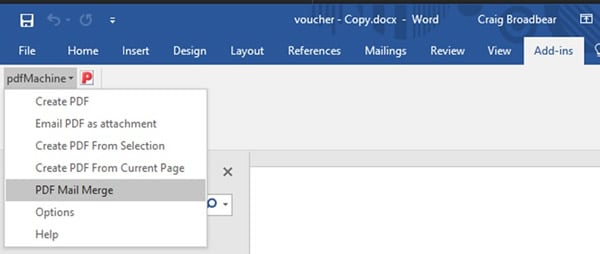
Step 3 Go to the "Word Add-Ins" tab, click on the "pdfMachine" drop-down menu and click on "PDF Mail Merge."
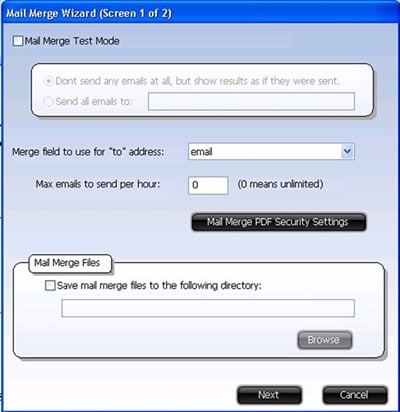
Step 4 Do a test to ensure the process was successful before you try an actual test merge. One option would be to generate the PDFs without sending any emails. With this option, we advise you to ignore the CC and BCC entries. The other option would be to send all emails to the same address and overwrite the email address in the merge data.
Step 5 Specify the email settings and any other security settings by using "pdfMachine Mail Merge Wizard."
Part 3. Mail Merge to PDF With Adobe Acrobat
Apart from using a Microsoft Word Add-in, you could also use Adobe Acrobat to mail merge a PDF. Adobe Acrobat is an efficient tool that makes editing your PDFs as smooth as butter.
To complete a mail merge with Adobe Acrobat, you need to have MS Office 2016 or later and install the Adobe Acrobat DC software on your device. Below is a detailed step-by-step guide on how to mail merge to PDF with Adobe Acrobat.
Step 1 Open Microsoft Word, then navigate to the "File" tab.
Step 2 Select "Open" to browse the merge document, which is the body of your PDF. The document could either be a certificate or a letter.
Step 3 Click on "Mailings," then click on the "Select Recipients" button. You could click "Use an Existing List" to find the data source file and select "Open." Most of the time, the source file is an Excel document. The data source file contains the mail merge data, such as contact information and names you want to enter into the PDF.
If you want to check whether you have entered the correct recipients, click on "Edit Recipient List" and untick any row on the list you do not wish to include.

Step 4 Ensure your document contains the field names you need to fill in, such as Dear
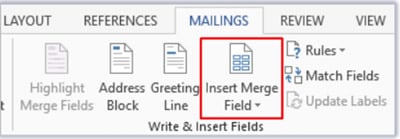
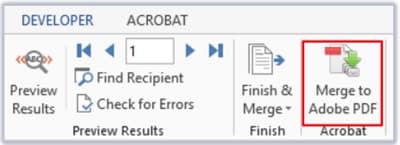
Step 5 Navigate to "Preview Results" to confirm that the document is filled in correctly.

Step 6 Click on "Merge to Adobe PDF." In this step, we recommend you record the range of pages you wish to merge. You can also go to "Specify PDF file name" to type the name for the generated PDFs.
Part 4. PDF Mail Merge with GMass
The last method you could use to mail merge a PDF like a pro is with GMass, a powerful mail merge email system for Google, specifically Gmail. A key perk of using GMass is that you don't need third-party add-ons like Adobe Acrobat to perform a mail merge.
With GMass, you can save the emails as drafts so you can review them later before you send them. Another exciting perk is the advanced personalization, which allows you to add nifty images, attachments, and links and personalize the subject line.
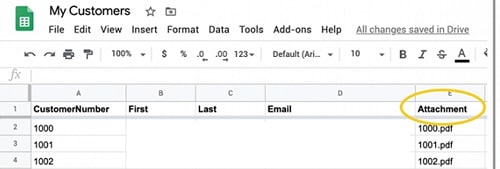
Before performing a mail merge with GMass, you must ensure that you have a Google sheet with a list of all the recipients in one column and the PDF files to be merged in another. It would also help to ensure all your PDF files are ready to send.
You also need a Google Workspace account and provide you install a GMass Chrome extension. Here is a step-by-step guide about how to mail merge with GMass.
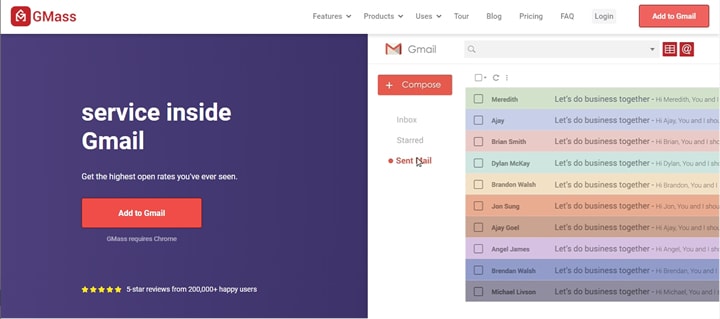
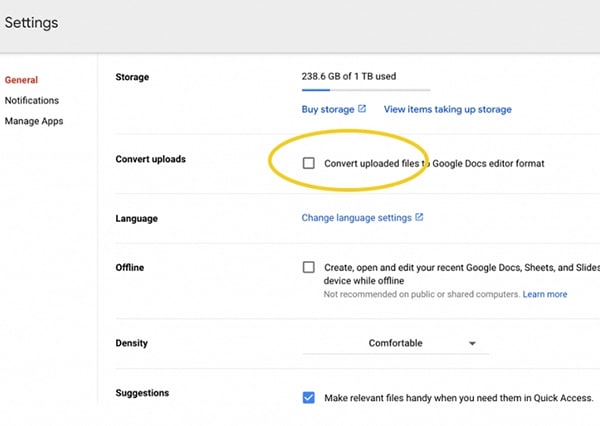
Step 1 Install the GMass Google Chrome extension. Adjust the extension settings and ensure the "Convert uploaded files…" option is unchecked. Upload your PDF files to Google Drive.
Step 2 Prepare the Google Sheet containing the details of the recipients and the PDF attachment. You can insert multiple columns to enter the first name, last name, company, email address, etc. in the Sheet.
Note: The name of the PDF attachment column must start with "attachment."
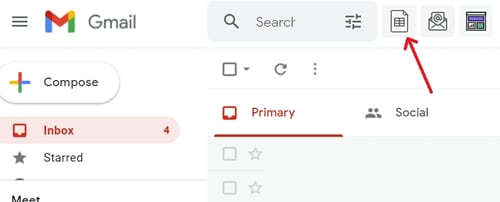
Step 3 Log in your Gmail account and click on the "Sheets Connector" button.
Step 4 Choose your spreadsheet and click the "Connect" button.
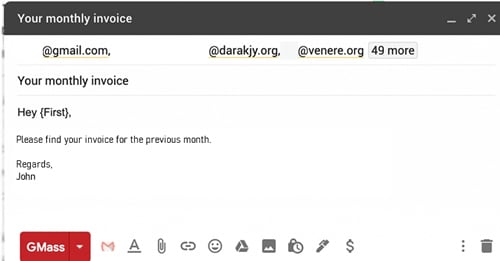
Step 5 Then, a new email composition window will open. Enter your message and click the "GMass" button. Thus, your PDF attachments will be delivered to multiple recipients with the GMass Chrome extension.
Part 5. [Bonus] Wondershare PDFelement – Best alternative to Adobe
By now, you understand how to mail merge a PDF document using a Word Add-in, Adobe Acrobat, and GMass. We will provide a bonus method, which is an excellent alternative to Adobe Acrobat.
Wondershare PDFelement is an efficient PDF editing tool that can also help you mail merge a PDF without the need for a third-party add-on. This platform has heavily emphasized simplicity and user-friendliness without slacking on providing you with features that can meet all your PDF editing needs. Here are some cool features you can enjoy using the platform.
- PDF Editing
- File conversion to Word, Excel, PPT, and more
- Password protection
- OCR compatibility
- Addition of comments and annotation
- Organizing PDFs
- Scanning documents
- Creation of forms
- Cloud management
- Reading PDFs
Prepare PDF with PDFelement for easy emailing
You have learned how to mail merge PDF documents. However, most email boxes have a size limit for their attachments. If your file is too big, the emailing process will fail, and the recipient won't receive the email in time. Therefore, if you want to send a file or document via email, reduce it to the correct size.
Here is a guide on optimizing your PDF using Wondershare PDFelement to ensure it is the right size for emailing.
Step 1 Launch the Wondershare PDFelement platform and open the PDF you would like to compress.
Step 2 Click on the "Tool" button.
Step 3 Select the "Compress" button and choose the level of optimization. Another way to access the Compress button is to navigate to the Homepage and select the "Quick Tool" tab.
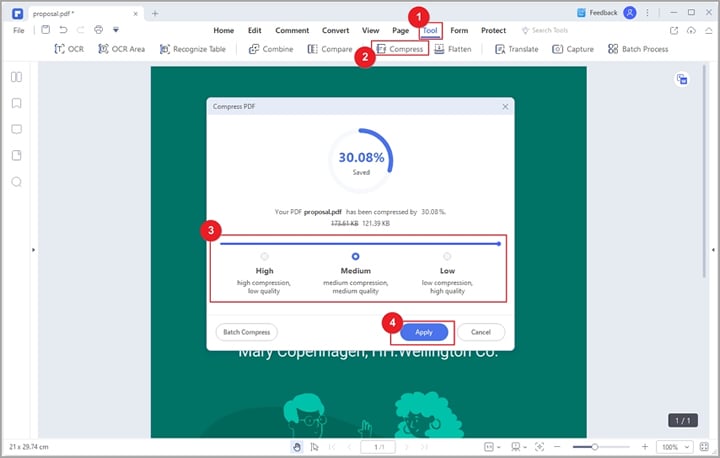
Step 4 Click on the "Apply" button to compress the PDF.
In addition, PDFelement has mobile versions for iOS and Android systems. You can compress the large PDF and email it via your phone. Check out the following video to learn more.
Conclusion
In this article, we have introduced 3 proven methods to mail merge PDF documents and an amazing PDF tool – Wondershare PDFelement, to help you reduce the PDF file size for easy sharing with others. We hope this article has been helpful and you can now mail merge a PDF like an expert.
 Home
Home
 G2 Rating: 4.5/5 |
  100% Secure


