
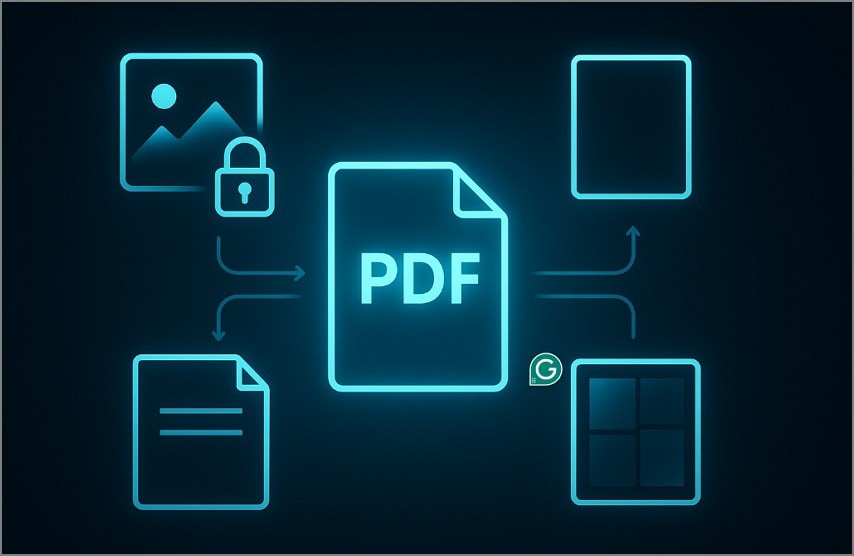
Many people run into the frustrating problem of PDF images looking stretched or distorted. This usually happens when an image’s aspect ratio does not match the page or screen. The key here is understanding the difference between an image aspect ratio and a PDF aspect ratio. The image ratio defines the original shape of the graphic, while the page ratio refers to the overall dimensions of the document.
The good news is that resizing a PDF image without losing quality is simple if you use the right tool. In this guide, we will provide reliable ways to resize images using PDFelement, along with professional tips to maintain sharpness.
In this article
- Part 1. PDF Aspect Ratio 101—Page vs Image
- Part 2. Method 1 — Resize a PDF Image (Keep Proportions)
- Part 3. Method 2 — Change the Image’s Aspect Ratio (Crop Without Warping)
- Part 4. Method 3 — Change the PDF Page Aspect Ratio (Canvas Resize)
- Part 5. Method 4 — Replace the Image at a Target Ratio (Highest Fidelity)
- Part 6. Keep Quality High—DPI, Compression, and File Size
- Part 7. Common Mistakes & How to Avoid Them
- Frequently Asked Questions
- Conclusion
Part 1. PDF Aspect Ratio 101—Page vs Image
Let's have a look at a detailed comparison of PDF aspect ratio and image ratio to get a better understanding of its basics:
Aspect Ratio: The Meaning for a Page and Image
Aspect ratio is basically a proportional relationship between width and height, written as 4:3 or 16:9. For a PDF page (the “Canvas”), it refers to the shape or proportion of the paper or digital view area. It is determined by the page’s dimensions, such as A4 or letter size (8.5 × 11 inches), which varies according to the PDF design.
In contrast, for an embedded image, the aspect ratio is set by the image’s actual pixel dimensions. Suppose an image has a 600×1200 pixel photo size, it will have a 4:3 aspect ratio. While inserting an image into a PDF, if the image’s aspect ratio does not match the page’s aspect ratio, it will result in distortion.
When To Change the Image Ratio vs. The Page Ratio
The image aspect ratio should be changed when the visual needs of specific displays or platforms demand it, such as for thumbnails or social media covers. These platforms require square (1:1), wide (16:9), or other fixed shapes to fit predictable slots without cropping. Adjusting the image ratio ensures the subject appears centered and undistorted, tailored for where and how the image will be seen.
On the other hand, the page aspect ratio is changed for document types like slides and other printing materials when needed to fit in the standard size. For modern displays, presentation slides are commonly 16:9 in size, so you need to alter the PDF file as each format brings its own ratio considerations.
How to Avoid Distortion in PDF Files?
Now, while learning about changing PDF aspect ratio, let's explore the prerequisites to avoid distortion within the PDF files:
- Image Original Aspect Ratio: During resizing, make sure you maintain the image’s original aspect ratio by locking proportions.
- Preserve Proportion: Ensure to preserve the proportion of the PDF unless you are cropping the file for creative or functional reasons.
- Add Blank Space: Add letterboxing or pillar boxing around images if ratios clash, instead of stretching.
- Choose Design Templates: Users should choose preset aspect ratios to streamline workflows and reduce the risk of ruining file formatting.
Part 2. Method 1 — Resize a PDF Image (Keep Proportions)
After knowing about the basics of aspect ratio, if you want to resize a PDF image, we recommend using PDFelement. This tool allows users to insert, resize, crop, and delete images within a PDF. Furthermore, it offers bulk processing features, including batch resizing and conversion of multiple PDFs at once. Besides resizing, it also provides high-quality OCR, which lets you transform PDF text to editable text.
It lets you export and convert PDFs to Word, Excel, PowerPoint, and other formats without losing formatting. The foremost advantage is that it is highly compatible with Windows and Mac and available for both desktop and web-based tools.


 G2 Rating: 4.5/5 |
 100% Secure
Steps to Resize PDF Image in PDFelement
Now, if you are exploring how to resize a PDF image using PDFelement, go through the following step-by-step guide:
Step 1Open the Desired PDF in the PDFelement Tool
Initiate by clicking on the “Open PDF” button to insert the desired PDF file into the tool.
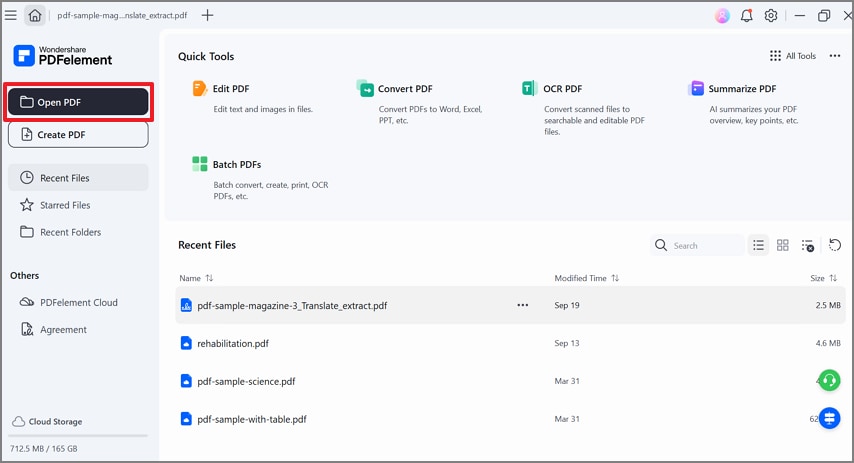
Upon inserting the PDF, tap on the “Edit” option available in the left toolbar of this interface.
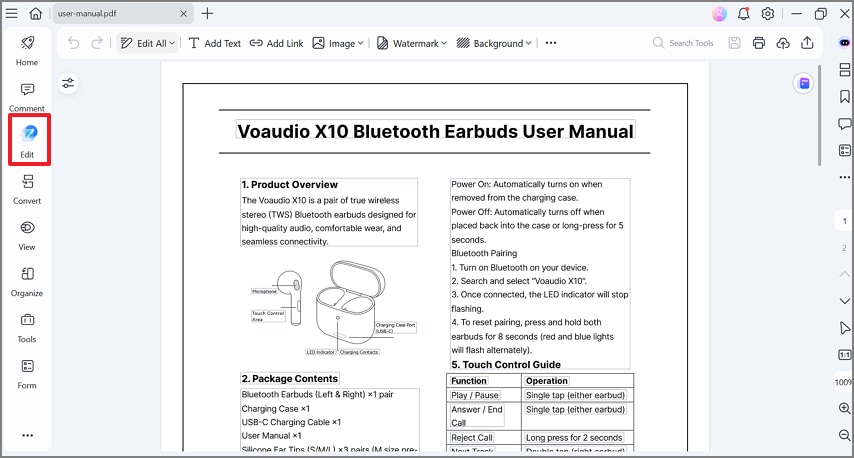
Step 2Select the Target Image Object
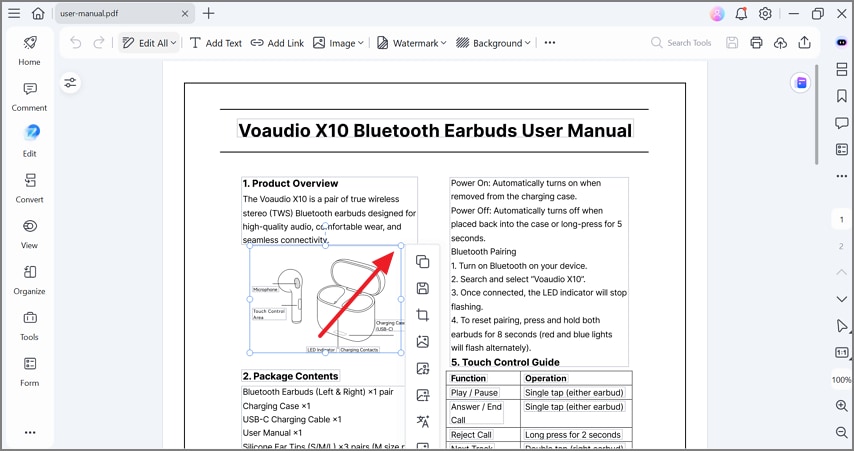
Here, navigate to the target image that needs to be resized in PDFelement, and select it by tapping on it.
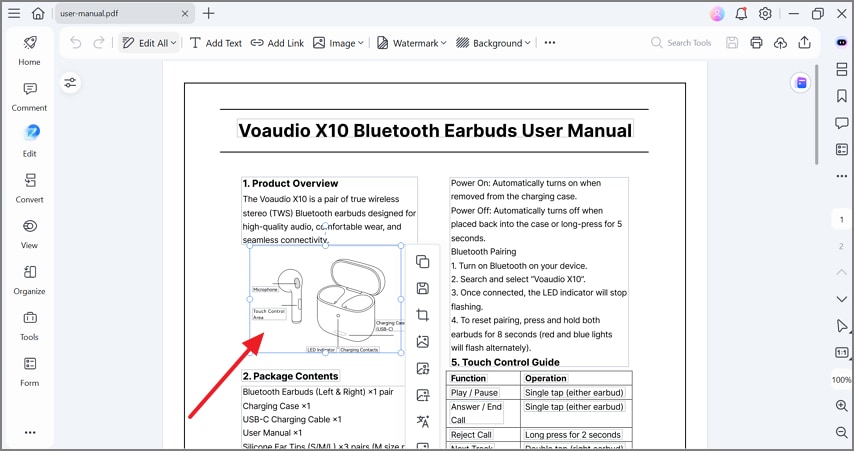
Step 3Drag The Corners of the Image for Resizing
As the blue border of the image is shown, click on the corners and drag it to get the desired aspect ratio.
Step 4Use the Alignment Tool to Center
Right-click on the image and choose the “Alignment” option from the pop-up menu, then select the desired “Align” option for your image.

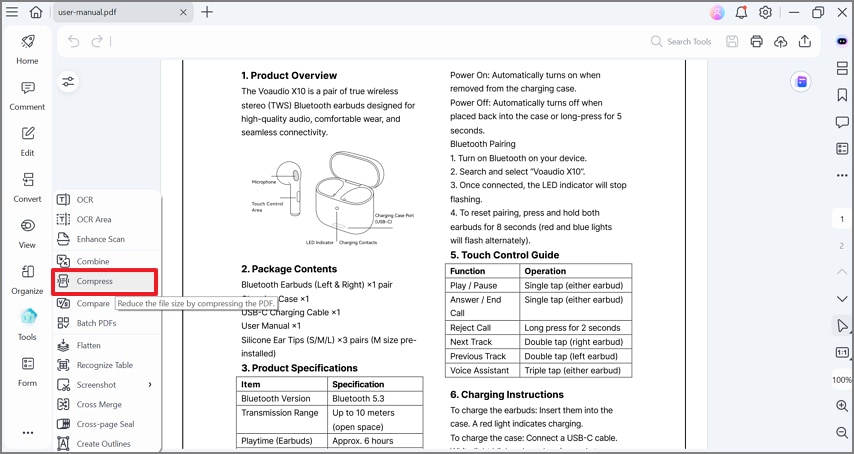
Step 5Optional: Compress the File if Needed
Afterwards, tap on the “Tools” feature available in the left tab of the editing interface and choose the “Compress” option from the pop-up menu.
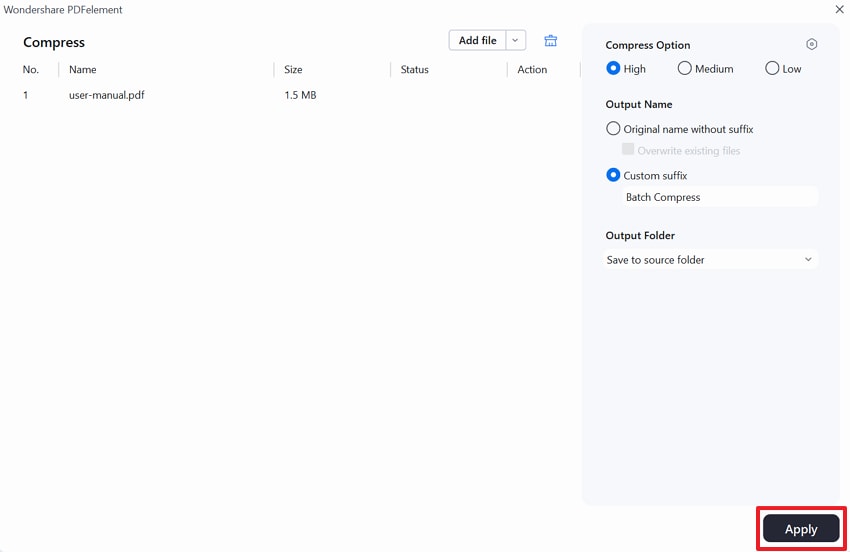
Select the desired “Compress” option to “High,” choose “Output Folder,” and hit the “Apply” button to make the changes in the file.
Pro Tips When Resizing PDF Image
As you are well aware of the procedure for resizing PDF images, let's explore the tips you should follow for high-quality results:
- Check Final DPI: Make sure to check final Dots Per Inch settings at 300 DPI (standard print size) to ensure sharp, professional print quality.
- Use Replace Image: In case the image has low resolution, you should use the Replace Image feature to swap in a higher version without disturbing its overall formatting.
- Batch Optimize: For large documents, use PDFelement’s batch processing features to optimize many image sizes all at once, saving time and storage.
- Apply OCR: One should use OCR on scanned PDFs to convert images with embedded text into editable text, making extraction easy.
G2 Rating: 4.5/5 |100% Secure
Part 3. Method 2 — Change the Image’s Aspect Ratio (Crop Without Warping)
Now, let's explore a detailed step-by-step guide to resize a PDF image using the cropping method in PDFelement, along with its significance:
Why Cropping Beats Non-Uniform Scaling
Cropping is usually superior to non-uniform scaling because it preserves the integrity and clarity of the visual content. Non-uniform scaling can lead to distortion, causing images to appear unnaturally wide, tall, and blurry.
In contrast, cropping simply removes excess or unwanted portions of an image while keeping the original proportions and key subject intact. Cropping is also ideal when updating aspect ratios, such as preparing images for social media, ensuring compositions remain visually balanced and undistorted.
Guide to Change Image Aspect Ratio in PDFelement
Upon hearing about cropping benefits, if you want to explore how to resize a PDF image, go through the following section:
Step 1Open the PDF file and select the Desired Image
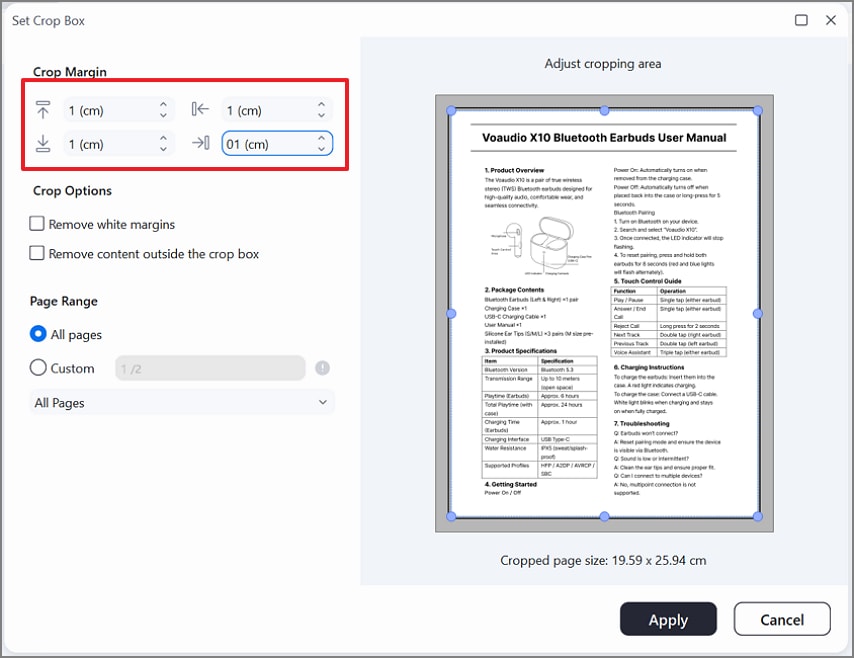
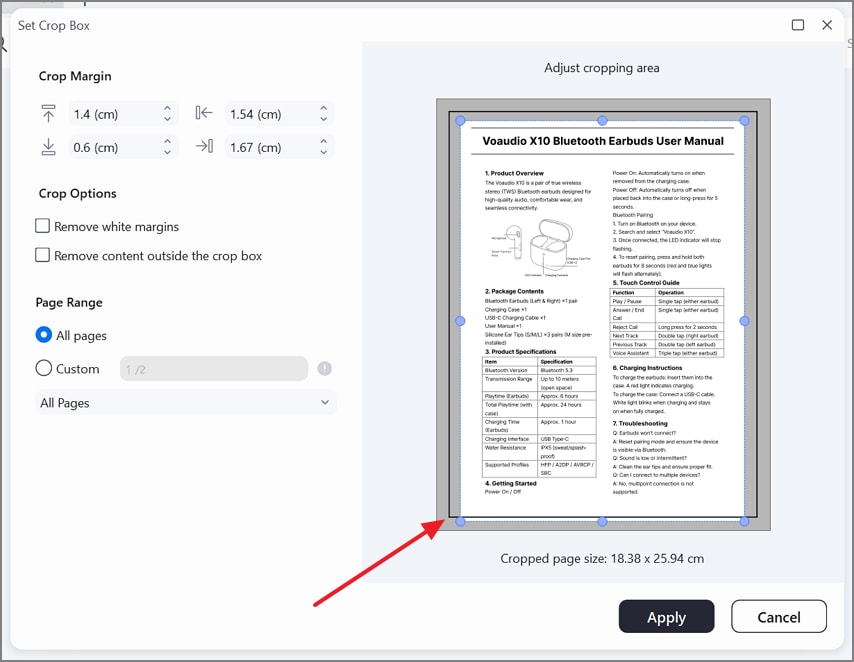
As you enter the PDF across PDFelement, tap on the "Organize" tool within the left tab. Click on the "Crop" tool available on the top toolbar.

Step 2Choose The Desired Preset Ratio (1:1, 4:3, 16:9) Or Set Custom
Here, write down the custom ratio manually in the “Crop Margin” option for your PDF.
Step 3Reposition The Image Within the Crop Frame
At this point, manually drag the image to reposition it to the center to look clean and visually appealing. Afterwards, hit the “Apply” button to save the changes to the PDF document.
Step 4Resize/Align the Image as Needed
Review the layout of the file, and if it needs more alignment, you can do it before exporting to the device.
G2 Rating: 4.5/5 |100% Secure
How to Deal With Complex Masks in the PDF?
While learning how to resize a PDF image, know that if your PDF requires advanced modifications, such as complex masking, then you will follow this workflow.
When standard PDF tools become insufficient to extract the image from the PDF, edit it in advanced software, and replace the edited image back into the original PDF. This approach is crucial for maintaining visual quality and accuracy, especially for those PDFs that require image alignment and transparency.
Part 4. Method 3 — Change the PDF Page Aspect Ratio (Canvas Resize)
While learning how to change the PDF aspect ratio, let's explore it in a detailed stepwise guide, and its popular use cases below:
Use Cases of Changing Page Aspect Ratio
Here we have narrowed down some of the famous use cases of resizing a PDF document for your better understanding:
- Slide Decks (16:9): Presentation slides tend to be best viewed in a widescreen format of 16:9 so that the content is centered in the screen with no unsightly borders or has not been cropped.
- Posters (A3): It can be used using A3 size, which offers enough room to lay out posters, considering the usual professional printing standards.
- Social Previews (1:1): Square (1:1) ratios will be well-liked on social media previews, which ensure that the post will be displayed the same on all social networks, such as Instagram, to gain the greatest number of viewers.
- Magazine Layouts (4:3): The 4:3 ratio is widely applied in digital publications, as it is comfortable to read and to look at the text, and it is applicable to the print edition.
- Tickets And Labels (Custom Ratios): Special documents, such as event tickets or business cards, need a non-standard aspect ratio to make sure that the information is presented in a proper way
Steps to Change Page Aspect Ratio Across PDFelement
If you are exploring how to change the PDF aspect ratio using the PDFelement desktop tool, then go through the following step-by-step guide:
Step 1Open the PDF and Click the Organize Feature
As you access the document across PDFelement, tap on the “Organize” menu available in the left bar of the interface. Afterwards, click on the “Three Dots” and choose the “Page Boxes” option from the pop-up menu.

Step 2Pick Preset (Cropbox, Bleedbox, Letter, A-Series) Or Set Custom Width × Height
Here, choose the desired page box, like "Bleed Box," by clicking on the "Apply To" menu. Here, you can also manually type the desired width and height for the file.
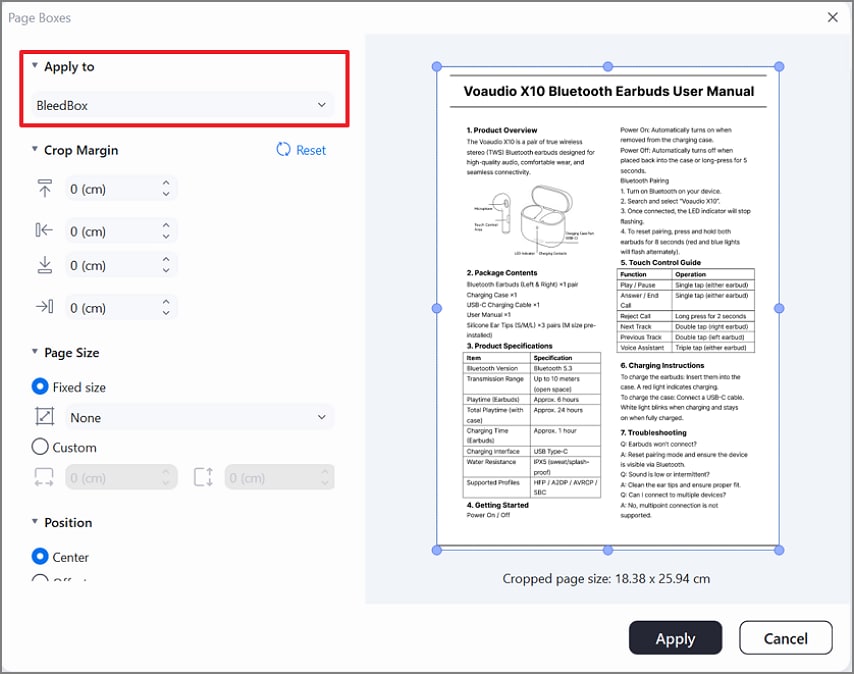
Step 3Anchor & Margin Controls; Preview Safe Areas
Choose other settings like "Position,” “Page Range," and preview the altered file before hitting the “Apply” button.
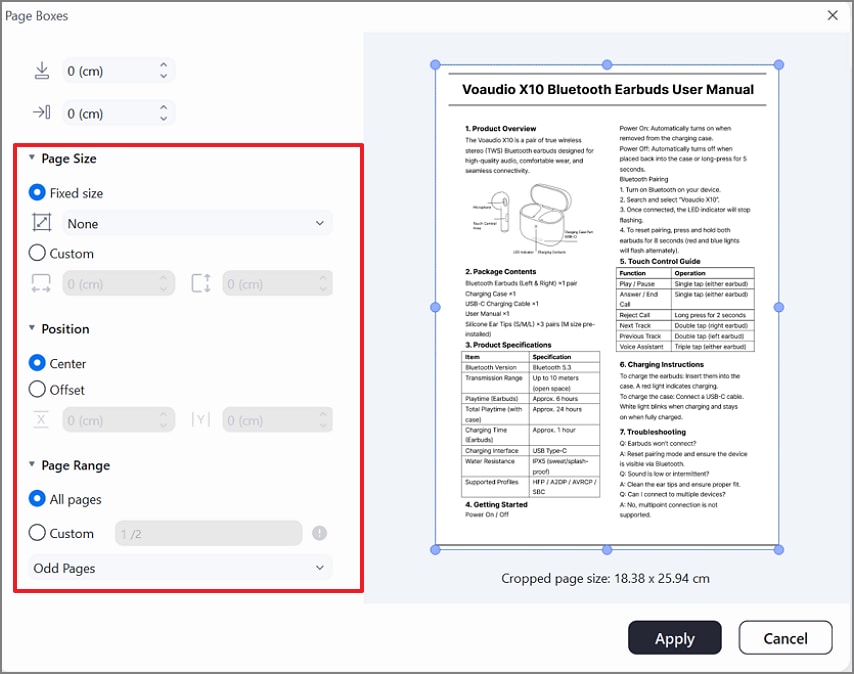
Step 4Reflow/Reposition Images and Text
After cropping, you can reposition the image and text manually in case it's disturbed during the procedure.
Export Profiles
| Print Profile | Screen Profile | |
| Purpose | Professional printing, physical media | Digital viewing, sharing via screen/web |
| Resolution | 300 DPI (high for sharp output) | 72–150 DPI (optimized for smaller files) |
| Color Space | CMYK (for print accuracy) | RGB (for monitor colors) |
| Font Embedding | Full embedding (preserves layout) | Subset or reference embedding (reduces size) |
| Compression | Minimal, lossless (max quality) | High, lossy (reduces file size) |
| Image Quality | Maximum (no downsampling) | Downsampling enabled (faster viewing, smaller files) |
| Transparency | Flattened where required | Maintained |
| Bleed/Crop Marks | Optional | Not needed |
| File Size | Larger | Smaller |
| Security | Password, print restrictions optional | Password, edit/view restrictions |
Part 5. Method 4 — Replace the Image at a Target Ratio (Highest Fidelity)
If you want to replace the image within the PDF to resize the PDF image, go through the following section:
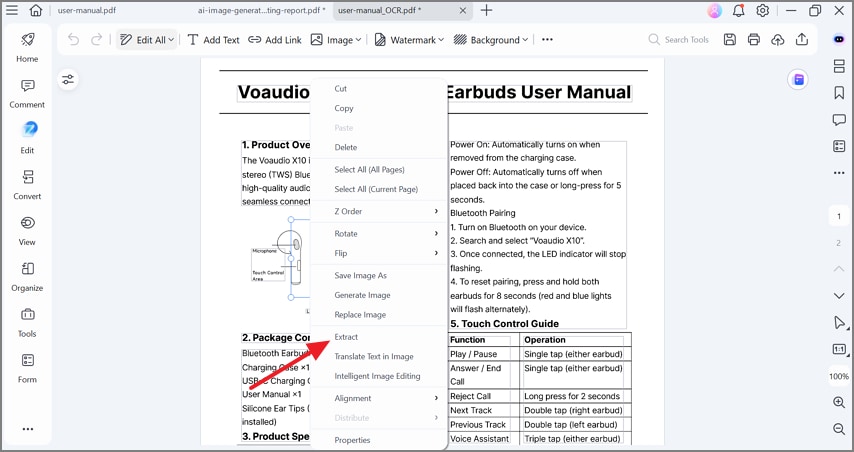
Step 1Right-Click the Desired Image In PDF
As you access the file in PDFelement, right-click on the desired image and hit the “Extract” option.
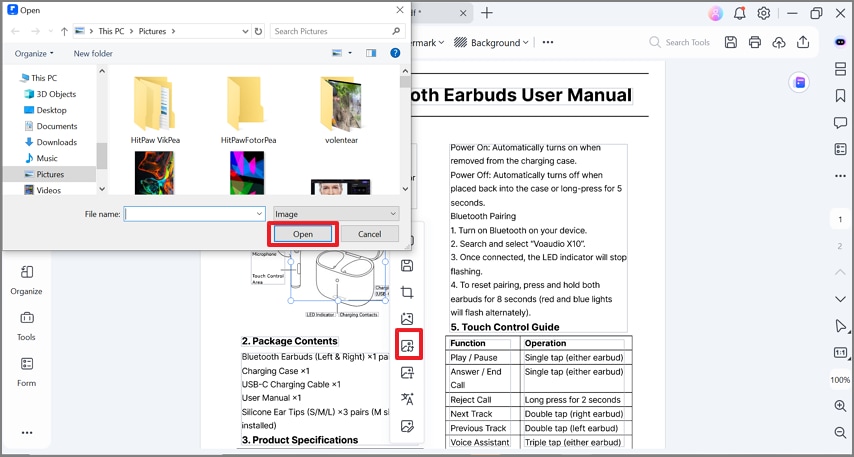
Step 2Edit The Image to Extract Ratio
Take that image and edit it in any other third-party editing software to later paste into the file.
Step 3Access the PDFelement again To Replace the Image
Revert back to the desired file and right-click to choose “Replace Image” to insert the edited picture.
Step 4Finalize The Image by Aligning and Saving It
As your image is replaced, preview it and click the “Save” button to render it.
Best For
- Brand Assets: Replacing images at a set ratio keeps logos, icons, and other brand visuals uniform across platforms.
- Covers: For cover images, using target ratios creates a polished look and aligns visuals with formatting requirements.
- Product Shots: Product photography strongly benefits from using target ratios, especially in e-commerce and advertising.
Part 6. Keep Quality High—DPI, Compression, and File Size
After knowing how to resize a PDF image, let's explore the common DPI targets and the importance of compressing the files:
DPI Targets
Here we list some of the most common DPI targets that are being used, along with their applications:
| Applications | Typical DPI Range |
| Screen Display | 96–150 |
| Office Print | 150–200 |
| High-Quality Print | 300+ |
| Digital Signage | 72 |
| Fine Art Prints | 600+ |
Use Optimize/Compress After Resizing
After resizing an image, using the optimize/compress functions reduces file size while preserving the best possible quality. Previewing artifacts is essential because compression, especially with lossy formats like JPEG or WebP, can introduce visible flaws. Optimizing or compressing an image after resizing ensures it is as small and efficient as possible for web use, digital delivery, or storage.
Avoid Repeated Recompression
Avoiding repeated recompression is crucial for maintaining high image quality. Minimizing the number of saves or using lossless formats, such as TIFF or PNG, during the editing stage helps preserve the original image fidelity.
Part 7. Common Mistakes & How to Avoid Them
While changing the PDF aspect ratio, several errors can occur, so let's explore how we can avoid them:
- Aspect Ratio: Ignoring the aspect ratio can result in stretched images, so always lock the aspect ratio or use resizing tools that maintain proportions.
- Over-Compressing: Over-compressing images causes visible artifacts and loss of detail; therefore, opt for moderate compression and preview it before saving.
- File Format: Using the wrong file format results in quality loss, so one should select the format suited to the image’s purpose.
- Resizing Multiple Times: This will progressively reduce image quality, so it's best to determine the file size first.
Conclusion
Summing up, most people get frustrated while resizing the PDF aspect ratio due to complex procedures. So in this guide, we have gathered efficient ways to resize PDFs using an advanced tool, PDFelement. Besides resizing, this tool also provides a high-quality OCR to turn your scanned file into a searchable one.
People Also Ask
-
How do I resize a PDF image without distortion?
You should scale from a corner with proportion locked to resize the image. Consider using the “Edit” tool, select the image and drag its corner. While you check the DPI settings before printing, also prefer using the “Crop” tool for changing the ratio. -
Can I change the PDF aspect ratio (the page itself)?
Yes, one can resize the PDF aspect ratio by applying the preset ratios or custom ratios. For that, navigate through the “Page” section to find the “Resize/Crop” option. Continue across the “Choose size” option to define the aspect ratio before hitting “Apply.” -
What’s the best way to make a 1:1 or 16:9 image in a PDF?
Users should crop the image first and then resize/align it. However, for exact pixels, replace with a pre-sized source. -
Will resizing reduce image quality?
As you know, scaling down is safe, but scaling up can blur the image. Use a higher-resolution source or replace the Image. -
Can I do this on my phone?
Yes, you can efficiently do basic crop rotations and optimization on a phone. For this purpose, use PDFelement for the exact ratio and DPI.

