
While InDesign is one of the premier page layout applications today, it's filled with jargon you might haven't even heard of before. Bleed and slug in InDesign are two examples that don't make a lot of sense in their current usage, making it a bit more confusing than it needs to be.
As such, we're taking a closer look at bleed marks on InDesign and learning how to add them on PDFs. By exploring below, you'll also grasp how to utilize slug effectively. Read on below to learn more.
In this article
Overview of Bleed & Slug in InDesign
Adobe InDesign, initially released in 1999, is a layout designing software produced by Adobe Inc. Adobe InDesign gives you the power to make posters, brochures, flyers, presentations, ebooks, and more, at the touch of a button or a few clicks. The software provides features to add bleed marks and slug areas on PDFs, making it the preferred app for many people, especially when printing documents professionally.
The terms, bleed and slug, are probably unknown to many people, but it's an integral part of your documents during the final printing process. Let's explore more.
What Are Bleed and Slug?
In the image below, the red outline represents bleed marks, while the outer edges represent your slug area. Bleed marks are the part where your design gets trimmed off during printing. Meanwhile, the slug is the extra space that will be intentionally left blank around the edge of your document.
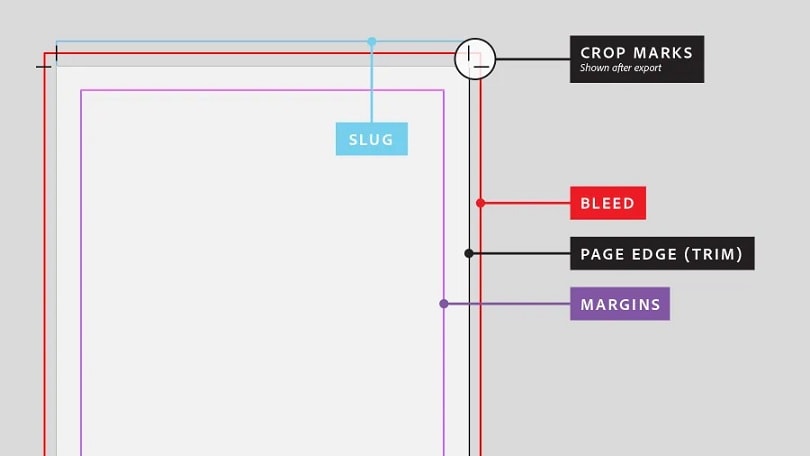
Bleed is a must to avoid white lines around the edges of your printed document, while the slug area gives your printer some room to work with.
When Should You Use Bleed and Slug?
If you're printing a document on dark-colored paper, it's a must to use bleed marks to avoid white lines around the edges of your project. Bleed marks create a borderless effect and ensure all the colors go to the edge of the paper.
Meanwhile, slug should always be utilized regardless of the document you're working on. Slug gives your printer some breathing room and helps avoid potential printing errors. It also helps prevent cutting off important text or images.
How To Add Bleed With InDesign?
If you want to add bleed and slug in Adobe InDesign for your PDFs, follow the step-by-step guide below.
Step1
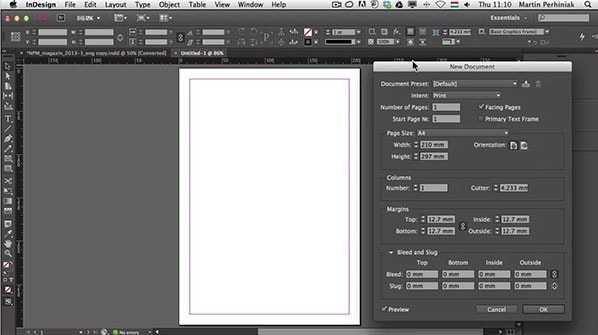
To add bleed marks and slug area to your PDF using InDesign, go to File > New Document. This step will create a new InDesign document in-app. The option to add bleed marks and a slug area is located at the bottom of the New Document Window.
Step2
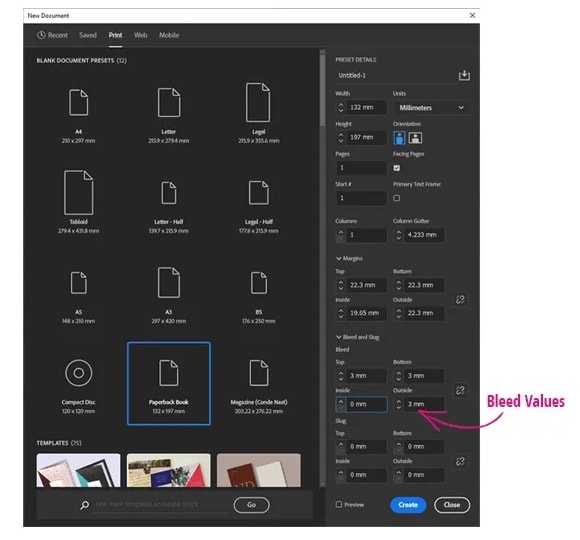
Enter your preferred values on the dialogue box beside the bleed marks and slug area. Once you're satisfied, close the panel and click Ok.
Step3
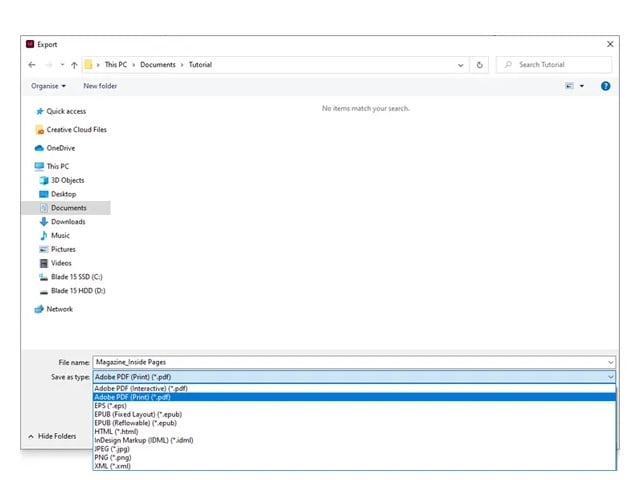
When you're done editing your document, it's time to export it into a print-ready format such as PDF. To convert the InDesign document into PDF format, go to File > Export. Next, choose Adobe PDF (Print) from the drop-down menu in the Export window.
A Flexible Alternative to Adding Bleed and Slug
If you're looking for an alternative to InDesign, then Wondershare PDFelement is the one for you. The app is very easy-to-use and can create the necessary bleed marks and slug areas you need when printing PDFs professionally. What's more, Wondershare PDFelement is available across major platforms, so you can create professionally-edited PDFs before printing anytime, anywhere.


 G2 Rating: 4.5/5 |
 100% Secure
Key Features
Here are the key features of PDFelement you can immediately take advantage of.
- Edit PDFs Like Word
The user interface of PDFelement looks and feels precisely like Word making it highly beginner-friendly. The app easily allows you to create crop marks and add bleed and slug to your desired size.
- Organize PDFs
You can merge, split, rotate, extract, and even compress your PDFs before sharing or printing.
- File Conversion
PDFelement can convert PDF files to other formats, including DOCX, XLSX, HTML, and more, and vice versa.
- Robust Security Features
You can add passwords to keep your PDFs safe and even watermarks to protect your document whenever you share it online.
- Supported Multiple Platforms
Wondershare PDFelement is available on Windows, Mac, iOS, and Android.
Pricing
Here are the price plans of PDFelement across different platforms in a handy table below.
| Windows | Mac | iOS | Android |
|
$79.99 (1 Year) $109.99 (2 Years) $129.99 (One-time) |
$79.99 (1 Year) $109.99 (2 Years) $129.99 (One-time) |
$9.99 (Quarterly) $24.99 (1 Year) $39.99 (One-time) |
Free |
How To Add Bleed to PDF With Wondershare PDFelement
Here are the steps to create bleed and slug marks using PDFelement.
Step1
Download and install PDFelement on your computer. Launch the program on your computer.
G2 Rating: 4.5/5 |100% Secure

Step2
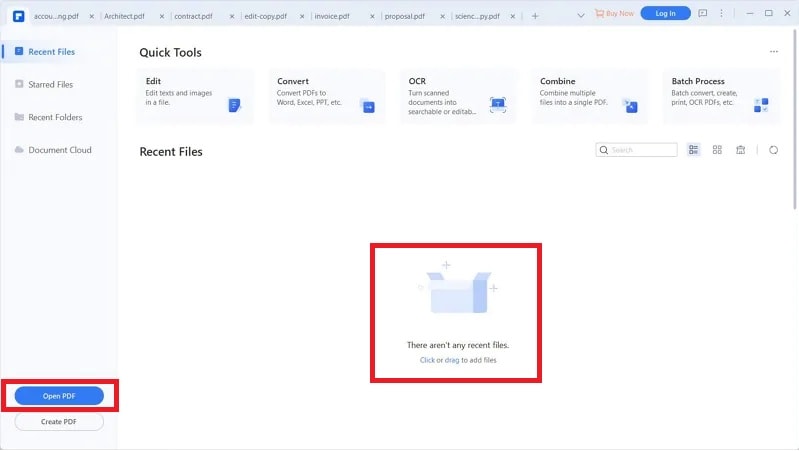
Click on Open File and choose the PDF saved on your computer to open the document you want to add bleed and slug marks. Alternatively, use the drag-and-drop function and drop the PDF file directly into the main program window to open the PDF file.
Step3
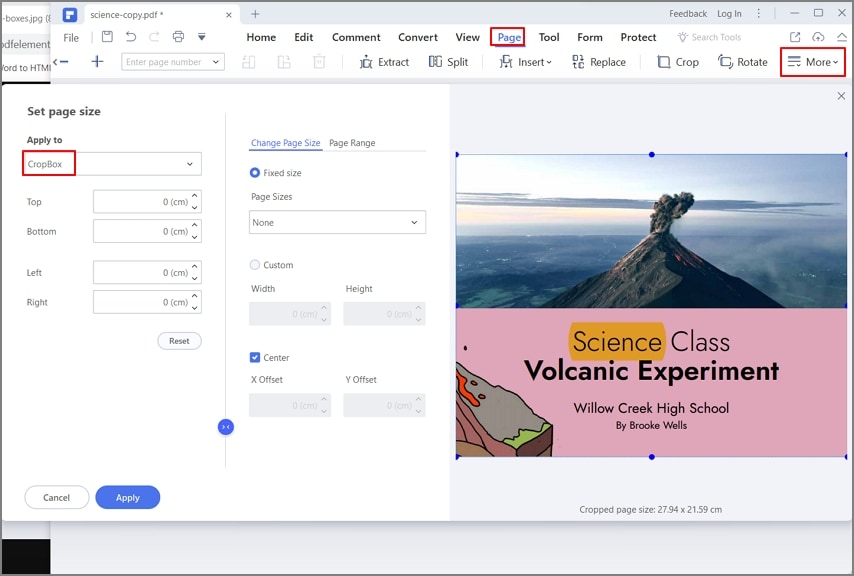
Once the PDF file is open, go to Page > Page Boxes. A Set Page Box dialog box will open where you can set a Bleed Mark and a Slug Area from the margin setting. Set your preferred bleed and slug by entering the specified number and clicking Apply.
G2 Rating: 4.5/5 |100% Secure
Step4
To add bleed marks and slug area on your PDFs, click the File button and choose the Print option. Next, find the Poster option under Print Mode and click on Crop Marks to include the bleed mark and slug area to your PDF during printing.
Conclusion
InDesign's bleed and slug feature allows you to prepare your PDF document for professional printing. These two can help you elevate your final print product to look flawless as it minimizes the visibility of any trimming errors. While Adobe InDesign is a powerful solution, it's not affordable and is far more complex.
That is why using Wondershare PDFelement as an alternative is a good choice, as it provides an advanced PDF solution in a cost-effective application. Wondershare PDFelement adds bleed and slug areas effortlessly without breaking the bank, so you can print image-rich documents without worries.

