
How to Print a Word Document Without Comments or Markup
Learn how to print without comments in Word by turning off Print Markup. Covers Microsoft 365, Windows, Mac, Word for web, tracked changes, and PDF.
 100% Secure |
 Powered by AI
 Home
>
Word Tips and Tricks
> How to Print a Word Document Without Comments or Markup
Home
>
Word Tips and Tricks
> How to Print a Word Document Without Comments or Markup
Need to print a Word document without comments? In current versions of Microsoft Word, the fastest method is to open File > Print, open the settings menu under Print All Pages, and clear Print Markup. Check the print preview before printing to make sure comment balloons, tracked changes, and other review marks are no longer visible.
This method gives you a clean printed copy without deleting the comments or tracked changes from the original Word file. If you need to remove review content permanently before sharing the document, you must delete the comments and accept or reject the tracked changes separately.
Quick Answer: How to Print Without Comments in Word
- Open the Word document.
- Go to File > Print.
- Under Settings, open the menu that normally says Print All Pages.
- Clear the check mark beside Print Markup.
- Check the preview to confirm that comments and tracked changes are hidden.
- Click Print.
Important: Turning off Print Markup changes the printed output only. It does not delete comments or tracked changes from the Word document.
- Part 1: How to Print Word Without Comments or Markup
- Print Without Comments in Word for Windows or Mac
- Print Tracked Changes but Hide Comments
- Print Without Comments in Word for the Web
- Part 2: Hide Comments vs. Remove Comments Permanently
- Part 3: How to Print or Save a PDF Without Comments
- Part 4: Why Are Comments Still Printing in Word?
- Frequently Asked Questions
How to Print Word Without Comments or Markup
For Microsoft 365 and recent desktop versions of Word, you usually do not need to delete comments before printing. Word has a dedicated Print Markup setting that controls whether review marks appear in the printed copy.
Print Without Comments in Word for Windows or Mac
The most reliable way to create a clean printout is to turn off markup in the print settings.
- Open the Word document you want to print.
- Select File > Print. You can also use Ctrl + P on Windows or Command + P on Mac.
- Under Settings, open the menu that normally displays Print All Pages.
- Find Print Markup and clear its check mark.
- Review the print preview. Comment balloons, tracked insertions and deletions, and other review markup should no longer appear.
- Select your printer and click Print.
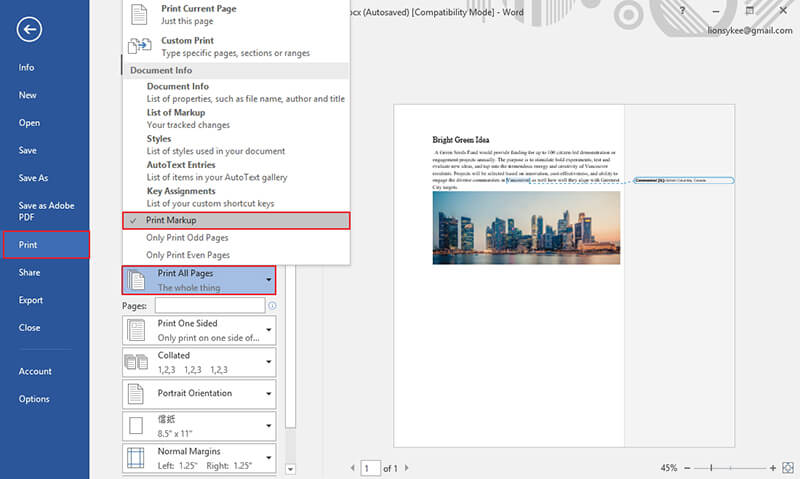

Clearing Print Markup controls what appears on the printed page. Choosing No Markup under the Review tab changes what Word displays on screen. Neither option permanently deletes comments or tracked changes from the document.
Alternative: Use No Markup Before Printing
If you want to preview how the final document will look without review marks before opening the print screen, use Word's No Markup view.
- Open the Review tab.
- In the Tracking or Display for Review controls, select No Markup.
- Review the document to make sure the clean layout looks correct.
- Go to File > Print.
- Confirm that Print Markup is not selected.
- Check the preview and print the document.
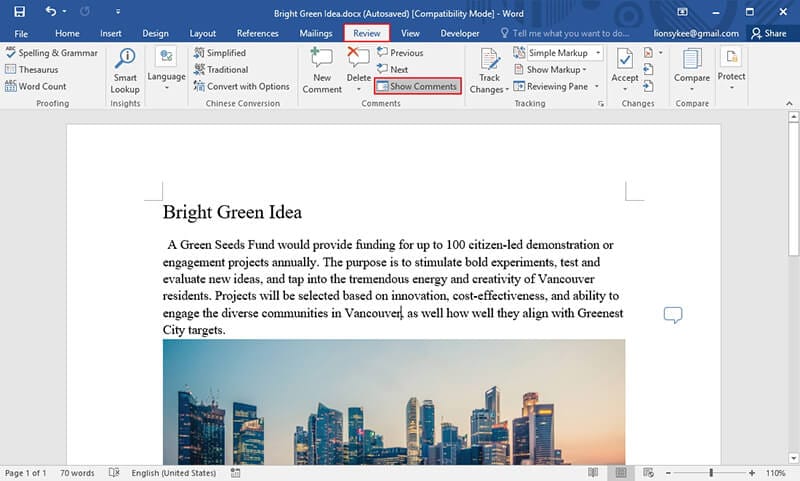
No Markup does not remove review history. If another person opens the Word file and switches the display back to All Markup, the comments and unresolved tracked changes can appear again.
How to Print Tracked Changes but Hide Comments
Sometimes you want the opposite of a completely clean copy: you want tracked insertions and deletions to remain visible, but you do not want comment balloons in the margin.
Where your version of Word provides separate markup controls, open the Review tab and use the markup options to hide Comments while leaving the revision types you want visible. Then open File > Print and keep markup printing enabled.
Because Microsoft has changed the review interface across Word versions, the exact menu wording can differ. Always check the print preview before printing. If you clear Print Markup entirely, Word will normally omit the other tracked markup as well.
How to Print Without Comments in Word for the Web
Word for the web uses a different workflow from the desktop application. If your goal is a clean copy without comments, one reliable option is to export a clean PDF first and print that file.
- Open the document in Word for the web.
- Select File.
- Choose Export.
- Select Download as PDF rather than the option that includes comments.
- Open the downloaded PDF and confirm that comments are not present.
- Print the clean PDF.
If you need more control over tracked changes, comments, or printer settings than the web version provides, open the file in the desktop version of Microsoft Word.
Hide Comments vs. Remove Comments Permanently
Printing without comments and removing comments are different tasks. Hiding markup is useful when you want a clean printout but still need to preserve the document's review history. Permanent removal is more appropriate when the final Word file itself will be sent to a client, customer, publisher, or other recipient who should not see the review content.
| Action | What It Does | Are Comments or Changes Still in the File? |
|---|---|---|
| No Markup | Hides review markup from the current document view | Yes |
| Clear Print Markup | Prevents markup from appearing in the printed output | Yes |
| Delete Comments | Removes comments from the Word document | No, for the deleted comments |
| Accept or Reject Tracked Changes | Resolves tracked revisions | No, after the revisions have been accepted or rejected |
How to Permanently Remove Comments Before Sharing
If you want a clean Word file rather than only a clean printout, save a separate copy first and remove the review content from that copy.
- Save a copy of the original document so you can preserve the review history if needed.
- Open the Review tab.
- Delete individual comments or use Word's option to delete all comments in the document.
- Review tracked changes separately and Accept or Reject each change, or use the appropriate all-changes command.
- Save the cleaned copy.
- Reopen or preview the document before sharing it.
Turning off Track Changes does not remove revisions that were already recorded. Likewise, selecting No Markup only hides them. Existing tracked changes must be accepted or rejected if you want them permanently removed.
How to Print or Save a PDF Without Comments
A common follow-up task is to create a PDF version of the Word document without comments. If you create the PDF from Word, make sure the Word print or export settings are configured for a clean document before generating the PDF.
If the document is already a PDF and contains annotations, highlights, sticky notes, or other comments, use the PDF application's annotation and print controls instead.
Wondershare PDFelement - PDF Editor Wondershare PDFelement Wondershare PDFelement
With Wondershare PDFelement, you can open an annotated PDF, review its comments, hide or manage annotations, and control how the PDF is printed. This is useful when the source file is already a PDF rather than a Word document.


 G2 Rating: 4.5/5 |
 100% Secure

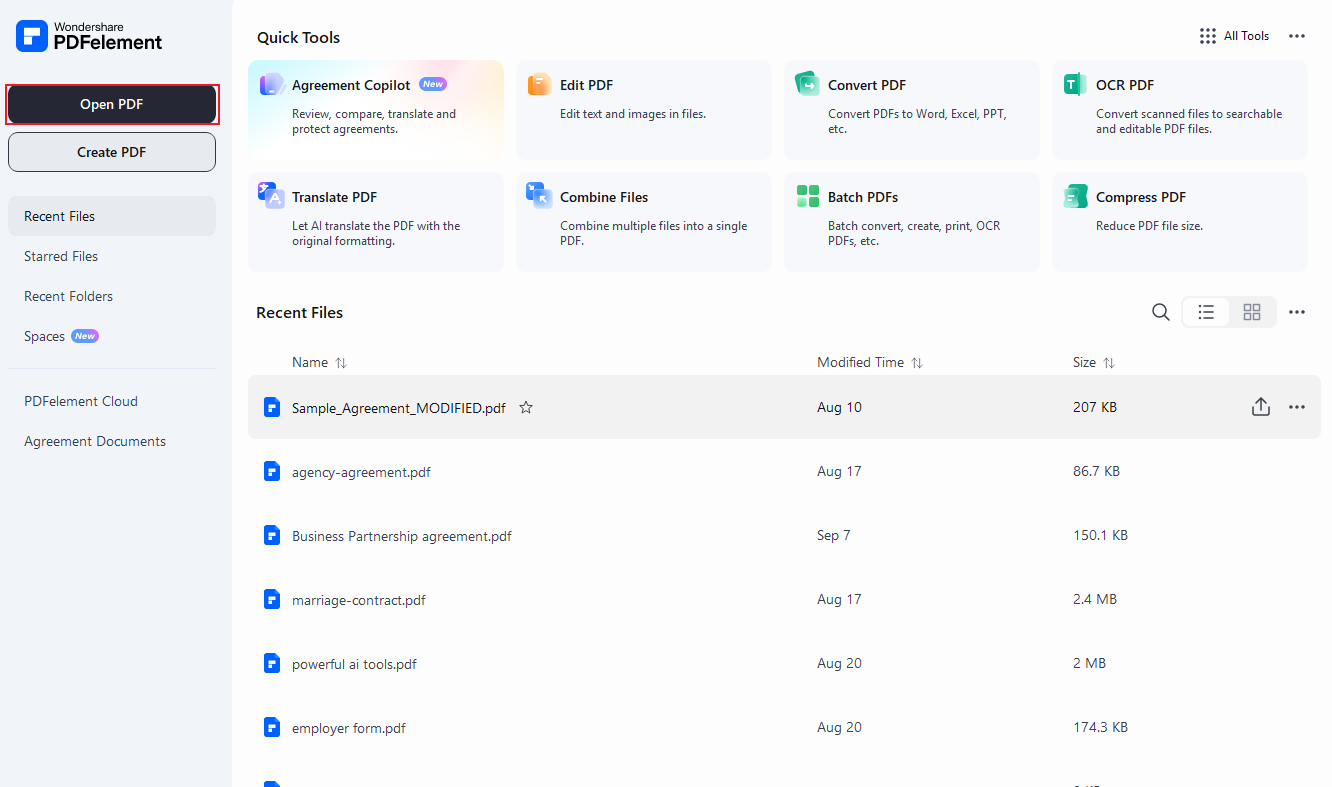
Step 1. Open the PDF
Launch PDFelement and open the PDF you want to print. If the document contains annotations, review them before printing so you know which comments should remain visible and which should be hidden from the printed copy.
Step 2. Open the Print Settings
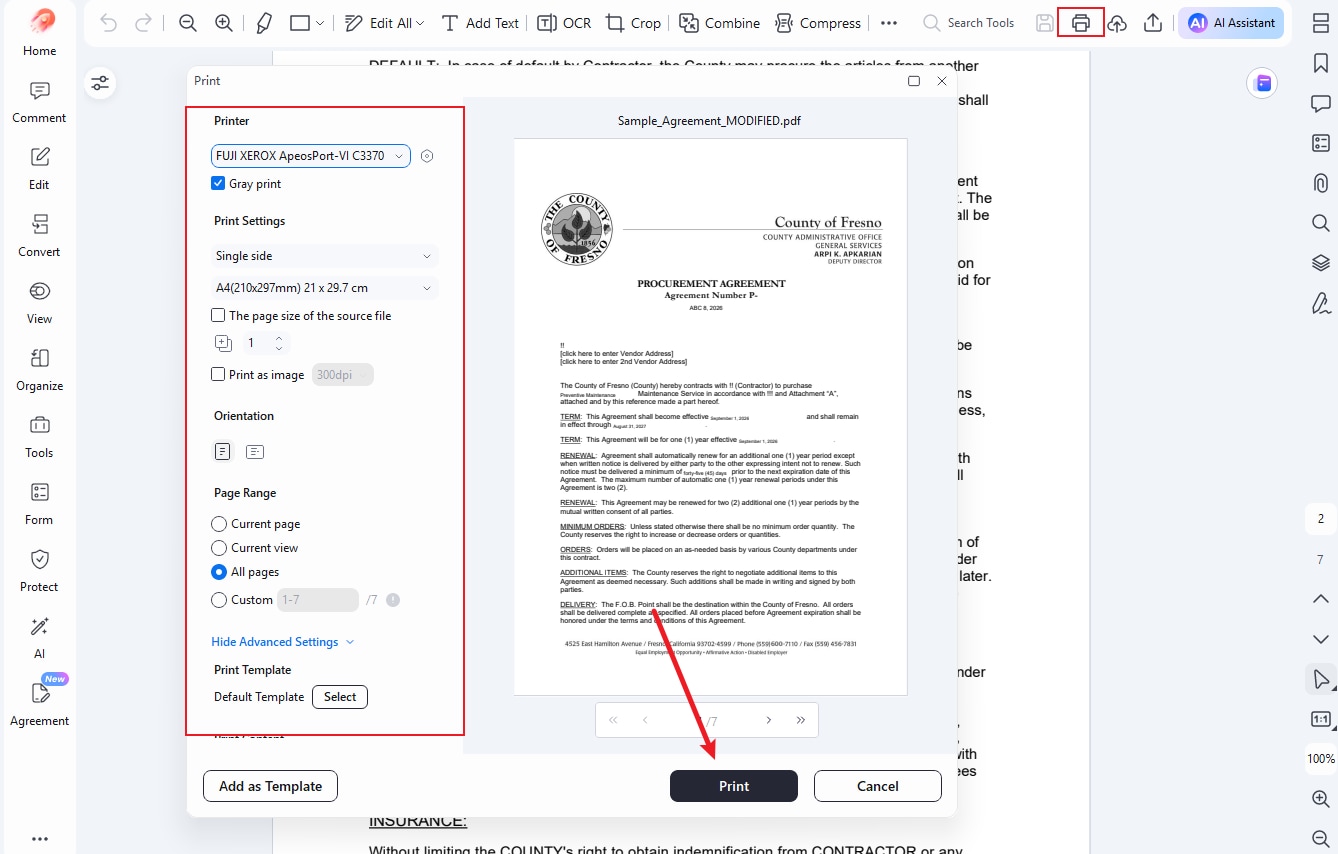
Open the Print dialog in PDFelement. Review the available comment or markup options and choose a setting that prints the document without annotations when you need a clean copy.
Before sending the file to the printer, check the preview and confirm that highlights, notes, strikeouts, and other annotations are not included in the output.
If you only want to hide comments while reading or reviewing the PDF, PDFelement also provides controls for hiding annotations without deleting them.
Why Are Comments Still Printing in Word?
If comments or tracked changes still appear after you tried to hide them, check the following settings before printing again.
| Problem | Likely Cause | What to Check |
|---|---|---|
| Comments still appear in print preview | Print Markup is still enabled | Go to File > Print > Print All Pages and clear Print Markup |
| No Markup is selected but review marks still print | The document view and print settings are controlled separately | Check Print Markup in the print screen as well |
| Comments disappear, but tracked changes also disappear | You turned off all markup rather than comments only | Use the Review markup controls to select which review items should remain visible |
| Comments return when the file is reopened | The comments were hidden rather than deleted | Delete comments permanently if the final file must not contain them |
| Tracked changes return when the file is reopened | No Markup only hid unresolved revisions | Accept or reject tracked changes before sharing the final file |
| The PDF still contains comments | The Word document or PDF was exported with markup included | Export a clean PDF or turn off comment/markup printing before creating the PDF |
Frequently Asked Questions About Printing Word Without Comments
-
How do I print a Word document without comments?
Open File > Print. Under Settings, open the menu that normally says Print All Pages and clear Print Markup. Check the preview to confirm that the comments and review marks are not visible, then print the document. -
Why are comments still printing when I select No Markup?
No Markup controls how review content appears in the document view, while printing has its own markup setting. Open File > Print and make sure Print Markup is also turned off. Then check the print preview before printing. -
Does No Markup permanently delete comments in Word?
No. No Markup only hides comments and tracked changes from the current view. The review content remains in the Word file and can appear again. Delete comments and accept or reject tracked changes if you need to remove them permanently. -
How do I print Word without comments but keep tracked changes?
Where your Word version provides separate markup controls, open the Review tab and hide Comments while leaving the tracked revision types you want visible. Keep markup printing enabled and check the print preview. Menu names can vary between Word versions. -
How do I save a Word document as a PDF without comments?
Use a clean export option that excludes comments. In Word for the web, choose File > Export > Download as PDF rather than the PDF option that includes comments. In desktop Word, make sure markup is excluded before printing or exporting the document as PDF. -
Will printing without comments remove them from the original Word file?
No. Clearing Print Markup only changes the printed output. The original comments and unresolved tracked changes remain in the Word document unless you delete, accept, or reject them separately.
Conclusion
The fastest way to print without comments in Word is to go to File > Print and clear Print Markup. Use No Markup when you want to preview a clean version on screen, but remember that neither setting deletes the underlying comments or tracked changes.
If the final Word file itself must be clean, delete the comments and accept or reject tracked changes before sharing it. If you are working with a PDF instead, use the PDF application's annotation and print settings to control whether comments appear in the printed copy.
Free Download or Buy PDFelement right now!
Free Download or Buy PDFelement right now!
Try for Free right now!
Try for Free right now!


Audrey Goodwin
chief Editor