
Table of Contents
Large photos can make a Word document feel unfinished. A picture dropped straight from a phone or camera may fill an entire page, push text into the wrong place, or make the file too heavy to email. The good news is that learning how to resize a picture in Word takes only a few minutes, and Word gives you several ways to do it depending on whether you want a quick visual adjustment, an exact measurement, or a percentage-based resize.
This guide covers the practical methods most people need: dragging the picture handles, entering exact height and width values, resizing by percentage, keeping proportions, fixing layout problems, and reducing file size. The steps apply to Microsoft Word for Microsoft 365, Word 2021, Word 2019, Word 2016, and Word 2013, with notes where the older interface differs.


 G2 Rating: 4.5/5 |
 100% Secure
How Resizing Pictures in Word Works
Before changing the size of an image, it helps to know what Word is actually doing. Resizing changes how large the picture appears on the page. It does not necessarily remove parts of the picture, and it may not reduce the actual file size much unless you also compress the image.
That distinction matters. If a photo looks too wide for your report, resizing is enough. If the photo contains extra background around the subject, cropping is usually better. If your Word document is too large to upload or send by email, you need compression as well as resizing.
Resizing vs. Cropping vs. Compressing
Resizing changes the displayed height and width of the image. For example, you can resize a picture in Word so it fits inside a resume header, a project proposal, or a one-page flyer.
Cropping hides unwanted edges of the image. It is useful when the subject is too small in the frame or when you need a photo to fit a specific shape without stretching it.
Compressing reduces the amount of image data saved inside the document. This is useful after adding several large photos. Microsoft has a helpful overview of image compression options in Office on its official support site.
A common mistake is to drag a picture smaller and assume the document file size has also become much smaller. Sometimes it has not. Word may still store the original image data unless you use the Compress Pictures command or remove cropped areas.
Before You Resize: Check the Picture Layout
Click the picture once. If the picture behaves like a large text character and is hard to move around, it is probably set to In Line with Text. That layout is fine for academic papers or simple documents, but it can make picture placement feel restrictive.
For more control, select the picture, then choose Layout Options beside the image. Options such as Square, Tight, or Top and Bottom allow text to flow around the image. If you only need the picture between paragraphs, In Line with Text is usually the safest choice.
Also pay attention to aspect ratio. Aspect ratio is the relationship between width and height. If you change only the width or only the height without preserving the ratio, people and objects can look stretched. For photos, logos, ID pictures, product shots, and screenshots, keeping the aspect ratio locked is usually best.
How to Resize a Picture in Word by Dragging
The fastest way to resize an image in Word is to use the sizing handles around the picture. This is the best method when you do not need an exact measurement and simply want the image to look right on the page.

Basic Drag Method
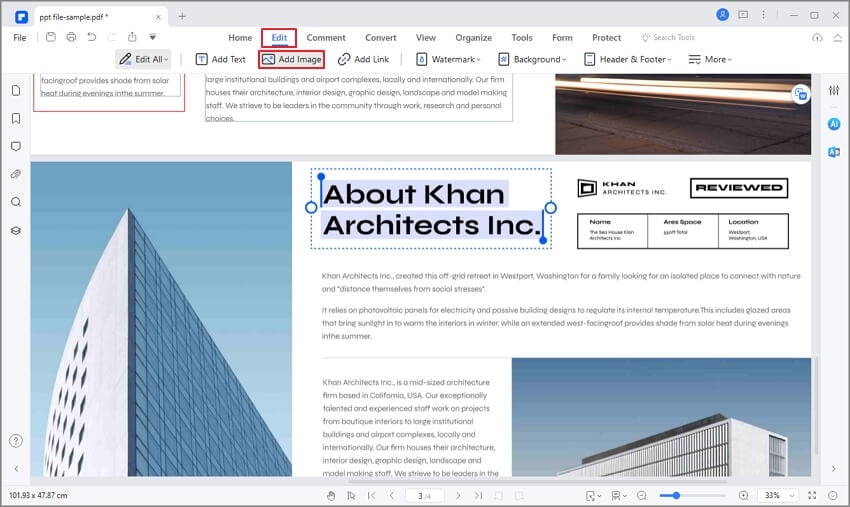
Open your Word document and click the picture you want to resize. Small circles or squares appear around the edges and corners of the image. These are the sizing handles.
Move your pointer over a corner handle until the cursor changes into a diagonal resize arrow. Click and drag inward to make the picture smaller, or drag outward to make it larger. Release the mouse button when the image reaches the size you want.
Use a corner handle for most resizing tasks. Dragging from the side handle changes the width only. Dragging from the top or bottom handle changes the height only. Those edge handles can be useful for shapes, but they often distort photos.
Keep the Picture Proportions While Resizing
In many newer versions of Word, dragging a corner handle keeps the picture’s proportions automatically. Even so, it is still worth checking the result visually. If faces, circles, logos, or product images look unusually wide or narrow, undo the resize and try again from a corner.
In some versions or document settings, you can hold Shift while dragging a corner handle to help maintain the original proportions. If the picture still looks distorted, use the exact sizing method later in this guide and make sure Lock aspect ratio is turned on.
For screenshots, charts, and interface images, keeping proportions is especially important. A stretched screenshot can make text look blurry and unprofessional.
Resize from the Center
If you want the picture to stay centered while resizing, hold Ctrl while dragging a sizing handle. This expands or shrinks the image around its center point instead of pulling it mainly toward the direction of your mouse movement.
You can hold Ctrl + Shift while dragging if you want to resize from the center and maintain proportions at the same time. This is useful for centered cover images, logos, certificates, invitations, and forms where alignment matters.
Use the Picture Format Tab for Quick Adjustments
When the picture is selected, Word shows a Picture Format tab on the ribbon. In older versions, this may appear as Picture Tools > Format. On the right side of the ribbon, you will see the Size group, where Word displays the picture’s current height and width.
You can use those boxes for quick manual changes, but if you need more control over aspect ratio, rotation, scaling, and layout, open the full Size and Position dialog box. The next section explains how.
How to Resize an Image in Word to an Exact Size
Dragging is convenient, but it is not precise. If you are making a badge, inserting a headshot, preparing a product sheet, or matching several images in a report, use exact measurements instead.

Set Exact Height and Width
Click the picture you want to resize. Go to Picture Format on the ribbon. In the Size group, enter the desired value in the Height or Width box.
For example, if you want the image to be 3 inches wide, type 3" in the Width box and press Enter. Word will usually adjust the other dimension automatically if the aspect ratio is locked.
If you do not see the full controls, right-click the picture and choose Size and Position. Then open the Size tab. This dialog box gives you more settings, including height, width, rotation, scale, and aspect ratio options.
Resize a Picture to 1x1 or 2x2 in Word
Many users search for how to resize a picture in Word because they need an ID-style or passport-style photo. Word can help you set a picture to 1x1, 2x2, or another exact size, but you should be careful not to stretch the photo.
Click the picture, then open Picture Format. In the Size group, enter the same value for height and width. For a 2x2 photo, set both Height and Width to 2" if your Word measurements are in inches. For 1x1, set both to 1".
If Word changes one value automatically and refuses to make the picture square, the aspect ratio is locked. That is usually good for normal photos, but a strict square output may require cropping first.
The better workflow is:
- Select the picture and use Crop to make the visible area square.
- Apply the crop so the face or subject is centered.
- Enter the final exact height and width, such as 2 inches by 2 inches.
This avoids the stretched look that happens when you force a rectangular image into a square size.
Lock or Unlock Aspect Ratio
The Lock aspect ratio setting controls whether Word preserves the original proportions when you resize. To find it, right-click the picture, choose Size and Position, and open the Size tab. You should see a checkbox for Lock aspect ratio.
Leave Lock aspect ratio turned on for most photos, logos, screenshots, illustrations, and scanned images. Turn it off only when you intentionally need to force a picture into a specific height and width and slight distortion is acceptable.
For ID photos, do not rely on unlocking the aspect ratio unless the original picture is already very close to the target shape. Cropping is cleaner. For logos, avoid unlocking the aspect ratio entirely unless your brand guidelines specifically allow it.
Match Multiple Pictures to the Same Size
If your document contains several images, such as staff photos or product thumbnails, inconsistent sizing can make the page look messy. Resize the first image to the exact height and width you want. Then select the next image and enter the same values in the Height and Width boxes.
For a grid of photos, also check alignment. Select multiple images by holding Ctrl while clicking each one, then use Picture Format > Align to align left edges, centers, or tops. If the Align commands are greyed out, the pictures may be set to In Line with Text. Change the wrap option to Square or Tight if you need free positioning.
How to Resize a Picture in Word by Percentage
Percentage scaling is useful when you want to enlarge or shrink an image relative to its current size. For example, you may want a screenshot at 75% of its original display size or a diagram enlarged to 120% for readability.

Use Percentage Scaling in Word
Select the picture, then right-click it and choose Size and Position. In the Size tab, look for the Scale section. You can enter a percentage for Height and Width.
If you want the image to remain proportional, make sure Lock aspect ratio is selected. Then enter the percentage in one field, and Word should update the other field to match. For example, setting the width scale to 80% will reduce the image to 80% of its current size.
If Lock aspect ratio is not selected, you can enter different percentages for height and width. This can be useful for shapes or decorative elements, but it is risky for photos because it causes distortion.
When Percentage Resizing Makes Sense
Use percentage resizing when relative size matters more than physical measurement. It works well for screenshots in software documentation, diagrams in training materials, or repeated graphics that need to be scaled consistently.
Exact measurements are better for print layouts, forms, ID pictures, labels, and documents with strict formatting requirements. If someone asks for a 2-inch-wide headshot, use the height and width boxes. If someone says an image looks too dominant and should be “about 20% smaller,” percentage scaling is faster.
How to Resize a Picture in Word 2013
The steps in Word 2013 are similar, but the ribbon labels may look slightly different. After selecting the picture, Word 2013 displays Picture Tools with a Format tab beneath it. Use that Format tab to find the Size group.
To resize manually, drag a corner handle just as you would in newer versions. To enter exact dimensions, select the picture and type values into the Height and Width boxes in the Size group. To open more settings, right-click the image and choose Size and Position.
For percentage resizing in Word 2013, open Size and Position, go to the Size tab, and use the Scale options. Keep Lock aspect ratio selected unless you have a specific reason to distort the picture.
If you are following instructions written for Microsoft 365 or Word 2021, remember that Picture Format in newer Word versions is roughly the same area as Picture Tools > Format in Word 2013.
Fix Layout, Quality, and File Size After Resizing
Resizing solves the visible size problem, but it can introduce other issues. The image may jump to an unexpected location, text may wrap awkwardly, or the picture may look blurry after enlargement. A few quick checks can prevent most of these problems.
Choose the Right Text Wrapping Option
Click the image and select the small Layout Options button that appears near it. If you want the picture to sit between paragraphs like a normal line of content, choose In Line with Text. This is stable and predictable, especially for academic papers and formal reports.
If you want text to flow around the image, choose Square or Tight. Square wraps text around the image’s bounding box. Tight wraps text more closely around the visible shape, although the effect depends on the image.
For images used as page decorations, Behind Text or In Front of Text may work, but these settings can be harder to control. Use them carefully in documents that will be edited by other people.
Crop Instead of Stretching
If the picture does not fit the available space, do not automatically unlock the aspect ratio and squeeze it. That may technically resize the picture, but it usually looks unprofessional.
Select the picture, go to Picture Format, and choose Crop. Drag the black crop handles to remove unwanted parts of the image. Then click outside the picture or press Enter to apply the crop.
For profile photos, crop around the face and shoulders before setting the final size. For screenshots, crop away unused browser bars or blank space. For product images, crop consistently so each product has similar spacing around it.
Avoid Enlarging Small Images Too Much
Word can enlarge an image, but it cannot create detail that was not in the original file. If a small image becomes blurry after resizing, the source image may not have enough resolution.
This is common with logos copied from websites, small social media images, and screenshots pasted from low-resolution displays. If quality matters, replace the image with a higher-resolution version instead of continuing to enlarge it.
A useful rule: shrinking a large image usually looks fine; enlarging a small image often reveals blur or pixelation.
Compress Pictures to Reduce Word File Size
After resizing several large images, your Word document may still be heavier than expected. To reduce file size, select a picture, go to Picture Format, and choose Compress Pictures.
In the compression dialog, you can apply compression to only the selected picture or to all pictures in the document. You can also choose whether to delete cropped areas. Deleting cropped areas helps reduce file size, but only do it when you are sure you will not need to restore those hidden parts later.
Choose a resolution based on the document’s purpose. A file intended for email does not need the same image quality as a print-ready brochure. If the document must be printed professionally, keep a higher resolution and ask the printer for specifications.
Check the Document After Saving as PDF
If the final document will be shared as a PDF, save or export a test PDF and inspect the images. Word layout can shift slightly depending on fonts, margins, page size, and PDF export settings.
Open the PDF and zoom in to check whether images are sharp enough. Also review page breaks, captions, and text wrapping around images. This small check is worth doing before sending a proposal, application, report, or client-facing document.
Working With Resized Word Images in PDF
Many Word documents eventually become PDFs because PDFs are easier to share, print, archive, and review consistently across devices. Once you resize a picture in Word and finalize the layout, exporting to PDF is often the safest way to preserve the document’s appearance.
In Word, you can usually go to File > Save As or File > Export and choose PDF. Microsoft provides general guidance on saving or converting Office files to PDF through its support documentation.
When a PDF Editor Helps After Resizing Images in Word
Sometimes the Word file is not the final working file. You may receive a PDF version from a colleague, discover that one image is too large, or need to replace a picture after the Word source file is no longer available. That is where a PDF editor becomes useful.
G2 Rating: 4.5/5 |100% Secure
PDFelement is a practical follow-up tool for this kind of document workflow. After converting your Word document to PDF, you can use PDFelement to adjust PDF content, replace images, crop pages, annotate review notes, add signatures, or compress the PDF before sharing. If the image layout is already correct in Word, PDFelement can help with the final PDF stage: reviewing the output, reducing file size, organizing pages, and preparing the file for delivery.
For example, if you create a Word report with resized images and then export it to PDF, you might notice the PDF is too large for an upload portal. Instead of going back through every Word image, you can use a PDF compression workflow. If you receive a scanned PDF and need editable text before making layout changes, OCR can also help turn scanned content into searchable, editable material.
This does not replace Word’s image resizing tools. Word is still the right place to resize pictures while drafting the document. PDFelement is most useful once the document enters the PDF stage and you need to edit, compress, annotate, sign, convert, or organize the finished file.
People Also Ask
-
How do I resize a picture in Word without distorting it?
Use a corner sizing handle instead of a side handle. In most modern versions of Word, dragging from a corner keeps the proportions. For more control, right-click the image, choose Size and Position, and make sure Lock aspect ratio is selected. This prevents the picture from becoming stretched too wide or too tall. -
How do I resize an image in Word to an exact size?
Select the picture, go to Picture Format, and enter the required values in the Height and Width boxes. If you need more options, right-click the image and choose Size and Position. Use the Size tab to set exact measurements and control whether the aspect ratio is locked. -
How do I resize a picture to 2x2 in Word?
Select the picture and use Crop first to make the visible area square. Then go to Picture Format and set both Height and Width to2"if your document uses inches. Cropping first is better than simply unlocking the aspect ratio and forcing the image into a square, because forcing it can distort the subject. -
How do I resize a picture in Word 2013?
Click the image, then use Picture Tools > Format. Drag the corner handles for quick resizing, or enter exact values in the Height and Width boxes in the Size group. For percentage scaling or aspect ratio controls, right-click the picture and choose Size and Position. -
Why does my picture move when I resize it in Word?
The image’s text wrapping setting affects how it behaves. If it is set to In Line with Text, Word treats it like a text character. If it is set to Square, Tight, or another wrapping option, it can float around the page. Click the picture, choose Layout Options, and select the wrapping style that matches your layout. -
Does resizing a picture in Word reduce the file size?
Not always. Resizing changes the displayed size, but Word may still store the original image data. To reduce the document size, use Picture Format > Compress Pictures. You can also delete cropped areas if you no longer need them. -
Why is my picture blurry after resizing?
The original image may be too small or low resolution. Shrinking a large image usually keeps it looking sharp, but enlarging a small image often causes blur or pixelation. Use a higher-resolution source image if the picture needs to appear larger. -
Can I resize multiple pictures at once in Word?
Word has limited batch resizing options compared with dedicated design tools. You can select multiple images by holding Ctrl and clicking each one, but exact resizing may depend on their layout settings. For consistent results, resize one picture to the desired dimensions, then apply the same height and width values to the others. -
Can I resize pictures after converting Word to PDF?
Yes, but you need a PDF editor. Word is best for resizing images before export. After the file becomes a PDF, a tool such as PDFelement can help edit or replace images, compress the PDF, annotate pages, add signatures, and organize the final document.

