How to Convert Scanned Document to PDF File
How do I convert scanned documents to PDF? After conversion, you are able to copy and edit text in your document.
 100% Secure |
 Home
>
Convert Scanned PDF
> How to Convert Scanned Document to PDF File
Home
>
Convert Scanned PDF
> How to Convert Scanned Document to PDF File
Any scanned document can be converted into different formats, including PDF. By converting a scanned document to PDF, you can edit and make change to your important scanned documents. This article will show you how to scan documents to PDF and convert scanned documents to editable PDF with Wondershare PDFelement - PDF Editor Wondershare PDFelement Wondershare PDFelement and more.This makes it easier to make modifications to a scanned document and save it into many output formats such as editable PDF, Word, Excel, PPT, EPUB, etc.
Part 1. Why Convert Scanned Document to PDF?
Converting a scanned document to PDF can enhance usability, accessibility, and security of your documents. Here are four reasons why you want to convert scanned documents to PDF.
- Make the document searchable and editable: When a scanned document is converted to a editable PDF using OCR (Optical Character Recognition), you can easily search for specific content within the file, modify the text, or digitally sign the document.
- Easier to share: PDF is a universally accepted format that preserves formatting. Sharing a scanned document as a PDF can ensure that the recipient sees the document exactly as intended.
- Improve document security: PDFs offer advanced security features, such as password protection, encryption, and permissions control. This makes it easier to safeguard sensitive information and prevent unauthorized access or editing.
Part 2. How to Convert a Scanned Document to PDF on Windows
Learn how to convert and edit a scanned document as a PDF file with Wondershare PDFelement - PDF Editor Wondershare PDFelement Wondershare PDFelement on Windows. Follow the steps below after you've ensured you downloaded and installed OCR.
PDFelement for Windows
Step 1. Import Scanned Document into PDFelement
Run PDFelement on your computer. The file can be opened directly with PDFelement by clicking on the add button.

Step 2. Convert Scanned Document to PDF
Using the OCR function, the program will automatically detect the scanned file and then prompt you to use OCR. Click on the "Perform OCR" button from the top information bar and select the language of the document. You can then click "OK". While OCR is being performed, don't try to perform any other activities.

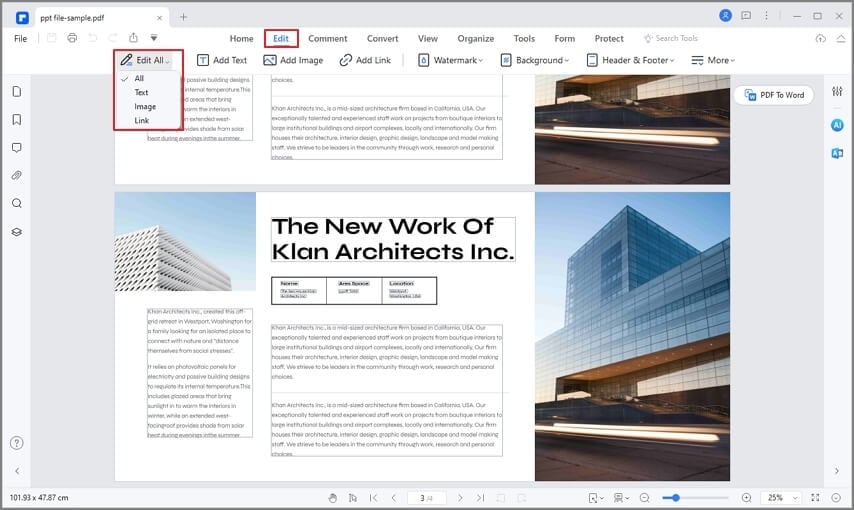
Step 3. Edit Content in Your PDF (Optional)
After the OCR is complete, you can further edit your document if necessary. PDFelement offers a variety of editing and annotation tools. To modify the text in your document, you can go to the "Edit" tab and choose edit mode. Then click on the text that you want to edit and make the change.
Step 4. Save Your File as PDF
If you're satisfied with the changes you've made, you can now save the scanned document as a PDF. Use the "Save" icon in the upper menu bar or you can go to "File > Save as". You will be able to choose where to save the file and the file name.

PDFelement offers fast recognition of text, images, and numbers, and effectively keeps document layout intact. It also supports a wide range of OCR languages, enabling you to get an editable file with high accuracy.
To make you know how to convert scanned documents to PDF more directly and comprehensively, you can view this video and explore more videos about PDFelement from Wondershare Video Community.


 G2 Rating: 4.5/5 |
 100% Secure
Wondershare PDF Converter Pro
Wondershare PDF Converter Pro is another powerful PDF converter which can not only help you convert scanned document to PDF but can also help you convert PDF to other Microsoft Office format. Here, you will be guided on the easiest way to convert scanned documents to PDF.
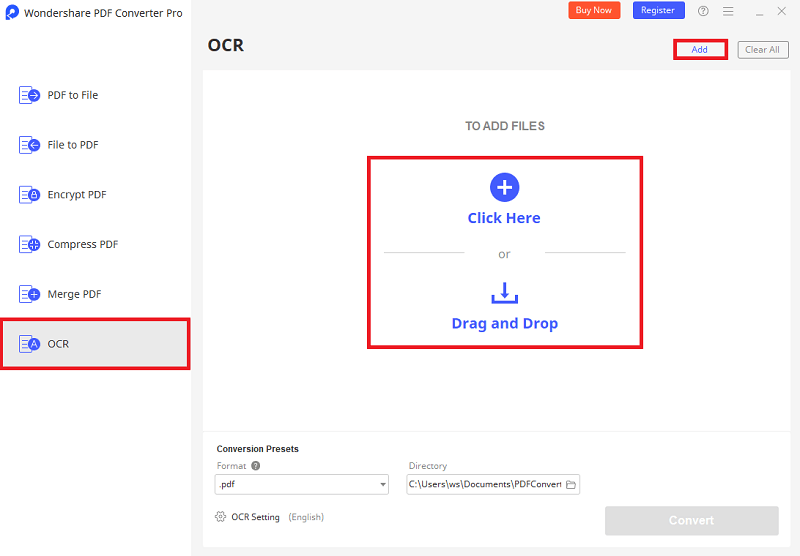
Step 1. Add scanned document
Launch Wondershare PDF Converter Pro, go to the "OCR" tab, then click the "Add" button to add a scanned document into this PDF converter.
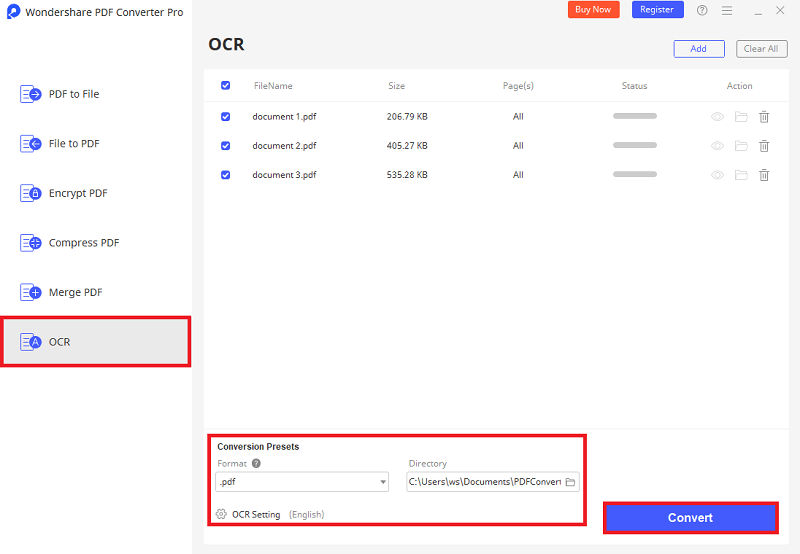
Step 2. Convert scanned document to PDF
After uploading your scanned document, choose "PDF" under the "Format" drop-down menu, then go to "OCR Setting" to choose the language you need to recognize. Click the "SUBMIT" icon then click the "Convert" button, the OCR process will be finished in seconds. Then you will get the converted PDF file.
Part 3. How to Convert a Scanned Document to PDF on Mac
The built-in Preview app on Mac can convert any scanned document to PDF in easy steps.
Step 1: Open the Scanned Document in Preview
Go to Finder and locate the scanned document. Right-click the document and choose Open With > Preview to open it.
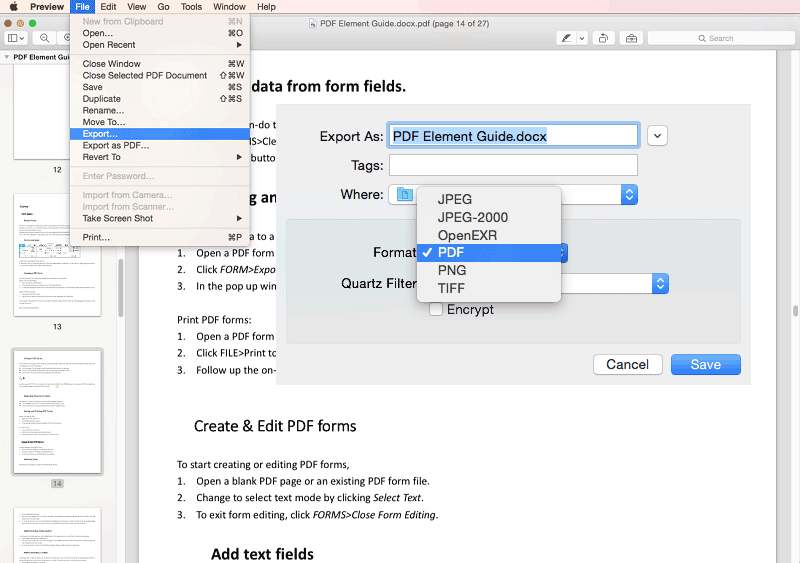
Step 2. Convert Scanned Document to PDF on Mac
Go to the top menu and click File > Export as PDF. Enter a file name and choose the location to save the PDF file.
Tip
With Preview, you can also combine multiple scanned documents into one PDF: Open all scanned files in the same Preview window by selecting them all. Then drag to reorder the pages as needed in Preivew window. Finally, export the combined pages as a PDF file.
Part 4. How to Convert a Scanned Document to PDF on Mobile Phone
>PDFelement app is available for Android and iOS app, enabling you to convert scanned documents to editable and searchable PDFs.
Step 1: Download and Install PDFelement
Search for PDFelement and install the app on your mobile device from App Store (iOS) or Google Play Store (Android).


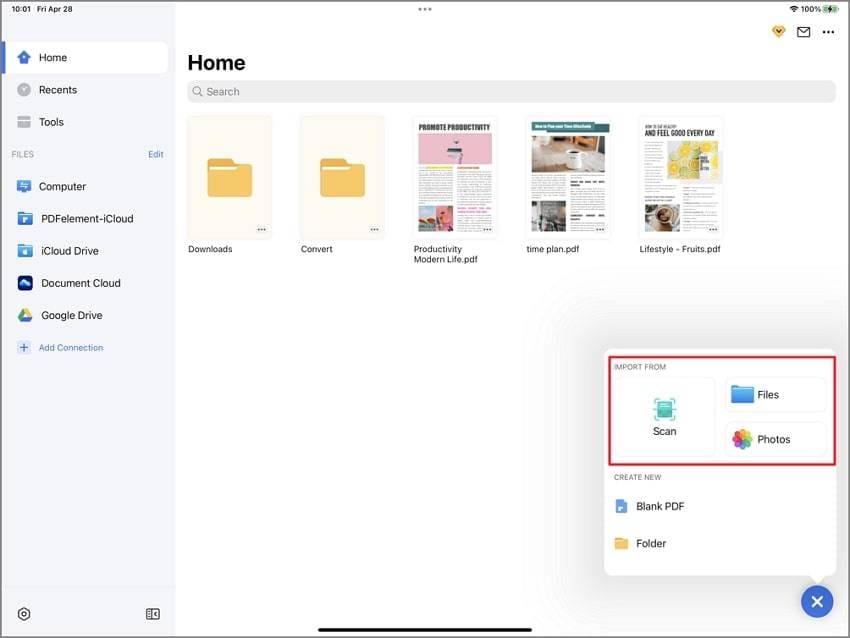
Step 2: Convert Scanned Files to PDFs
Tap the “+” (plus) button and select your scanned document from your phone. Save the document to a PDF.
Tip: Make PDF Searchable or Editable
If your document is an image, tap the OCR option and wait for the OCR process to complete. Once done, you can search, copy, or edit text in the scanned PDF.
How to Convert a Scanned Document to PDF Online
There is another method to convert scanned documents into PDF. PDFelment Online PDF Converter is one of the best online PDF converters, it can not only convert PDF to Microsoft Office format but also encrypt PDF, compress PDF, crop PDF, etc. Now, follow the steps below to learn how to convert scanned documents to PDF.
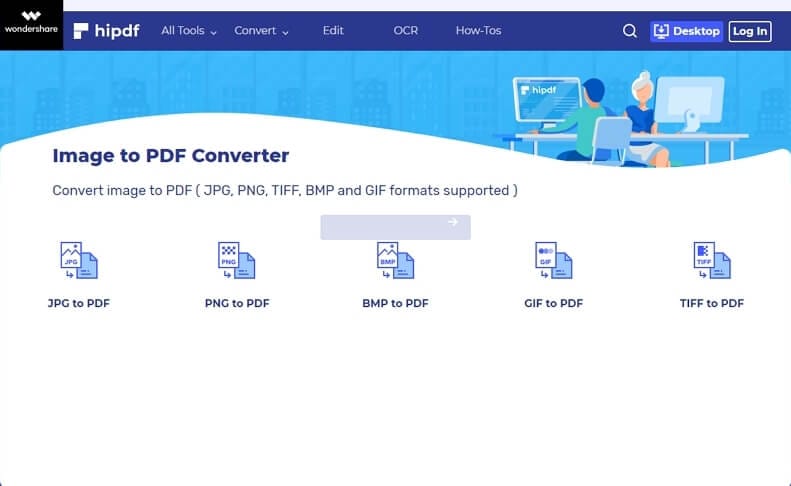
Step 1. Upload Scanned Document
When you open the HiPDF website, click the "Convert" option on the top toolbar, and select "Image to PDF." After selecting the "Image to PDF" option, you will open a new web page that allows you to upload the scanned document. Click the "Select File" button and then open the scanned document. In addition, you can upload files by dragging them to the web page.
Step 2. Convert scanned document to PDF
After uploading the scanned document, click the "CONVERT" button. In only a few seconds, the scanned document will be converted to a PDF file and you can click "DOWNLOAD" to save your file.
Tips for How to Convert Scanned Document to PDF using OCR
- There are more than twenty languages that you can select from. This will ensure that you won't have issues with the recognition of special characters in your document.
- If you have a larger document with hundreds of pages, you can customize the page range as you wish.
- After you access the OCR feature, you are able to select multiple options such as how your document should be displayed, the zoom view for your document, and the default font for a text box.
- You can convert your files from multiple formats such as image, Word, Excel, PowerPoint, EPUB, HTML, into PDF and vice versa, from PDF to many other formats.
Free Download or Buy PDFelement right now!
Free Download or Buy PDFelement right now!
Try for Free right now!
Try for Free right now!


Margarete Cotty
chief Editor