You may be curious why someone would want to convert their Excel sheet to a PDF document? Your curiosity is correct, but there are many reasons that a user would think to convert the existing Excel to PDF. Such as if the user has some quotes in excel and doesn't want anyone to edit these. In this blog, we will talk about converting Excel to PDF without losing formatting.
In this article
Part 1. Excel to PDF Converter without Losing Formatting
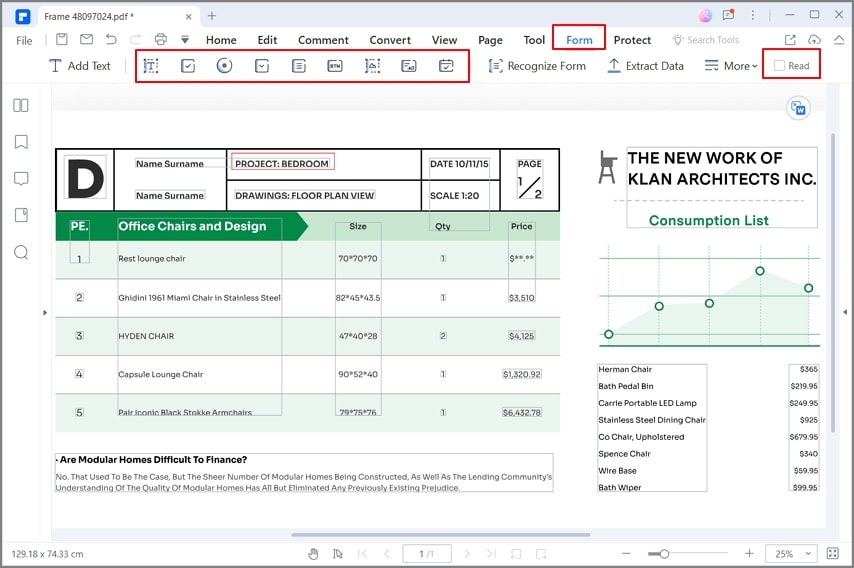
With Wondershare PDFelement - PDF Editor Wondershare PDFelement Wondershare PDFelement you could convert all Excel files into PDF without losing formatting. and enhance it with a more professional look and printable form.
It is one of the best PDF editors in the market as it offers amazing solutions for creating a PDF from excel in a presentable format and also offers PDF editing functions such as adding text, changing font or color, adjusting images, creating forms, and many more features. It also supports bulk conversion of multiple Excel files into one single PDF.
PDFelement is a revolutionary platform that facilitates all PDF edits and conversions. Watch the video to learn more about the best PDF editor out there.
Part 2. How to Convert Excel to PDF without Losing Formatting
The very first method doesn't use any third-party tool, and by making use of the save feature that comes with Excel, we will keep the existing Excel sheet to PDF.
Before saving an Excel as PDF, you need to change the page layout to ensure you can convert excel to PDF without losing formatting. You need to click on the Page Layout tab which is present in the ribbon bar on top of an Excel worksheet.
- You can determine page margins, size, orientation, overall area for print, and so forth. You can keep the margins as default; if you wish to make changes then you can select from the options that appear on the drop-down menu. When it comes to page orientation it is set to Portrait by default. When there are many columns, you can switch to Landscape mode instead; this can be done by pressing on Orientation button.
- Page size is also a matter to look into. These are usually based on standard paper sizes. Press on the Size option. Here you will come across a drop-down menu. A4 is usually the size that is most recommended, especially if you wish to keep the PDF ready for print.
- You can select an area to print in Excel and ensure that it saves as PDF as well. You can start by selecting the rows and columns that you wish to find in the PDF. Once the data is selected, click on Page Layout. Here you can select Print Area and then set the print area as well.
- You can also find three options of Width, Scale, and Height under Page Setup. One can define how many pages, columns, or rows will appear in a table. The scale will help one to decide the overall resizing of the print area.
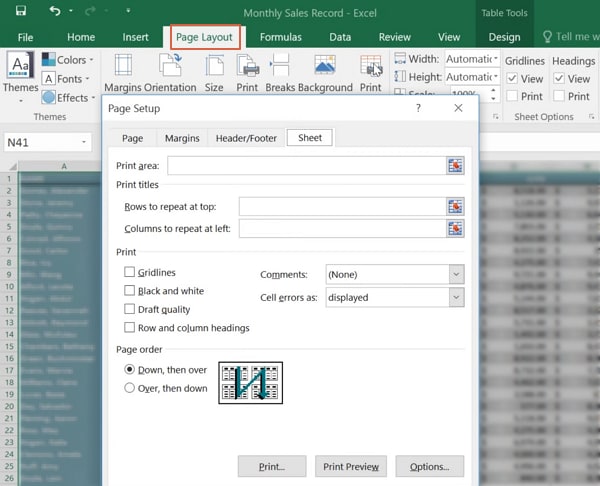
The above option help users make necessary changes to page layouts, sections they want to depict in different pages in a PDF, and so forth. Once these changes are set, you can then proceed to convert the Excel to PDF.
After saving all the settings, you can convert Excel to PDF without formatting changes.
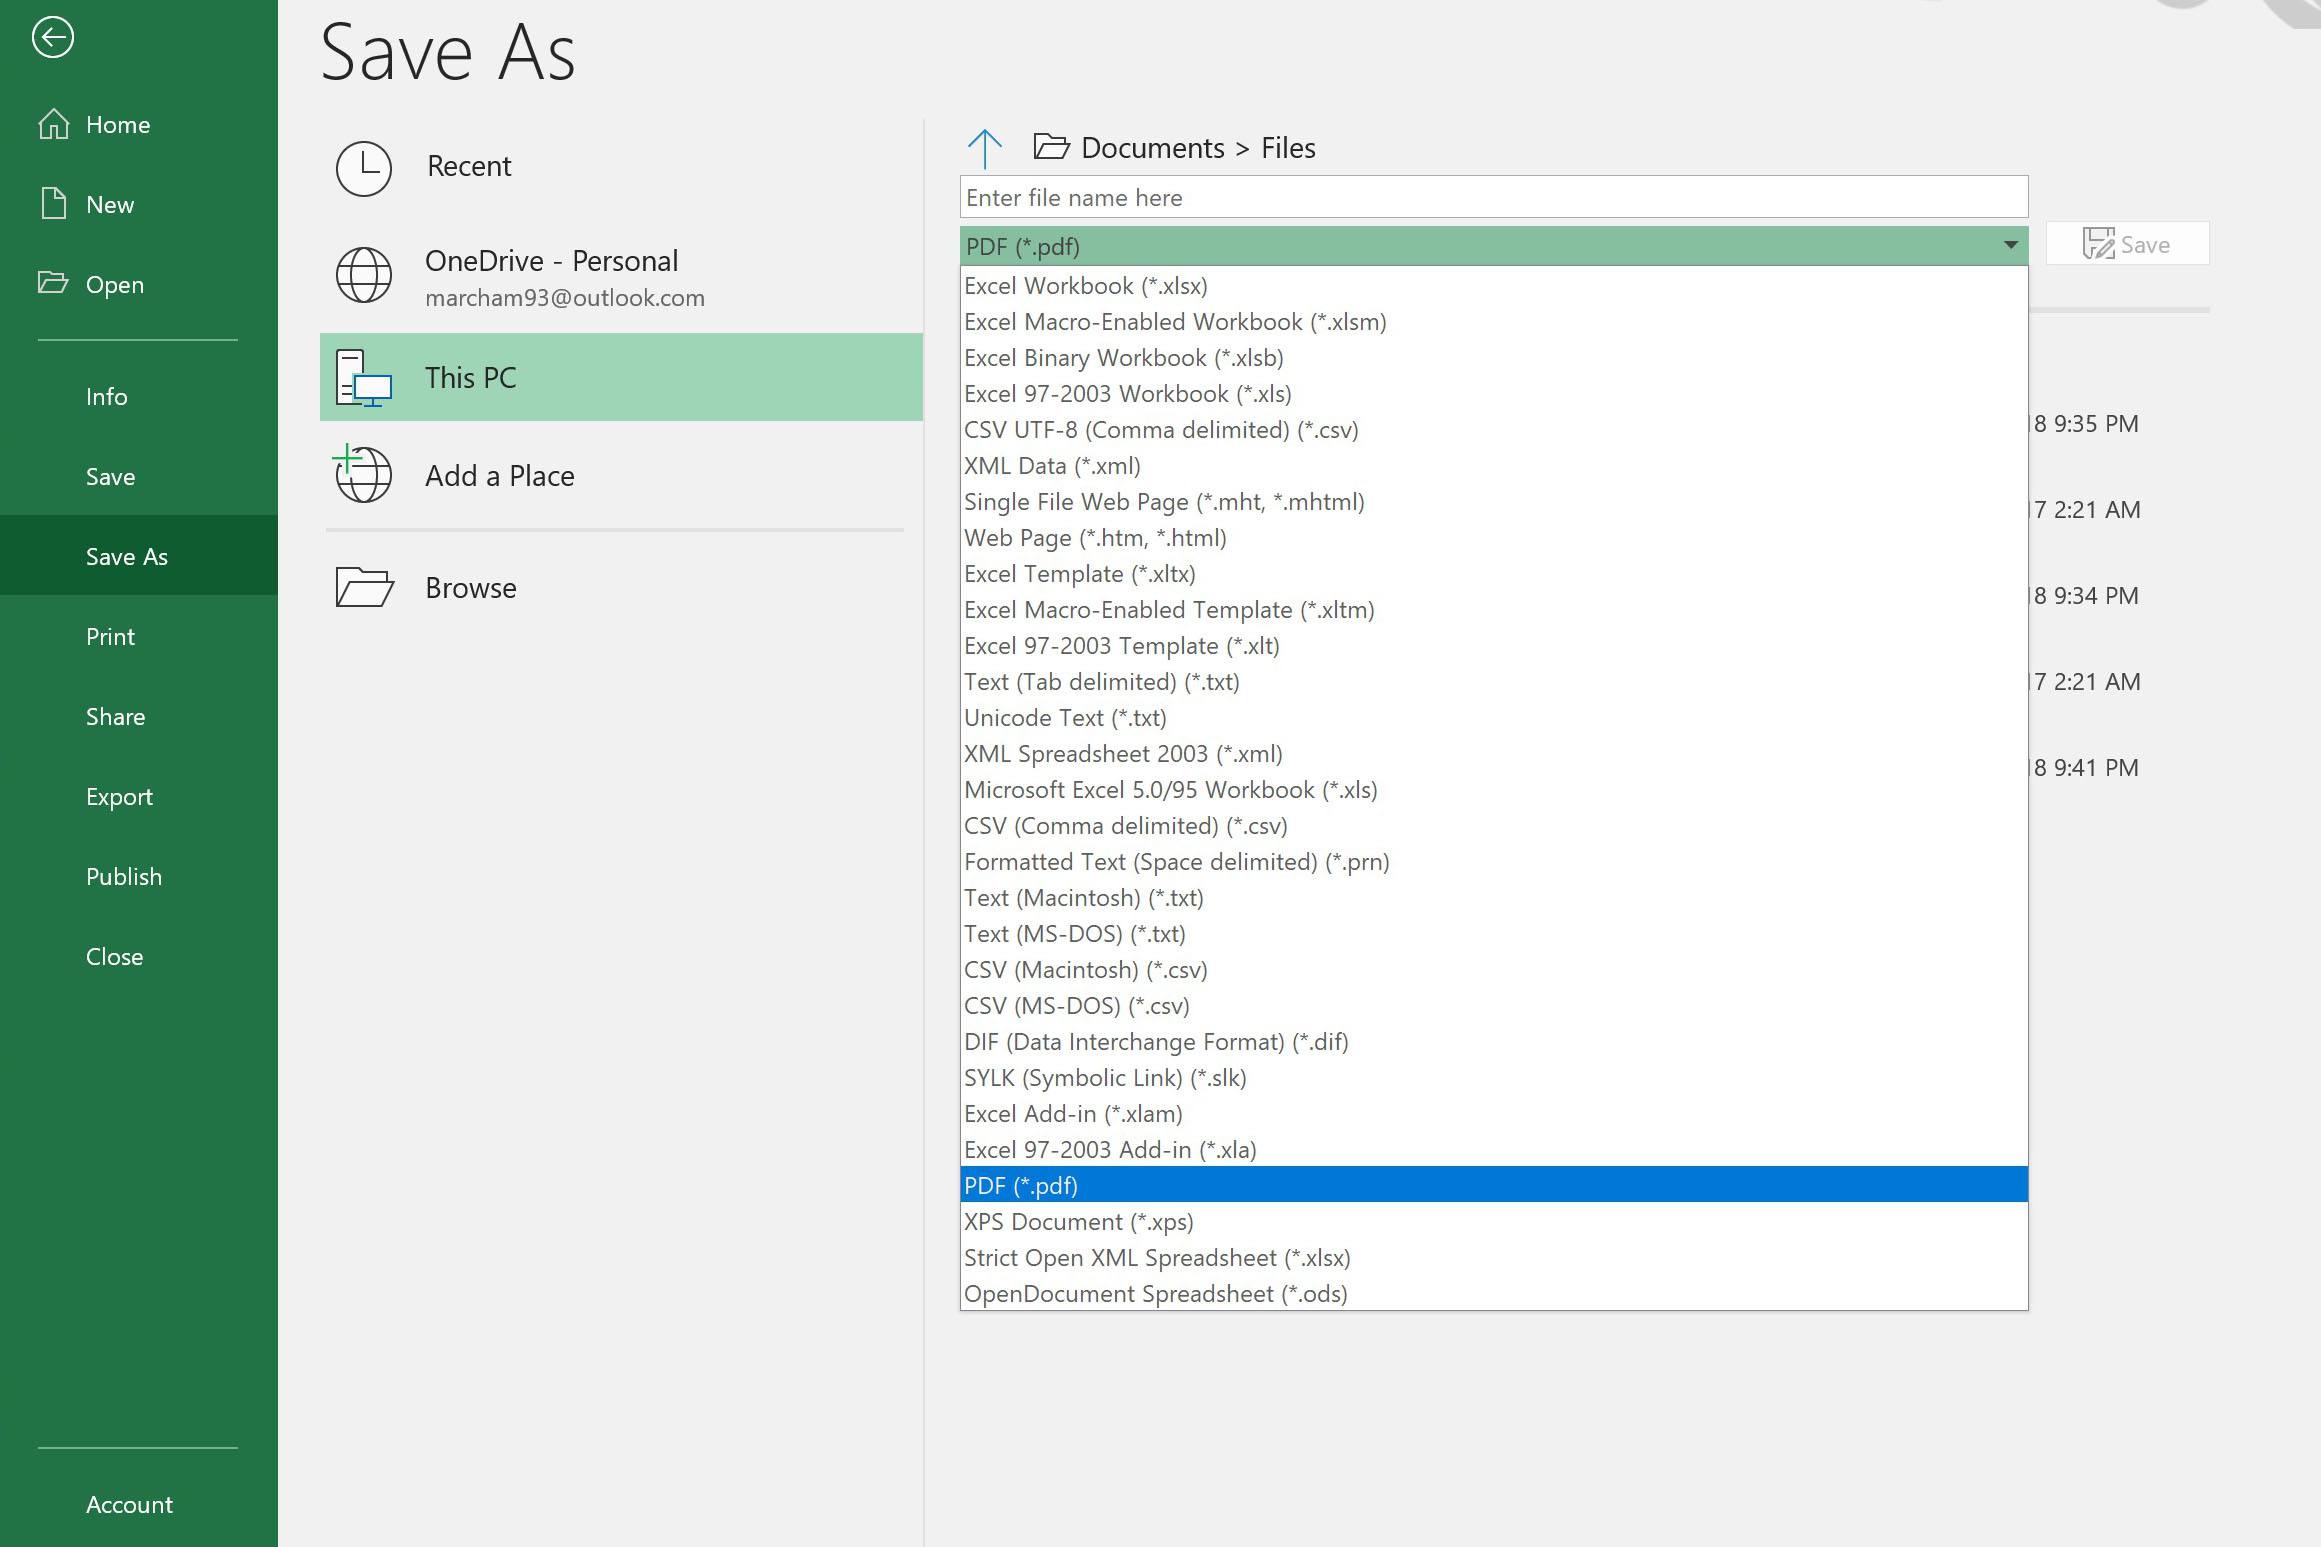
Step 1 Click on the "File" tab and click on the "Save As" button. Choose a location where you want to save the PDF file on your computer
Step 2 After you have selected a location, click on "Save as type," and a list of options will appear. Choose PDF and click on the "Save" button.
Step 3 Please enter the name of the PDF that you want to save it with. The Excel will save this sheet on your desired location with your desired name in PDF form. You can later open and view it in a PDF viewer app.
Part 3. How to Convert Excel to PDF without Cutting off
To convert Excel to PDF without cutting off, you need to consider one thing in mind: print points. Let's dive deep into the step-by-step details below.
Step 1 Launch the MS Excel app on your computer and open the Excel sheet you are willing to convert to PDF without cutting off.
Step 2 After opening an Excel sheet, select the cells with the right button to print on one page by dragging.
Step 3 Now click on the "File" tab and click on the "Print" options again. Print settings will appear, and here you have to choose "Print Selection" from the Settings list.
Step 4 Choose "Microsoft Print to PDF" from the Printer drop-down. Click on the Print button.
Step 5 A dialogue box will appear that will ask you to enter the file's name, choose a location where you want to save the PDF and click on Save after providing all that information.

Your Excel file will be converted to PDF without cutting off, and you can find it in a location where you saved it. You can change the layout of the same. To do so, simply select the number of columns and rows within the area to be printed. Then set Height or Width accordingly. Under the option Page Layout, you can choose Scale to Fit. Here you can select a section for one page. There is also a Scale option using which you can change the scale percentage overall.
Part 4. How to Convert Excel to PDF without Changing Font
Adobe was the creator of PDF, and it's one of the widely used PDF editors as well. This part will show you how you can use Adobe Acrobat to convert Excel to PDF without changing the font on Acrobat. Let's get into step by step guide.
To use this method, you need to have Adobe Acrobat installed on your computer, and you should also add the Adobe add-on in your Excel application.
Step 1 Open the Excel sheet you want to convert to PDF without changing the font.
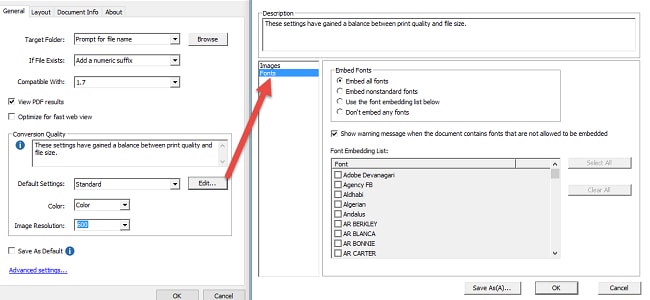
Step 2 Click on the Acrobat PDF Maker tab appearing on the opt at last. Please keep in mind this will only appear if you have added Adobe Acrobat in your Excel application.
Step 3 Click on the "Settings" tab and "Advanced Settings." Now click on Font Category and ensure that "Embed all fonts" and "Subset" options are checked.
Step 4 Now it's time to convert Excel to PDF without changing the font, which can be done within seconds.
Part 5. How to Convert Excel to PDF without Losing Color
This part will show you how you can convert Excel to PDF without losing color. If anyone is willing to use this for their existing Excel sheets, this guide will be beneficial. Let's get to the point:
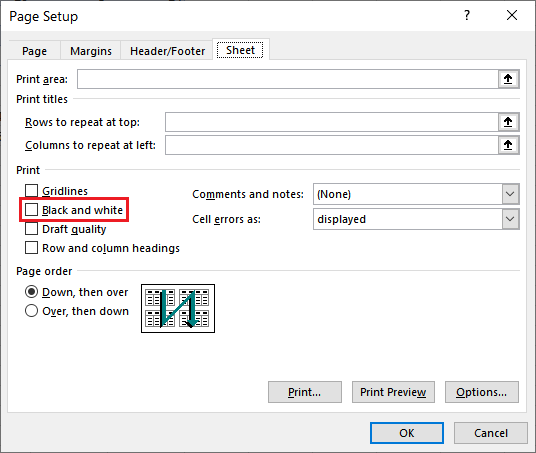
Step 1 Open the Excel sheet you want to convert to PDF without losing color. Click on the "File" tab and click on the "Print" button from the options.
Step 2 You will see the "Page Setup" link appearing at the bottom of Settings and click on it. A window will appear and here you have to click on the "Sheet" tab and uncheck the "Black and White" in the Print section and hit the OK button.
Step 3 The next process is the same as we told you in the above parts. You will click on the Print button and from there you will have to choose "Microsoft Print to PDF".
Step 4 A dialogue will appear asking you to enter the name of the PDF file and choose a location where you want to save the file.
Step 5 Now click on the "Save" button and your Excel file will be saved without losing color on your desired location. You can view it using any PDF viewer app later.
 Home
Home
 G2 Rating: 4.5/5 |
  100% Secure


