How to Do a Drop Cap in InDesign
Do you want to know how to do a drop cap in InDesign? Here is a detailed guide for you.
 100% Secure |
 Home
>
Indesign Tips and Tricks
> How to Do a Drop Cap in InDesign
Home
>
Indesign Tips and Tricks
> How to Do a Drop Cap in InDesign
If you've ever read a magazine or a newspaper article, you've noticed that the first paragraph always starts with drop cap. And if you are a graphic designer, you need to know how to do drop cap in InDesign. Adding a drop cap adds a professional flourish to the layout, no matter if you are working on a book, poster, newspaper, or magazine. It is a fundamental typographic skill that is just easy to learn. With that in mind, let's talk about the basics how to do a drop cap in InDesign.
How to Make a Drop Cap in InDesign
Working in the InDesign app, not only you can add drop caps easily, you can also add flair and style the drop cap as you need/want. Here is the quick guide for how to make a drop cap in InDesign.
- 1. Open the InDesign document, and start by preparing the text frame on the layout. Use the Type Tool, and fill the paragraph of text you would like to add a drop cap.
- 2. Highlight the first letter of the paragraph. You can now use "Paragraph Formatting Controls" panel or Paragraph panel. Go to Window > Type & Tables > Paragraph. Find the "Drop cap number of lines" and click it.
- 3. Click the arrows up or down, or manually type a number to set the drop cap to extend to a specified number of lines. This will increase the size of the character.
- 4. Adjust the number of characters in the drop cap by increasing the value in the option "Drop cap one or more characters". Find the option in the bottom right corner of the Paragraph panel. If you want to highlight a whole word or phrase, this option helps you.
Now that we learned how to add a drop cap in InDesign, let's look at all of the simple tweaks that can take your drop caps to a new level.
If you go to "Window > Type & Tables > Story", and then click on "Optical margin alignment", you can shift any straggly serif or apostrophes to outside of the text frame. This will give cleaner appearance to the drop cap.
If your drop cap is crowding and overlapping some of the body text, rectify it by placing the cursor between the drop cap letter and first letter of the body text. Increase the Kerning value in the "Window > Type & Tables > Character" until you have enough separation between the two.
Last, but not least, shift the baseline of the drop cap by highlighting the drop cap, and then increase the baseline shift in the Character panel.
How to Edit the Drop Cap in InDesign File without InDesign
InDesign is a powerful tool for graphic designers. You can do almost anything. But in some cases, you might need to do further editing of the document once you are done in InDesign. You export the file to PDF, but you forgot to do a couple of more edits.
What can you do now? Well, one thing you can do is open the document in InDesign again, do the edits again, and then export to PDF again. Or, you can go a simpler route, and just edit the PDF document. For that, you need a powerful PDF tool like Wondershare PDFelement - PDF Editor Wondershare PDFelement Wondershare PDFelement that can make your working with PDF files easy, simple, and seamless.


 G2 Rating: 4.5/5 |
 100% Secure
It is a software tool that helps you produce great looking PDF files in an easy and simple way thanks to its many features. Here is a quick breakdown of the features.
- Add, remove, rotate, and edit any graphical element in the PDF file.
- Edit text using Single Line or Paragraph mode.
- Add annotations to PDF documents to make them look more professional.
- Personalize your PDF document by editing, marking, annotating the file.
- Create interactive form fields and fill them easily.
- Insert pages, or page numbers in the PDF document.
- Sign documents digitally.
- Create editable and searchable PDF documents from scanned images.
- Convert PDF documents into image files, Word files, or other format files.
- Extract data from an existing PDF document.
With that in mind, you can edit drop cap in InDesign file. Here is the guide.
Step 1. Open the InDesign File
Open the InDesign file to the program to unlock all of its amazing features. Click "Open Files…" and browse to open the InDesign PDF file. Or just simply drag and drop it into the program.

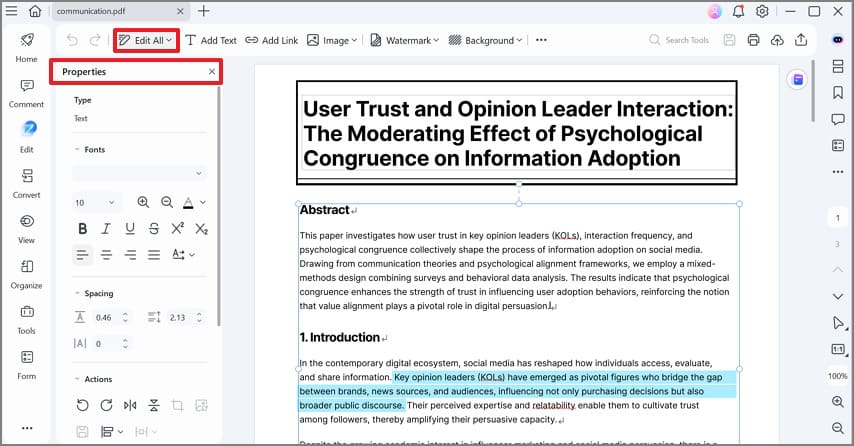
Step 2. Edit Text
Within the document, go to "Edit" button located on the left side to start editing the text. There are two options available, single line mode or paragraph mode. If you click single line, you can edit each line as a separate block. Click on "Edit" > "Add Text" to add new text on the position you want. Furthermore, you can select the text and change the font, size, color, add bold, add italic, and more.
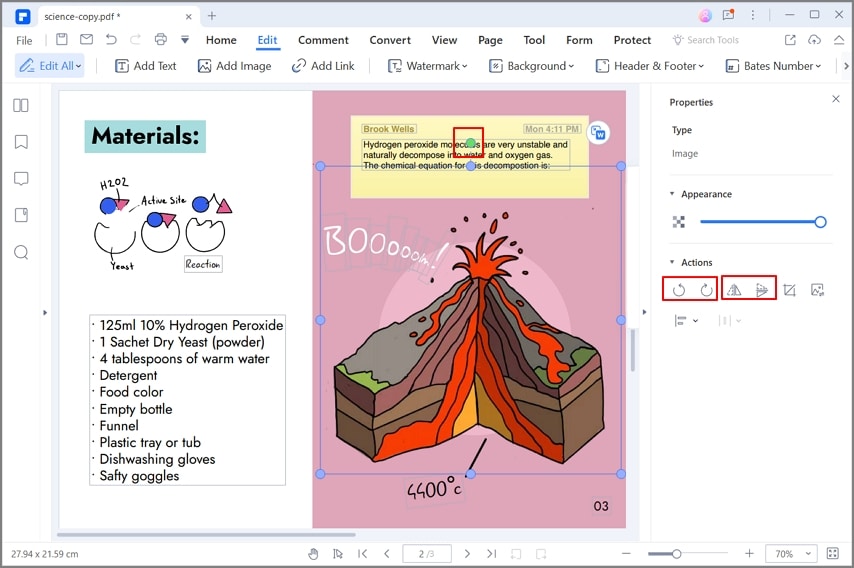
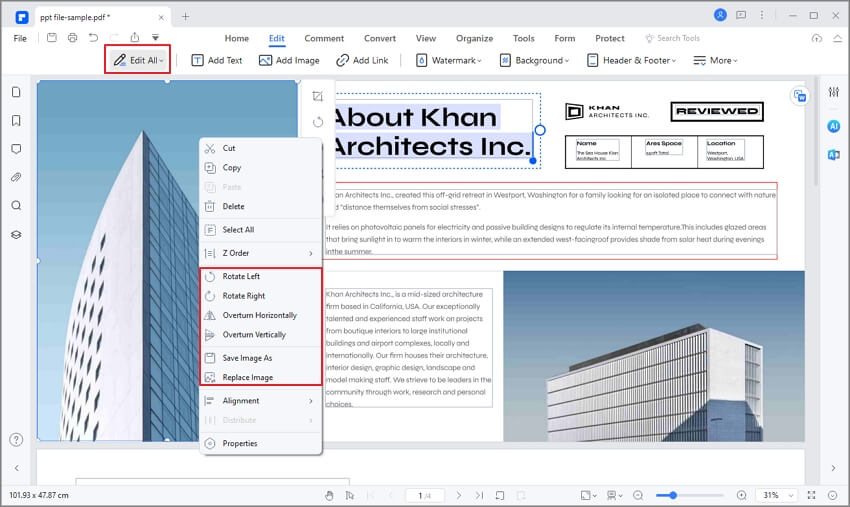
Step 3. Edit Image and Object
To edit objects, go again to "Edit" in the left corner, and then click on the image or object you want to Edit. Drag the object to move it, or place the cursor on the edge of the blue box to edit it. Right click to choose "Rotate Left, Overturn horizontal, Rotate right, and Overturn vertical". Other options include "Clip Image, Replace image", etc. Click on "Edit" > "Add image" to select an image you want to add in the PDF document.
Free Download or Buy PDFelement right now!
Free Download or Buy PDFelement right now!
Try for Free right now!
Try for Free right now!


Elise Williams
chief Editor