Often people like saving their documents, text, and images, in PDF format. But in this article, you will get to learn how to convert PDF to PNG on Windows 7, 8, and 10.
There are many reasons for people to convert PDF to PNG in Windows. The primary one is generating an image for some new article or just sending one page of the PDF rather than the whole document. Be that as it may, you can't copy and paste the text in the PDF and save it as PNG.
Going through the process of printing and then scanning it is also going to take a long time. So, what do you do? This is what you are going to find out. Here are three different ways to convert PDF to PNG in Windows.
In this article
Part 1: Convert PDF to PNG on Windows(The Easiest Way)
The most direct way to convert PDF to PNG is using a PDF converter tool. blockstart object_id="6060">Wondershare PDFelement - PDF Editor Wondershare PDFelement Wondershare PDFelement is a full-featured PDF editor that can convert PDF to PNG easily and quickly in different ways.
-
Convert PDF to PNG in high quality (up to 600dpi)
-
Extract images from PDF as PNG
-
PDFelement is free to download on Windows 10, 8, 7
-
Batch convert PDF files to PNG images
-
Convert multi-page PDF to separate PNGs
Convert PDF to PNG in Windows
Step 1 Open PDF to PNG converter for Windows
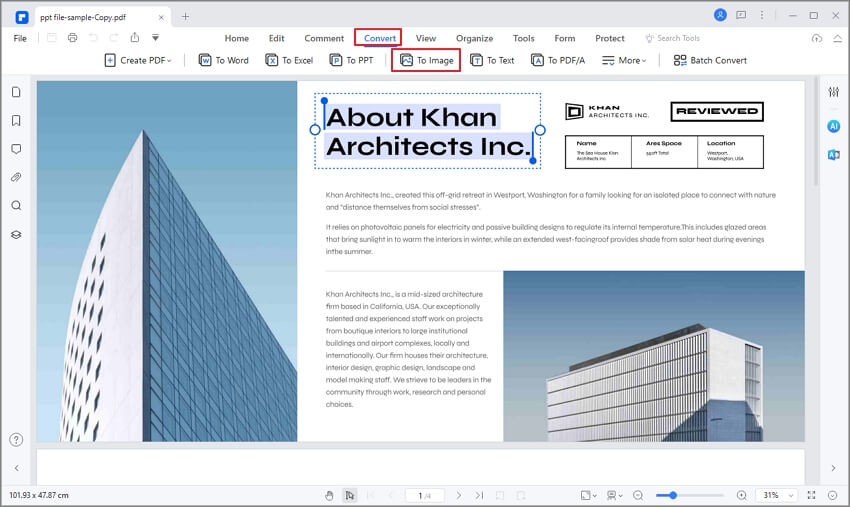
Download and install PDFelement on your PC. Launch the program, click Open Files to add PDF files. Then go to Convert > to Image.

Step 2 Change PDF to PNG in Windows
In Save as Type, select PNG and click Save to save the converted PNG files on your desired location.
Tip: Before converting, click the Settings icon > PDF to Image to set up image quality, page range, border width, and more.
Batch convert PDF to PNG in Windows
If you have multiple PDF files to convert to PNG, PDFelement's Batch Convert can be a real helper.
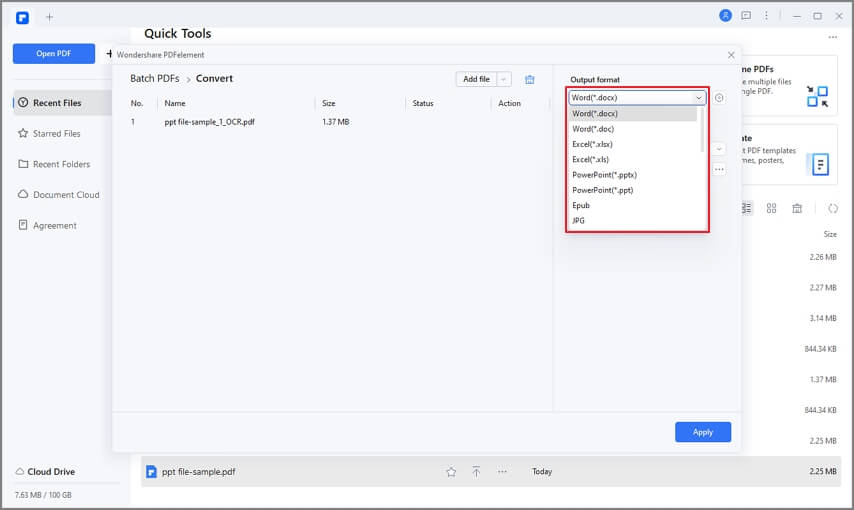
On PDFelement, click Batch PDF > Convert and add multiple PDF files to turn them to PNG in one click.

PDFelement is the best all-in-one PDF software for Windows 11, 10, 8, 7. It runs on different types of platforms, including Mac, Windows, and mobile devices. The software is easy and fast. PDFelement comes with some amazing advanced features. By using the software, you will be able to edit, create, convert, print, protect, annotate, perform OCR, and share PDF files without any hassle.
Check out the link below to learn about PDFelement 9 and save your time and efforts using the best PDF editing platform.
Part 2: PDF to PNG on Windows Using Photoshop
You can convert PDF to PNG using Photoshop for free. Check out the steps you have to follow to change PDF to PNG.
Step 1 Open the PDF File in Photoshop on Windows
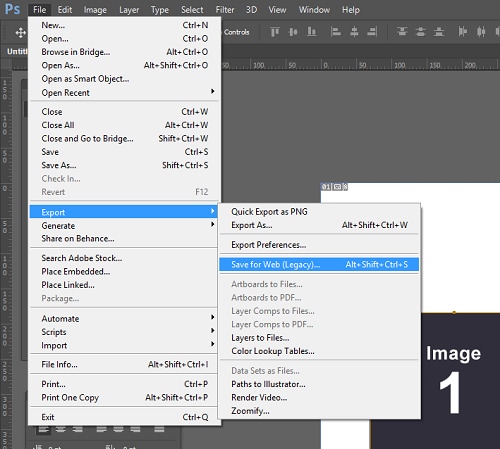
From the menu, you have to go over to 'File' and then click on 'Open'. As you navigate to the folder where there is the PDF file, choose the file and click on the 'Open' option. You are going to be asked to import settings. Choose the page and leave it at default. When you are done click on 'OK'.
Step 2 Convert PDF to PNG on Windows with Photoshop
Now, from the menu bar, go over to File and then choose 'Save for Web'. In the 'Save' window, you have to set the image type to PNG and select the preferred image quality. When you are done, click on the 'Save' button.

If you want to save PNG for multiple PDF pages in Windows with Photoshop, you will have to follow the steps given below.
Click on the 'Window' tab and choose 'Actions' from the drop-down menu. You will find the 'Actions' window at the bottom-right corner. On the 'Actions' window, you have to click on the 'Create new action' option.
Name the action on the window you have opened and then click on 'Record'. Now, to convert the chosen PDF pages to PNG, you have to choose 'Automate' from 'File' and then choose 'Batch'. Choose the action you created and then choose 'Opened Files' on the 'Source' section. Then, click on 'OK'. Photoshop will not convert all PDF files to PNG.
Part 3: Convert PDF to PNG Windows Using Command Line
Convert PDF to PNG through the command line using Unix Binary Release software for Windows. You can use the software for converting tons of documents. It can be installed on your laptop or desktop.
Step 1 Download the Binary Release Windows for your Windows laptop. Also, download Ghostscript for reading the PDF file.
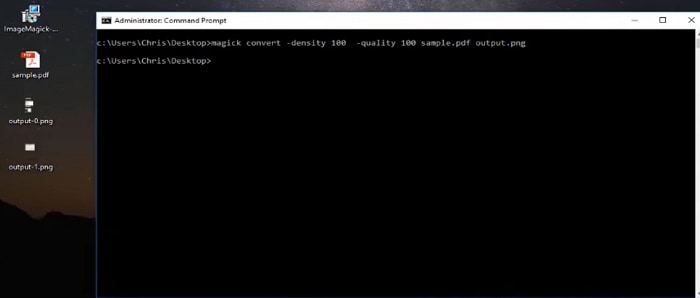
Step 2 Go over to Command Prompt and choose "Run as Administrator". Write the command 'magic convert-density 100 -quality input.pdfoutput.png'.
Step 3 Press Enter. You will have the image file on the Windows desktop. Now, you have the PNG image using the command line. This is a hassle-free process and takes only a few minutes.

 Home
Home
 G2 Rating: 4.5/5 |
  100% Secure


