 Home
>
PowerPoint Tips
> How to Wrap Text in PowerPoint
The wrap text feature is not available in PowerPoint, like other Microsoft Office tools. However, there are few other hacks to help you wrap text around an image in PowerPoint. This may happen when you need a presentation with text wrap but lack the right tool. There are three workarounds to fix your anxiety. These methods involve a long process but will help you wrap text in PowerPoint effectively.
How to Wrap Text in PowerPoint
Method 1. Imitate Text Wrapping by Inserting Spaces in Text Manually
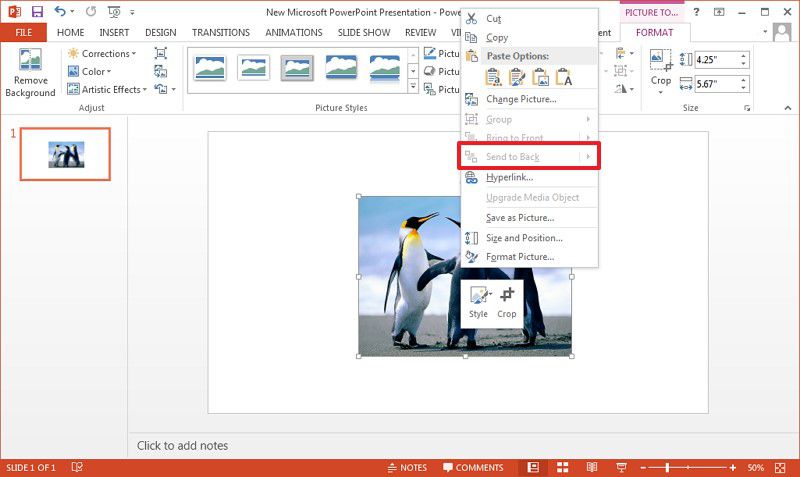
- Step 1. Launch PowerPoint in your PC and add the picture that you want to wrap text around. After that, right-click on the picture and select the “Send to Back” option. If the option is grey, then the picture is okay.
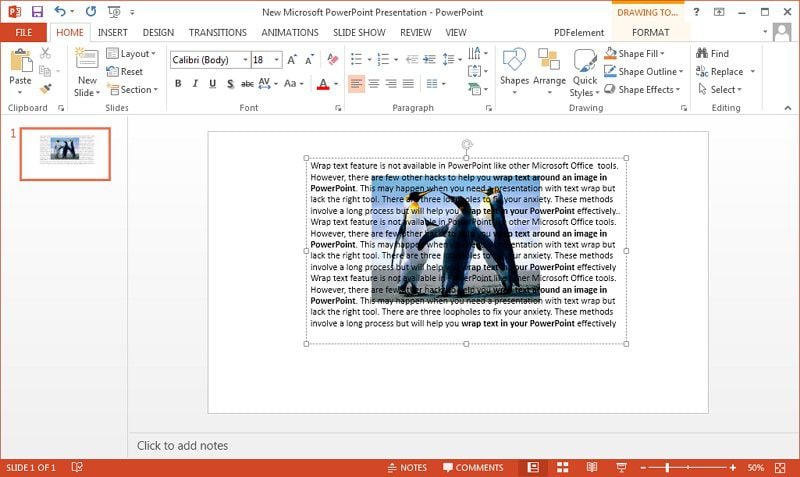
- Step 2. Click the “Insert” button and select “Text Box” to add text in front of the picture.
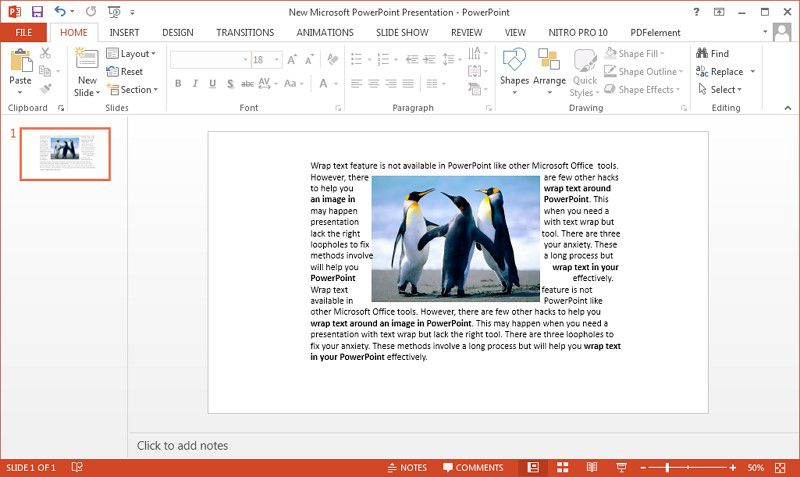
- Step 3. Using space bar and tab keys, align the text to the picture. Push text as it gets close to the left margin of the picture, and use a tab or space bar to move the text to the right margin. Ensure that the text flows from one side of the picture to the other.
Method 2. Wrap Text by Using Text Boxes
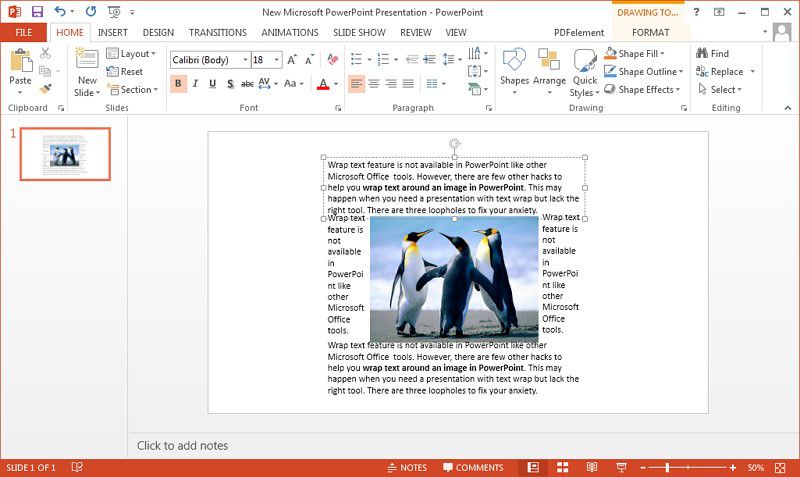
Imitating this method to wrap text in a picture in PowerPoint, you just need to add text boxes on the sides of the picture. Add the picture to PowerPoint and add two large textboxes at the top and bottom of the picture. Then add small vertical text boxes on the sides of the picture.
Method 3. Create and Import from Microsoft Word
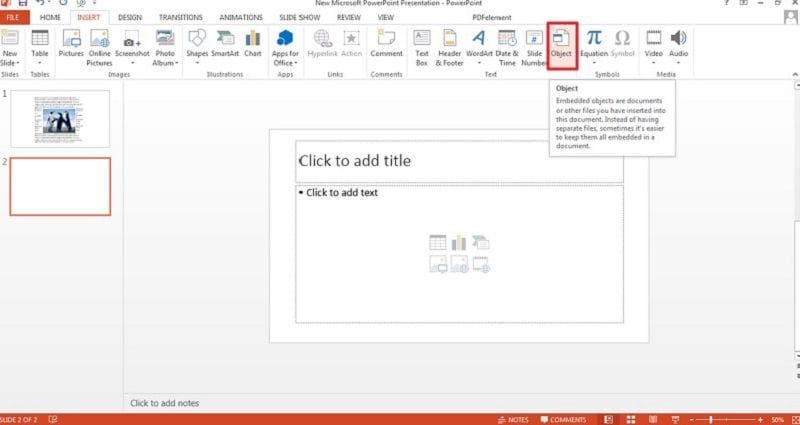
- Step 1. Launch the presentation that you want to add the text wrap. Click “Insert” > “Object”.
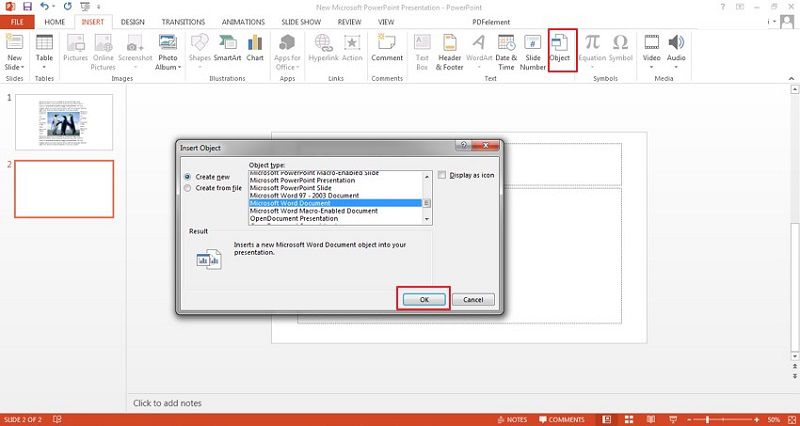
- Step 2. From the Object type list to choose from, select “Microsoft Word Document” and click the “OK” button to confirm.
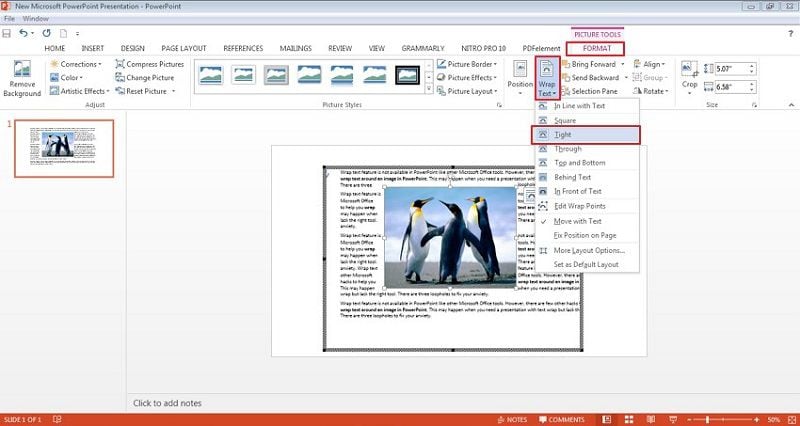
- Step 3. In the pop-up Word window created, add a picture and text. To wrap text around the added picture on PowerPoint, click on the picture. A format section will appear on the menu tab on top. Click “Wrap Text” and select “Tight” to wrap text all-round the picture.
The Best PDF Software
Alongside how to wrap text around an image in PowerPoint, you need PDF software for your PDF editing needs. Wondershare PDFelement - PDF Editor Wondershare PDFelement Wondershare PDFelement is the best performing editor for PDF documents. It has exceptional features that make it outstanding.
- Creates PDF documents by converting or scanning other documents formats to PDF that is easy to view on other devices.
- Seamlessly edit PDFs and scans without revisiting the original file.
- Use the Convert option to modify your PDF document to any other format, including Excel, PowerPoint, or Word without losing content quality.
- Design PDFs for signing and sign when need be for remote approval to allow contract execution.
- Process and edit forms to allow data collection digitally through PDF forms.
- Add annotations and comments to PDF for review purposes by other team members.
- Using the OCR feature, extract text from images, and scanned documents easily while retaining the original text quality.
How to Edit PDFs using PDFelement
You can edit your PDFs, add text and annotations, thereby making it easy for you to work with PDFs. Here is a simple guide on how to add text, edit text, and add annotations on PDF using the best PDF software.
• Add Text
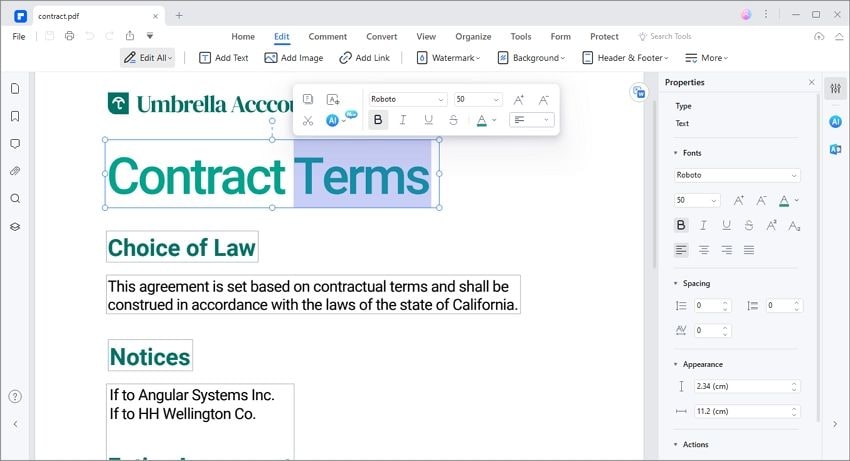
Launch PDFelement program and upload the PDF file you need to add text. Then click the “Edit” > “Add Text” option.
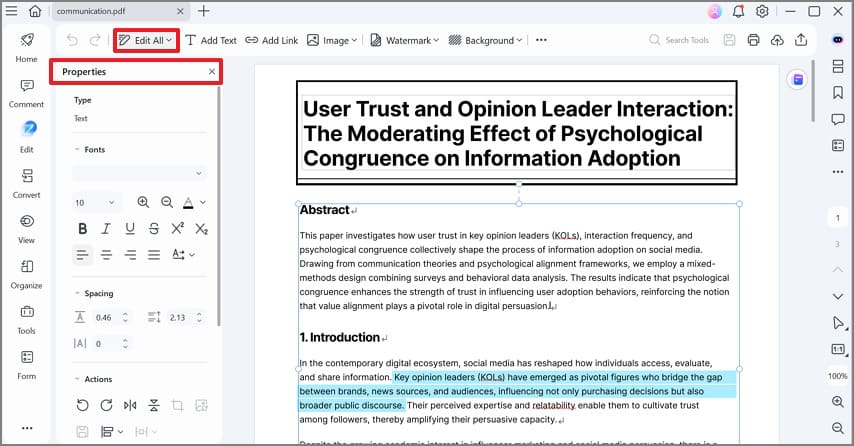
• Edit text
Click the “Edit” > “Edit text and image object” icon to edit the text. You can change the font size, add text, change the font and color.
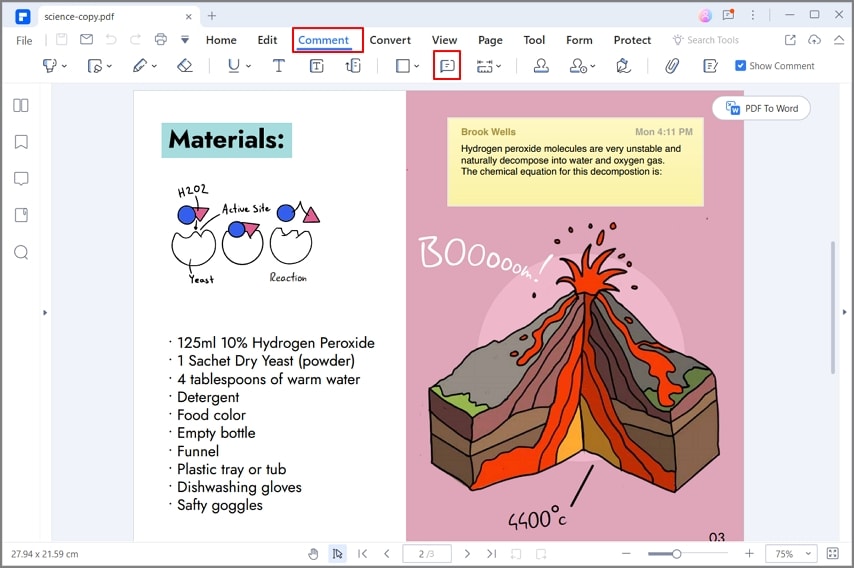
• Annotate PDF
You can highlight the text to annotate. Besides, you can click "Comment" > "Note."
Free Download or Buy PDFelement right now!
Free Download or Buy PDFelement right now!
Try for Free right now!
Try for Free right now!
 100% Secure |
 G2 Rating: 4.5/5 |
  100% Secure


Elise Williams
chief Editor