
Table of Contents
Lines in Word look simple, but Word gives you several different ways to create them depending on what you need. A line used as a section divider is not made the same way as a hand-drawn line, a vertical separator, a signature line, or a line through text. That is why one “draw line in Word” answer often feels incomplete.
This guide explains the practical methods: using Shapes, AutoFormat, paragraph borders, vertical lines, signature lines, and strikethrough. The steps apply mainly to Microsoft Word for Windows and Mac, with notes where the interface may look slightly different.
[Image placeholder: Screenshot of a Word document with different line types labeled, including a drawn line, horizontal divider, vertical line, signature line, and strikethrough text.]


 G2 Rating: 4.5/5 |
 100% Secure
Quick Answer: The Best Way to Draw a Line in Word
If you want to draw a line in Word manually, use Insert > Shapes > Line. This method gives you the most control because you can place the line anywhere, change its thickness, adjust the color, add arrows, and move it later.
Here is the fastest version:
- Open your Word document.
- Go to Insert.
- Select Shapes.
- Choose the basic Line shape.
- Click and drag in the document to draw the line.
- Hold Shift while dragging if you want a perfectly straight horizontal, vertical, or diagonal line.
That is the best method for most layout tasks. But it is not always the fastest method. If you only need a horizontal divider across the page, typing three hyphens and pressing Enter may be quicker. If you want a line through words, you need Strikethrough, not Shapes.
Use the method that matches the job:
Use Shapes when you need to position and style a line freely.
Use AutoFormat when you need a quick horizontal divider.
Use Borders when the line should behave like part of a paragraph.
Use Strikethrough when you need a line through text.
Use Signature Line when preparing a document for signing.
The following sections walk through each option in more detail.
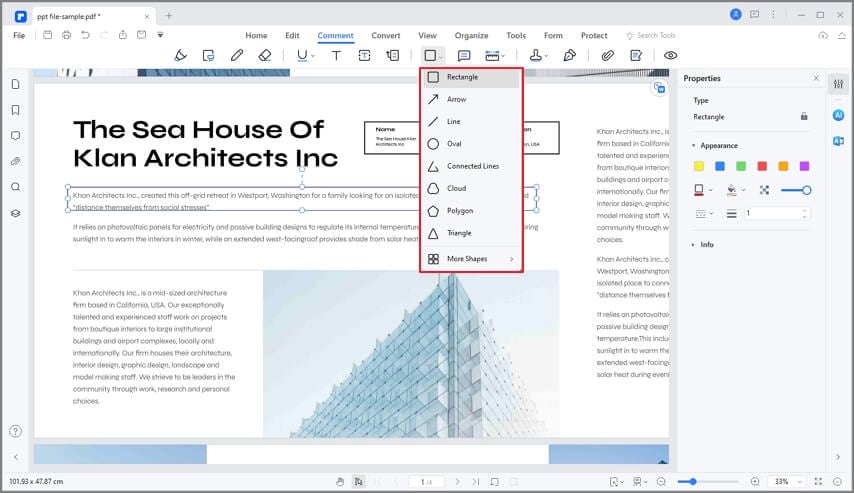
How to Draw a Line in Microsoft Word Using Shapes
The Shapes tool is the most direct answer to “how to draw a line in Microsoft Word.” It works well for custom layouts, forms, diagrams, resumes, worksheets, and documents where the line needs to sit in a specific place.
Insert a Straight Line
Open the document where you want the line to appear. Click the Insert tab in the ribbon, then choose Shapes. In the drop-down menu, look under the Lines section and select the plain line.
Your cursor changes to a crosshair. Click where the line should begin, hold the mouse button, drag to the endpoint, and release.
[Image placeholder: Screenshot showing Insert > Shapes > Line selected in Microsoft Word.]
If the line appears in the wrong place, click it once to select it, then drag it to a better position. You can also use the small circular handles at the ends to resize or rotate it.
Keep the Line Perfectly Straight
A common problem when people draw a line in Word is that the line is slightly tilted. To avoid that, hold Shift while dragging. Word will lock the line into clean angles, such as horizontal, vertical, or 45 degrees.
This is useful when drawing:
- a horizontal divider under a heading
- a vertical separator between two content areas
- a diagonal line for a simple diagram
If you already drew the line and it looks crooked, select it, drag one endpoint, and hold Shift while adjusting it.
Format the Line Color, Weight, and Style
After drawing the line, click it once. Word should show a Shape Format tab in the ribbon. From there, choose Shape Outline to change the line’s appearance.
You can adjust the line color, thickness, dash style, and arrow options. For example, a thin gray line works well as a subtle divider, while a thicker dark line may be better for a form field or worksheet. If you are adding arrows to a process diagram, use Shape Outline > Arrows.
[Image placeholder: Screenshot of the Shape Format tab with Shape Outline options for color, weight, dashes, and arrows.]
For a cleaner document, avoid using too many different line styles. One or two consistent line weights usually look more professional than a mix of thick, thin, dashed, and colored lines.
Move, Resize, or Delete a Line
To move a line, click it and drag. If clicking the line is difficult, try clicking near one endpoint or using the Selection Pane. You can open it from Home > Select > Selection Pane in many Word versions.
To resize the line, select it and drag one of the endpoint handles. To delete it, select the line and press Delete or Backspace.
If the line jumps around when you edit nearby text, check its layout behavior. Select the line, click the Layout Options icon beside it, and choose how it should interact with text. For most simple document work, In Front of Text gives free positioning, while In Line with Text makes the line behave more like a typed character.
Microsoft’s own Word help pages also explain shape and object layout behavior if you need more detail: Microsoft Support for Word.
Other Easy Ways to Draw Lines in Word
Shapes are flexible, but they are not the only answer to how to draw a line in MS Word. Word has several built-in shortcuts for common line tasks.
Create a Horizontal Line With AutoFormat
If you need a full-width horizontal divider, AutoFormat is the fastest method.
Place your cursor on a blank line. Type three hyphens:
---
Then press Enter.
Word automatically turns the hyphens into a horizontal line across the page. You can also try other characters for different line styles:
---creates a plain single line.===creates a double line.___creates a thicker line.***creates a dotted line.###creates a decorative thick line.~~~creates a wavy line.
This is useful for separating sections in simple documents, meeting notes, drafts, or printable handouts.
One catch: this line is not a normal Shape object. Word treats it like a paragraph border. That means you do not delete it by clicking it like a drawn line. If it becomes hard to remove, see the troubleshooting section below.
Add a Line Using Paragraph Borders
Paragraph borders are a cleaner choice when you want a divider that stays aligned with text margins. This method is especially useful under headings.
Place your cursor in the paragraph where the line should appear. Go to Home, find the Borders button in the Paragraph group, and choose Bottom Border. Word adds a line below the current paragraph.
[Image placeholder: Screenshot showing Home > Borders > Bottom Border in Word.]
This method is more stable than a floating Shape line because the line belongs to the paragraph. If the paragraph moves, the line moves with it. It is a good option for reports, policy documents, letters, and section headings.
To remove it, place your cursor in the same paragraph, open the Borders menu again, and choose No Border.
Draw a Vertical Line in Word
A vertical line can be useful in forms, newsletters, resumes, and side-by-side layouts. The easiest method is still Insert > Shapes > Line. Choose the line shape, hold Shift, and drag downward to keep it vertical.
If you want a vertical separator between columns, use Word’s column settings instead. Go to Layout > Columns > More Columns, then check Line between. This adds a vertical line between text columns and keeps it aligned automatically.
For a resume or designed document, you may prefer the Shapes method because you can place the vertical line exactly where you want it. For a formal multi-column document, the column setting is usually more reliable.
Insert a Signature Line
If the line is meant for a signature, Word has a dedicated feature.
Go to Insert > Signature Line. In some versions, you may find it under the Text group. Word opens a setup box where you can add the signer’s name, title, email address, and instructions. After you confirm, Word inserts a formal signature line.
This is better than drawing a plain line if the document is intended for review, approval, or signing. It makes the purpose of the line clear and gives the signer a defined place to sign.
For documents that will be signed digitally or sent as PDFs, you can also handle the signing step after export. More on that later.
How to Draw a Line Through Text in Word
If your goal is to draw a line through text in Word, use Strikethrough. Do not use a Shape line unless you are creating a special design effect.
Select the text you want to cross out. On the Home tab, look in the Font group and click the Strikethrough button. It usually appears as letters with a line through them.
Example:
This text is crossed out.
For a double line through text, open the Font dialog box. On Windows, you can press Ctrl + D after selecting the text. Then choose Double strikethrough if your Word version includes it.
Strikethrough is best for editing marks, revised prices, completed items, and text you want readers to see but understand as removed.
How to Fix Common Line Problems in Word
Lines in Word can behave strangely because they are not all the same type of object. A Shape line, a paragraph border, and an AutoFormat line are controlled in different places. If something does not work, first identify which kind of line you created.
You Can’t Select the Line
If you inserted the line using Shapes, you should be able to select it by clicking directly on it. Thin lines can be hard to click, especially at lower zoom levels. Zoom in, then try clicking near one end of the line.
If that still does not work, use the Selection Pane. Go to Home > Select > Selection Pane. You can then click the line object from the list of objects in the document.
If the line was created by typing --- and pressing Enter, it is probably a paragraph border, not a selectable shape. You will need to remove it through the Borders menu.
The Line Moves When You Edit Text
A drawn Shape line can be anchored to a nearby paragraph. When that paragraph moves, the line may move too. This is normal, but it can be annoying.
Click the line and look for the Layout Options button. If you want the line to stay with a specific paragraph, use an option like In Line with Text or Move with text. If you want more freedom, choose In Front of Text and position it manually.
For simple section dividers, paragraph borders are often easier than floating lines because they stay connected to the text structure.
The Automatic Horizontal Line Won’t Delete
This is one of Word’s most common line frustrations. If Word created a horizontal line after you typed three hyphens and pressed Enter, the line is likely a bottom border.
Place your cursor in the paragraph directly above the line. Go to Home > Borders, then choose No Border. If that does not work, place the cursor in the paragraph below the line and try again.
You can also press Ctrl + Z immediately after Word creates the line. That undoes the automatic conversion and returns the three typed characters.
If you dislike this feature, you can turn it off in Word’s AutoCorrect settings. The exact path varies by Word version, but it is usually under File > Options > Proofing > AutoCorrect Options > AutoFormat As You Type. Look for the option related to border lines.
The Line Is Not Straight
If the line is only slightly crooked, select it and adjust one endpoint while holding Shift. If you are drawing a new line, hold Shift before releasing the mouse button.
For exact positioning, use the size and position controls under the Shape Format tab. This is helpful when you need multiple lines to match, such as in a printable form.
The Line Prints Differently Than It Looks
Print differences can happen when a line is too thin, too light, or positioned outside the printable area. If a line appears on screen but not on paper, increase the line weight slightly or move it farther inside the margins.
For important documents, export a PDF and check the PDF preview before sending or printing. PDF output often gives you a more reliable view of final layout than the Word editing screen.
Working With Lines After Converting Word to PDF
Many Word documents eventually become PDFs: contracts, forms, reports, invoices, worksheets, applications, and approval documents. Once a Word file is converted to PDF, the way you edit lines changes. You are no longer editing a flowing Word layout; you are marking up or editing a fixed-page document.
G2 Rating: 4.5/5 |100% Secure
That is where a PDF editor such as PDFelement fits into the workflow. It is not a replacement for Word’s line tools when you are still drafting a DOCX file. But after the document becomes a PDF, PDFelement can help you add annotation lines, adjust markups, prepare forms, sign files, and manage PDF pages without reopening the original Word file.
For example, if you export a Word form to PDF and then realize you need to add a line for an extra signature or a visual divider, you can open the PDF in PDFelement and add the line as a comment or markup.

Once the PDF is open, go to the commenting or markup tools and choose a line shape. Draw the line where you need it, then adjust its properties, such as color, thickness, opacity, or style.
This is useful for review workflows because the line becomes part of the PDF markup layer. You can use it to point to a revision, separate form areas, mark a place for signing, or annotate a layout issue before sending the file back to a colleague.
PDFelement is also practical when the Word document is no longer available. If you only have the PDF version, you can still add visual lines, comments, signatures, and other document updates directly in the PDF. For scanned documents, OCR can help make text searchable or editable before you continue working with the file.
The key point is to use the right tool at the right stage. Use Word to create and format lines while drafting. Use PDFelement when the document has moved into PDF review, markup, signing, or distribution.
G2 Rating: 4.5/5 |100% Secure
Tips for Using Lines Cleanly in Word Documents
A line can make a document easier to read, but too many lines can make it look crowded. The best line choices usually support the structure of the page without drawing attention to themselves.
Use horizontal lines to separate major sections, not every small paragraph. If headings already create enough structure, you may not need divider lines at all. In business reports and proposals, a bottom border under a heading often looks cleaner than a thick Shape line.
Keep spacing consistent. A line placed too close to text can look cramped, while a line floating too far away may feel disconnected. If you are using paragraph borders, adjust paragraph spacing before and after the heading rather than dragging the line manually.
Choose line weight carefully. A 0.5 pt or 1 pt line is usually enough for subtle dividers. Thicker lines work better for forms, worksheets, or areas where users need to write by hand. For formal documents, black, gray, or brand colors are safer than bright decorative colors.
If several lines need to align, use Word’s alignment and positioning tools instead of guessing by eye. Select multiple Shape lines and use Shape Format > Align to line them up. For forms, tables may be even better than manually drawn lines because table borders stay organized as content changes.
For documents that others will edit, prefer stable structures. Paragraph borders, tables, and column lines usually survive editing better than floating shapes. Shape lines are fine for visual design, but they can shift if the surrounding text changes.
People Also Ask
-
What is the easiest way to draw a line in Word?
The easiest way is to use Insert > Shapes > Line, then click and drag in the document. Hold Shift while dragging if you want the line to stay perfectly horizontal, vertical, or diagonal. -
How do I draw a horizontal line in Word quickly?
Type three hyphens---on a blank line and press Enter. Word will convert them into a horizontal divider. If you want more control over the line, use Insert > Shapes > Line or Home > Borders > Bottom Border instead. -
How do I draw a line through text in Word?
Select the text, go to the Home tab, and click Strikethrough in the Font group. You can also open the Font dialog box for more text effects, including double strikethrough in some Word versions. -
How do I draw a vertical line in Word?
Go to Insert > Shapes > Line, select the line shape, then hold Shift while dragging downward. If you are working with text columns, go to Layout > Columns > More Columns and enable Line between. -
Why can’t I delete a horizontal line in Word?
If the line appeared after typing three hyphens and pressing Enter, it is probably a paragraph border. Place your cursor in the paragraph above the line, go to Home > Borders, and choose No Border. -
How do I change the thickness of a line in Word?
Click the line, open the Shape Format tab, choose Shape Outline, then select Weight. Pick a thicker or thinner line weight from the menu. -
Can I draw arrows in Word?
Yes. Go to Insert > Shapes and choose an arrow line from the Lines section. You can also draw a normal line, select it, then use Shape Outline > Arrows to add an arrowhead. -
How do I make a signature line in Word?
Go to Insert > Signature Line and fill in the signer details. Word will insert a formal signature line with optional name, title, and instructions. -
Can I draw lines in Word for the web?
Word for the web supports many basic editing features, but shape tools may be more limited than the desktop app depending on your account and version. For full control over drawn lines, use the desktop version of Microsoft Word. -
Can I add a line after converting Word to PDF?
Yes. After converting the Word file to PDF, use a PDF editor such as PDFelement to add line annotations, markups, signatures, and other PDF edits. This is often easier than going back to Word when the document is already in review or distribution.

