How to Add InDesign Transparency and Opacity Effects
Want to add InDesign transparency and opacity effects? This article gives the easiest way to add and change transparency and opacity in InDesign.
 100% Secure |
 Home
>
Indesign Tips and Tricks
> How to Add InDesign Transparency and Opacity Effects
Home
>
Indesign Tips and Tricks
> How to Add InDesign Transparency and Opacity Effects
Opacity refers to the amount of light that travels through an object. In print design, opacity is referred as transparency. You can easily adjust InDesign transparency for both graphic elements and text. Adjusting the opacity will allow you to draw attention to items you want to use as background element. Understanding and maneuvering InDesign opacity will give you tools to add eye-catching effects to your documents. Here is all you need to know.
How to Change InDesign Transparency Effects
By default, when you create an object or stroke in InDesign, that object has an opacity of 100%. That is why the object appears solid. In this guide, we will teach you how to change opacity in InDesign. You can go from 100%, which is completely opaque, to 0%, which is completely transparent. When you reduce the percentage of opacity, the underlying artwork becomes visible through the surface of the object.

- 1. Select an object you wish to apply transparency effects to. If you want to apply effects to a graphic, use Direct selection tool to select the graphic. Select which of the following you want to change: object, graphic, group, stroke, fill, or text. Object affects the entire object, graphic only the graphic selected using the direct selection tool, group applies to all objects and text in the group, stroke only the subject's stroke, fill only the object's fill, and text only the text inside the object, not the text frame.
- 2. Click the arrow next to the object's opacity value to bring up a slider. Adjust the opacity as you want. If you move the slider to the far right of the bar, the object is fully opaque. If you move it to the far left, the object is fully transparent. Setting the slider anywhere in between will make the object semitransparent. Click "Ok" and confirm the changes. Close the effects tool.
- 3. You can open the Effects dialog box by doing any of the following: - Click the "FX" button in the Effects panel or Control panel, and choose an effect from the menu. - From the context menu, chose "Effects" and then an effect name. - Choose "Object > Effects", and then an effect name. - From the "Effects" panel menu, choose "Effects" and then an effect name.
How to Comment and Edit InDesign Files
Changing the opacity and transparency in InDesign can affect the opacity of the object, be it text, graphic, or anything in between. Once you export the file to PDF, you can still edit text. Or, you can add sticky comments to make matters clear within the file. For this purposes, you need a powerful PDF software. We recommend using Wondershare PDFelement - PDF Editor Wondershare PDFelement Wondershare PDFelement, one of the best alternatives to Adobe Acrobat that can help you maximize your document productivity.


 G2 Rating: 4.5/5 |
 100% Secure
Among the many things, you can use the program for the following tasks:
- Edit text within the document, by either using single line or paragraph mode.
- Edit images and graphic objects in the PDF file by cropping, resizing, rotating, copying, pasting, moving, and more.
- Add annotation tools, including sticky comments and notes for more professional looking file.
- Convert PDF files to any other file format easily by single conversion, or batch conversion.
- Protect your documents with password restriction.
- Add fillable form fields within the PDF document and easily fill them.
- Digitally sign PDF documents.
In this guide, we will show you how you can edit text and add comments into your exported InDesign file.
Step 1. Open the InDesign File
There are two ways to open the file. The first one is by drag and drop, and the second is by using "Open File…" option on the main interface and selecting the InDesign file.

Step 2. Comment InDesign File
You can add different comments to the PDF file. Go to "Comment" > "Note" and click anywhere you want to place the note. If you want to add a text box, go to "Comment" > "Text Box", click where you want to place the text box, and then click the box to type the comment inside the box. If you want to highlight an area, click on "Comment" > "Area Highlight", and then drag the mouse click to select the area for highlighting.
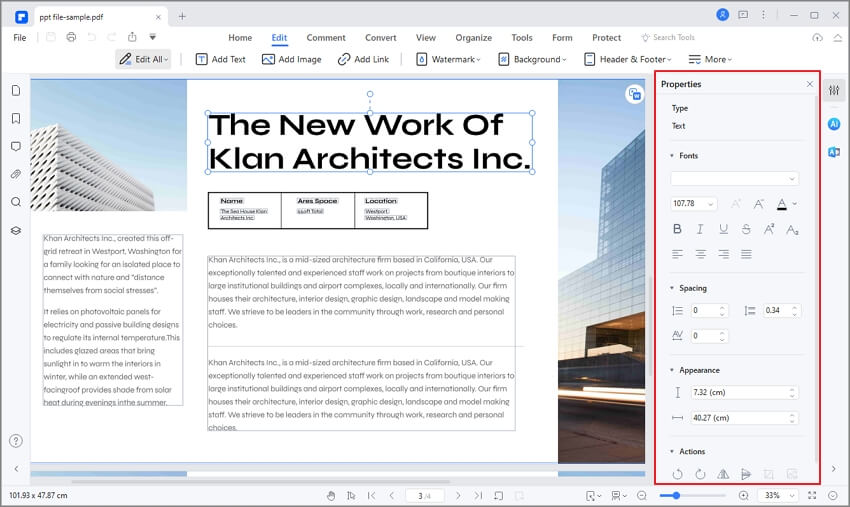
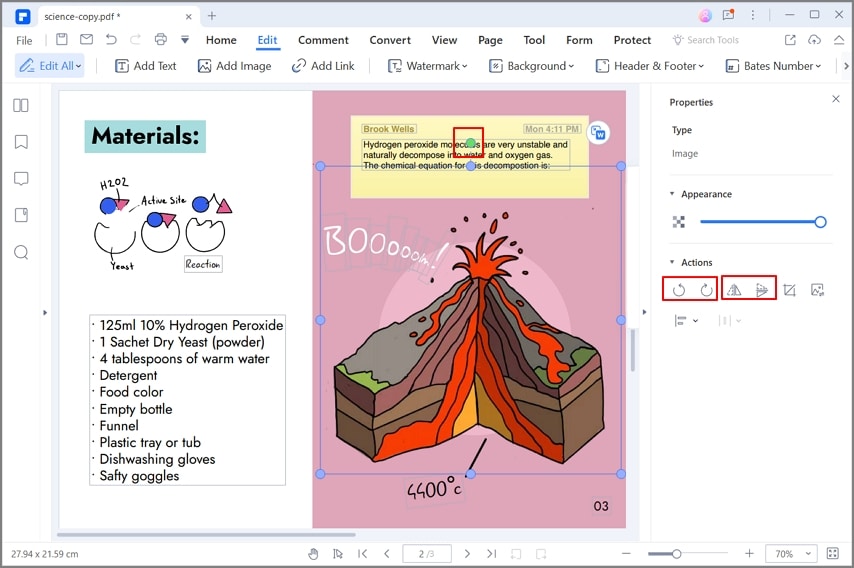
Step 3. Edit InDesign File
If you want to edit the PDF file, click "Edit" button located on the left side, and then click the desired text you want to edit. Choose either line mode, or paragraph mode. Click "Edit", and then select an image or object to edit the image.

Free Download or Buy PDFelement right now!
Free Download or Buy PDFelement right now!
Try for Free right now!
Try for Free right now!


Elise Williams
chief Editor