
In today's world, sharing information is key. We often use PowerPoint to do this. But, when we share these presentations, we might not want others to change them. This is where making a PowerPoint read-only comes in handy. It means others can look but can't edit. This is very important for many reasons.
For example, when you share your work with others for feedback, you might not want them to make changes. Or, when you give a presentation to a big audience, you want to ensure your message stays the same. Making your PowerPoint read-only keeps your information safe and as you intended. It's a simple step that can save much trouble later. This way, you can share your hard work with peace of mind, knowing it will stay just as you made it.
In this article
Part 1. How To Make a PowerPoint Read Only
Making your PowerPoint read-only is a smart move. It's like putting a lock on your presentation. This stops others from making changes to it. In this part, we will show you how to do it step by step. It's an easy process that anyone can follow. Let's get started.
Method 1: Convert PPT to PDF
One way to keep your PowerPoint safe is by turning it into a PDF. This means changing it from a PPT file to a PDF file. When you do this, people can still see your presentation, but they can't change it. This is a good idea because PDFs are easy to open on all computers and phones. Plus, your slides will look just as you made them. This method is simple and doesn't need any special skills. Let's see how you can do this to protect your work and keep it just the way you want.
How to Convert PPT to PDF Using PDFelement


 G2 Rating: 4.5/5 |
 100% Secure
PDFelement is a great tool to turn your PowerPoint (PPT) into a PDF. This keeps your presentation safe from changes. Here's how to do it:
Step 1. First, open PDFelement on your computer. Finding your way around is easy because everything is clear and simple.
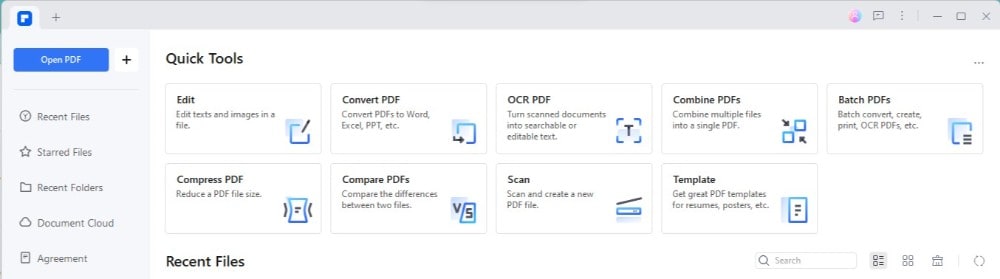
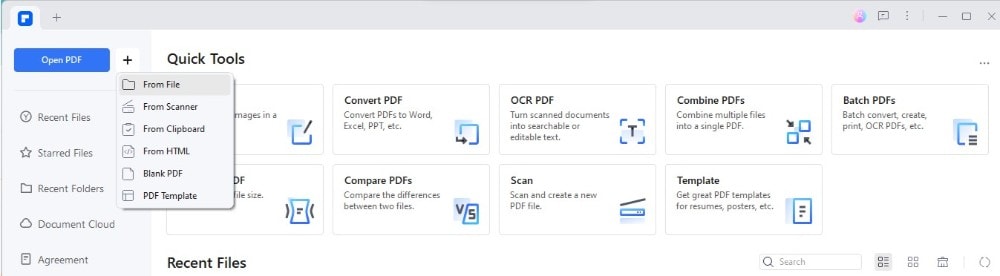
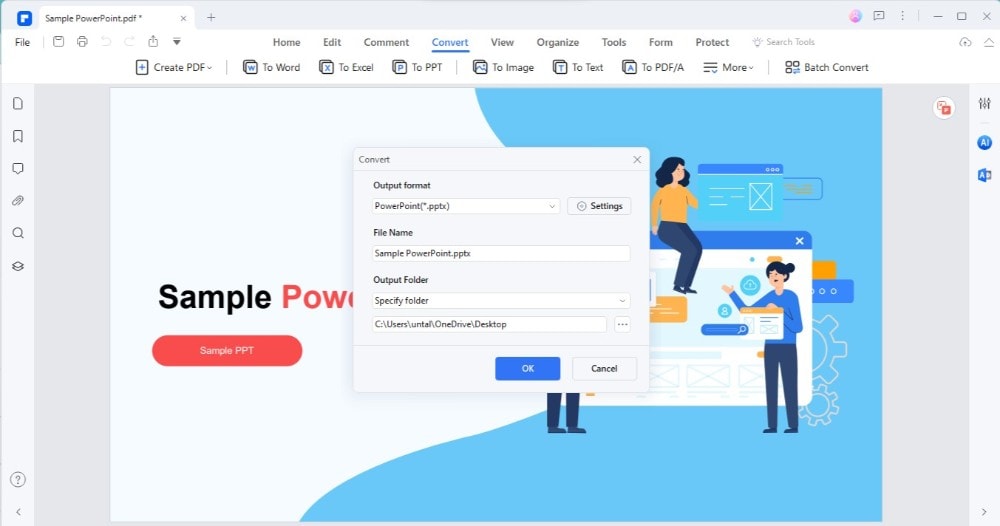
Step 2. Look for a "+" > "From File" button on the main screen. Click it. This lets you make a PDF from another file, like your PowerPoint.
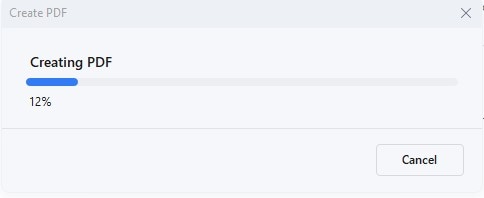
Step 3. A window will open. Find your PowerPoint file, click the "SamplePPT," and open it.
Step 4. After you pick your file, PDFelement changes your PPT to a PDF. It's quick. Just wait a bit until it's done.
Step 5. Your new PDF opens in PDFelement. Now, you can change it if you want. PDFelement has tools to edit text, pictures, and more. Change anything you need.
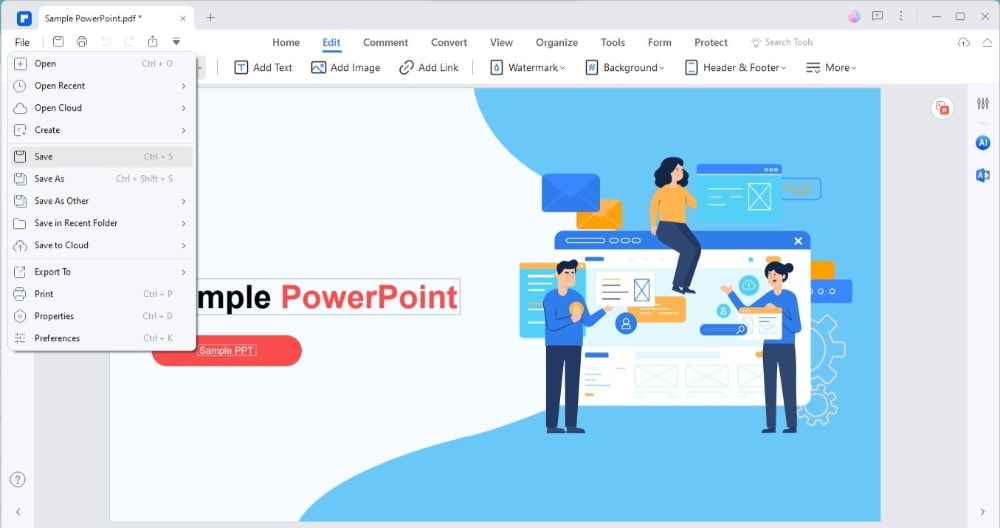
Step 6. When you're finished, go to "File" > "Save." Pick a place on your computer, name your file, and click "Save."
Step 7. Sometimes, you might want to go back to a PowerPoint. PDFelement does this, too. Click "Convert" > "To PPT," choose where to save, and it turns your PDF into a PPT again.
Using PDFelement for this is smart. It makes your presentation safe across different computers and phones. Your slides look just right, adding an extra layer of security. This way, sharing your work is easy and safe.
Method 2: Set PPT in Read-Only Mode
Setting your PowerPoint presentation to read-only mode is another good way to protect it. Here’s how you can do it step by step:
Step 1. First, open your PowerPoint presentation on your computer.
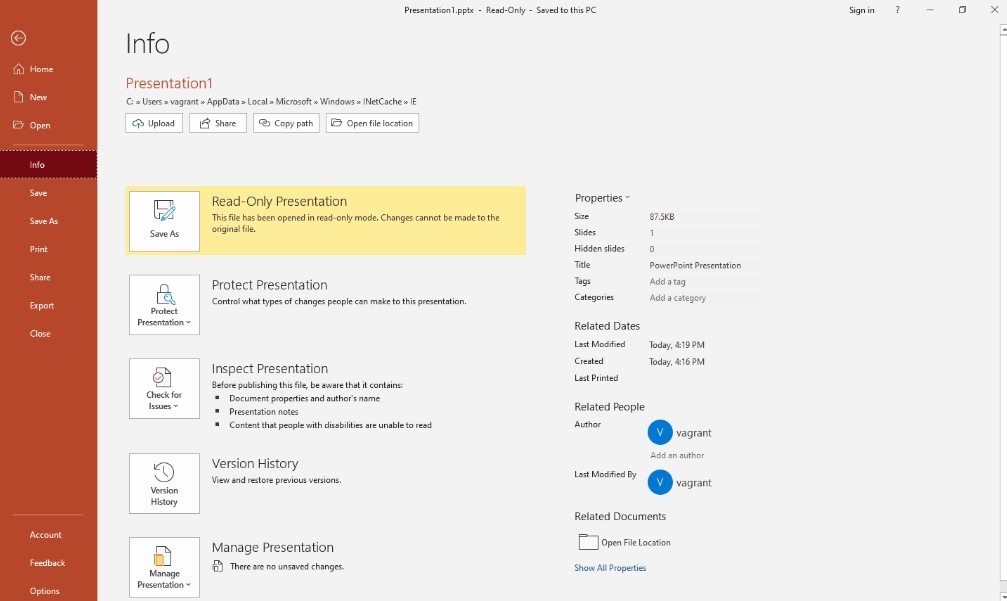
Step 2. Click on "File" > "Info."
Step 3. Look for an option that says "ProtectPresentation." Click on it. A menu will appear.
Step 4. In the menu, select "Mark as Final." This tells PowerPoint and anyone who opens it that your presentation is finished and shouldn't be changed.
By choosing "Mark as Final," you're letting others know your presentation is the final version. This doesn't lock your file with a password but adds a mark suggesting people shouldn't edit it. When someone opens your presentation, they'll see a message marked as final. This discourages editing.
However, it's important to remember that this method doesn't fully lock your presentation. If someone wants to, they can still make changes. They just need to click "Edit Anyway." So, while "Mark as Final" is a good way to suggest your work shouldn't be altered, it's not the strongest protection. It's best used when you trust the people you're sharing your presentation with to respect your wish to keep it as is.
Method 3: Lock PPT for Read-Only
Locking your PowerPoint for read-only with a password is a strong way to protect it. You can set two types of passwords: one to open the presentation and another to modify it. Here's how to set it up:
Step 1. Start by opening your PowerPoint presentation.
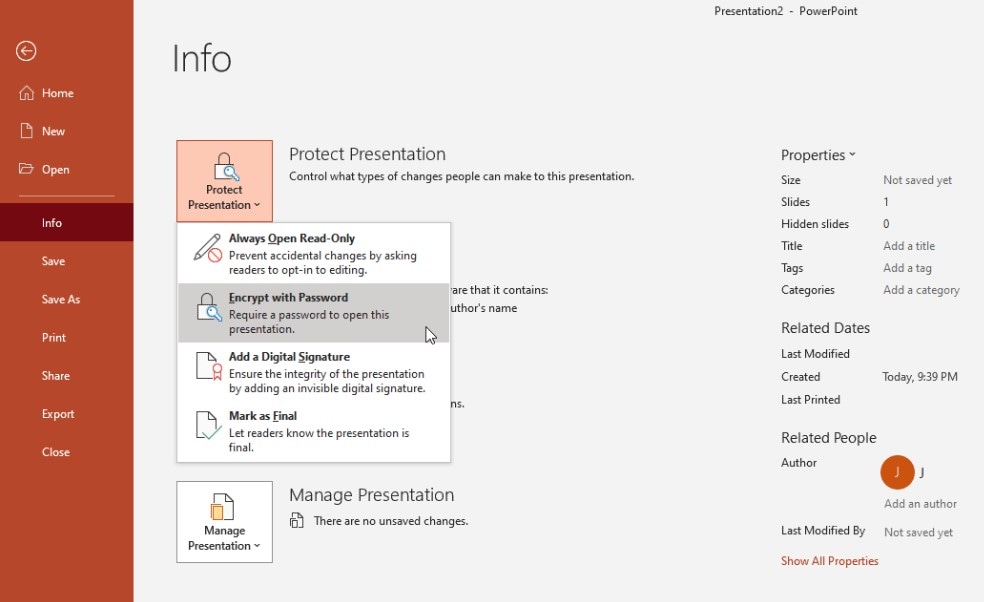
Step 2. Go to "File" > "Info."
Step 3. Find "ProtectPresentation." Click it to see more options.
Step 4. Choose "Encrypt with Password." Here, you can set your passwords.
When you set a password to open, anyone who wants to see the presentation must enter the password. A modified password lets people open the presentation but not change it unless they know this second password.
It's important to share these passwords safely. If you use a password to open it, make sure to send it through a secure way, like a secure email or messaging app. Remember, you can't access or change your presentation if you forget these passwords.
Using passwords is very secure, but it comes with responsibility. Ensure you keep the passwords safe and share them only with people who need to know. This method is great for keeping your presentation the way you want without worrying about unwanted changes.
Method 4: Set Restrict Access for PowerPoint Read-Only
Using the restrict access feature in PowerPoint is a smart way to control who can do what with your presentation. Here’s how you can make your presentation read-only for others:
Step 1. Start by opening your presentation in PowerPoint.
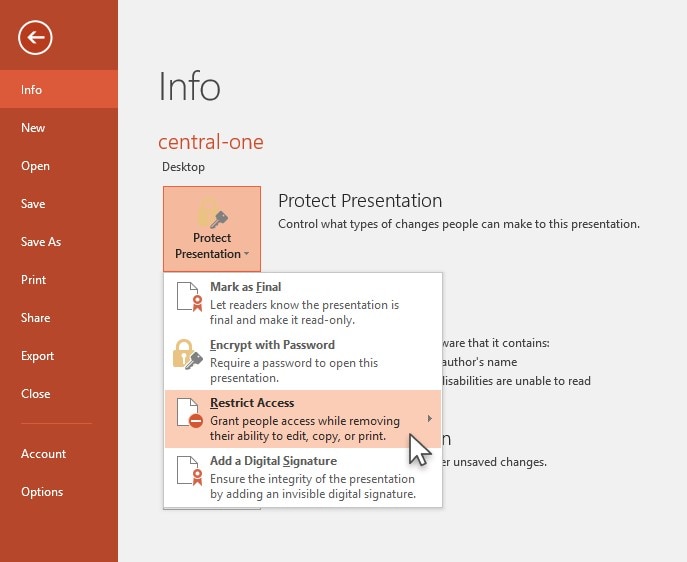
Step 2. Find and click on "File" at the top left corner, then select "Info" from the menu.
Step 3. Now, look for "Protect Presentation." Click on it to see more options.
Step 4. From the options, choose "Restrict Access." This lets you set rules on who can read or change your presentation.
By using restricted access, you can ensure that only certain people can edit your presentation, while others can only view it. This is great when you need to share your work with a team but want to control who can make changes.
The advantage of this method is that it gives you more control. You can decide exactly who gets to edit and who doesn't. However, there are some things to keep in mind. First, everyone you're sharing with needs the right software or service to respect these restrictions. If they don't, they might be unable to open your presentation. Also, managing who has what permission can take extra work, especially if you share with many people.
Restrict access is a powerful way to protect your presentation. It helps keep your work safe while still letting others view it. Think about how it fits with how you plan to share and collaborate on your presentation.
Method 5: Record a Slideshow to Make PowerPoint Read-Only
Recording your slideshow is a creative way to share your PowerPoint while keeping it read-only. This method turns your presentation into a video, which means people can watch it but can't change any part of it. Here's how to do it:
Step 1. First, open your presentation in PowerPoint.
Step 2. Find the "Slideshow" tab at the top. Click on it, and then look for "Record Slideshow." Choose to start recording from the beginning or a current slide.
Step 3. Press the record button. As you go through your slides, you can talk and explain them, just like you would if you were presenting live. You can also use your mouse as a pointer.
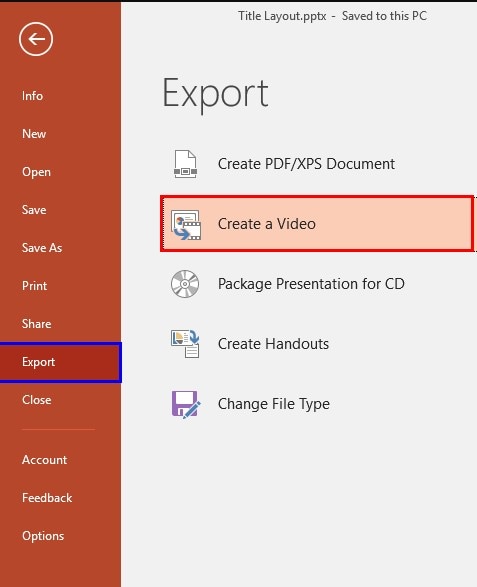
Step 4. After finishing your recording, save your presentation. Then, go to "File" > "Export" and select "Create a Video." Choose the video quality you prefer.
Step 5. Once your video is ready, you can share it. Because it's a video, no one can edit your slides.
Recording your slideshow has many benefits. It keeps your presentation safe from changes, which is great. But it also lets you share exactly how you want your presentation to be viewed. You control the flow and timing, ensuring your audience sees and hears what you intend in the order you intend. This method works well when you can't present live but want to make an impact.
Remember, a video might be larger than a PowerPoint file, and viewers can't interact with it as they can with slides. But if keeping your content safe and controlling how it's shown are your top priorities, this could be the perfect solution.
Part 2. The Importance of Making PowerPoint Presentations Read-Only
Making your PowerPoint presentations read-only is like putting a "Do Not Alter" sign on your work. It lets you keep control when you share your presentation. This is important because if someone changes your slides, it can cause problems. For example, wrong information could be shared, or your message might not come across as intended. This could confuse or mislead people.
When your presentation is read-only, it stays just as you made it. This means your professional touch, how you arranged your slides, and the information you included are the same. It helps make sure your brand looks consistent everywhere your presentation goes. This consistency is key to keeping a strong and trustworthy image.
There are also bigger legal and ethical issues when someone changes your work without asking. If someone edits your presentation, it could be seen as them putting words in your mouth. This isn't fair and can lead to problems. Keeping your presentation read-only helps avoid these issues, ensuring your work stays safe and respected.
Conclusion
Making your PowerPoint read-only is a smart step to protect your work. It helps keep your presentation the way you want, safe from changes. This ensures your message stays clear and your brand remains consistent. Remember, sharing your ideas is important, but so is keeping them as you intended.
G2 Rating: 4.5/5 |100% Secure

